Imagine the situation: you are riding peacefully on a beautiful trail in the middle of lush nature, and you have the best ride of your life. The sky is immaculate blue, and the sun cradles you with its gentle rays. You are in ecstasy in front of a paradisiacal landscape, and you are almost in a trance. You thank life for giving you the chance to have such a wonderful time doing your favorite activity.
Unfortunately, an unforeseen event spoils a practically perfect day until now. You realize that your vehicle has a flat tire. You have two solutions at your fingertips: the first is to declare your bad luck to all the saints in heaven with curse words that I will spare you. The second is to take a deep breath and tell yourself that, after all, such a small unforeseen event can not spoil such a beautiful day in harmony with nature.
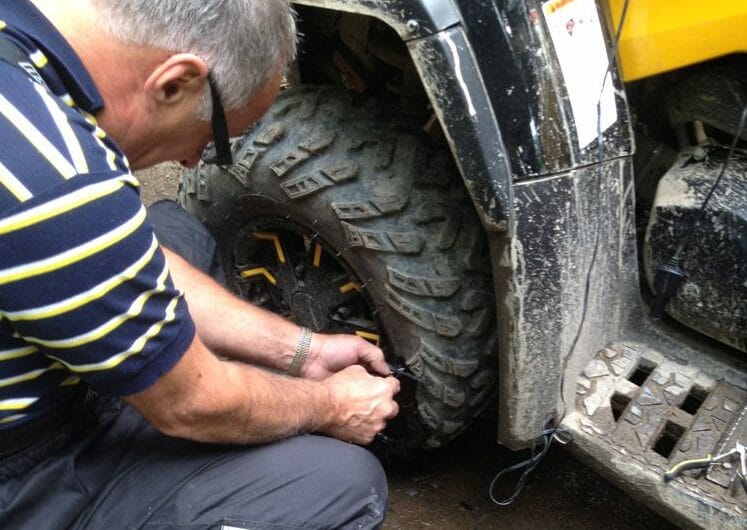
Your reaction will probably be proportional to the precautions you took before your departure. When we go on a Quad ride, we need a few items and accessories to deal with eventualities. Among these, a flat repair kit should be on top of the list.
Here is a list of items that I recommend carrying with you on your rides:
- Complete tire repair kit including repair plugs and specific tools
- side cutters
- split-joint pliers
- bottle of pressurized air or portable air compressor for tire inflation
These items may seem basic, but they will be helpful for a quick and efficient repair. That will let you rapidly return home by the shortest path for a permanent repair at your nearest dealer.
Here are the repair steps:
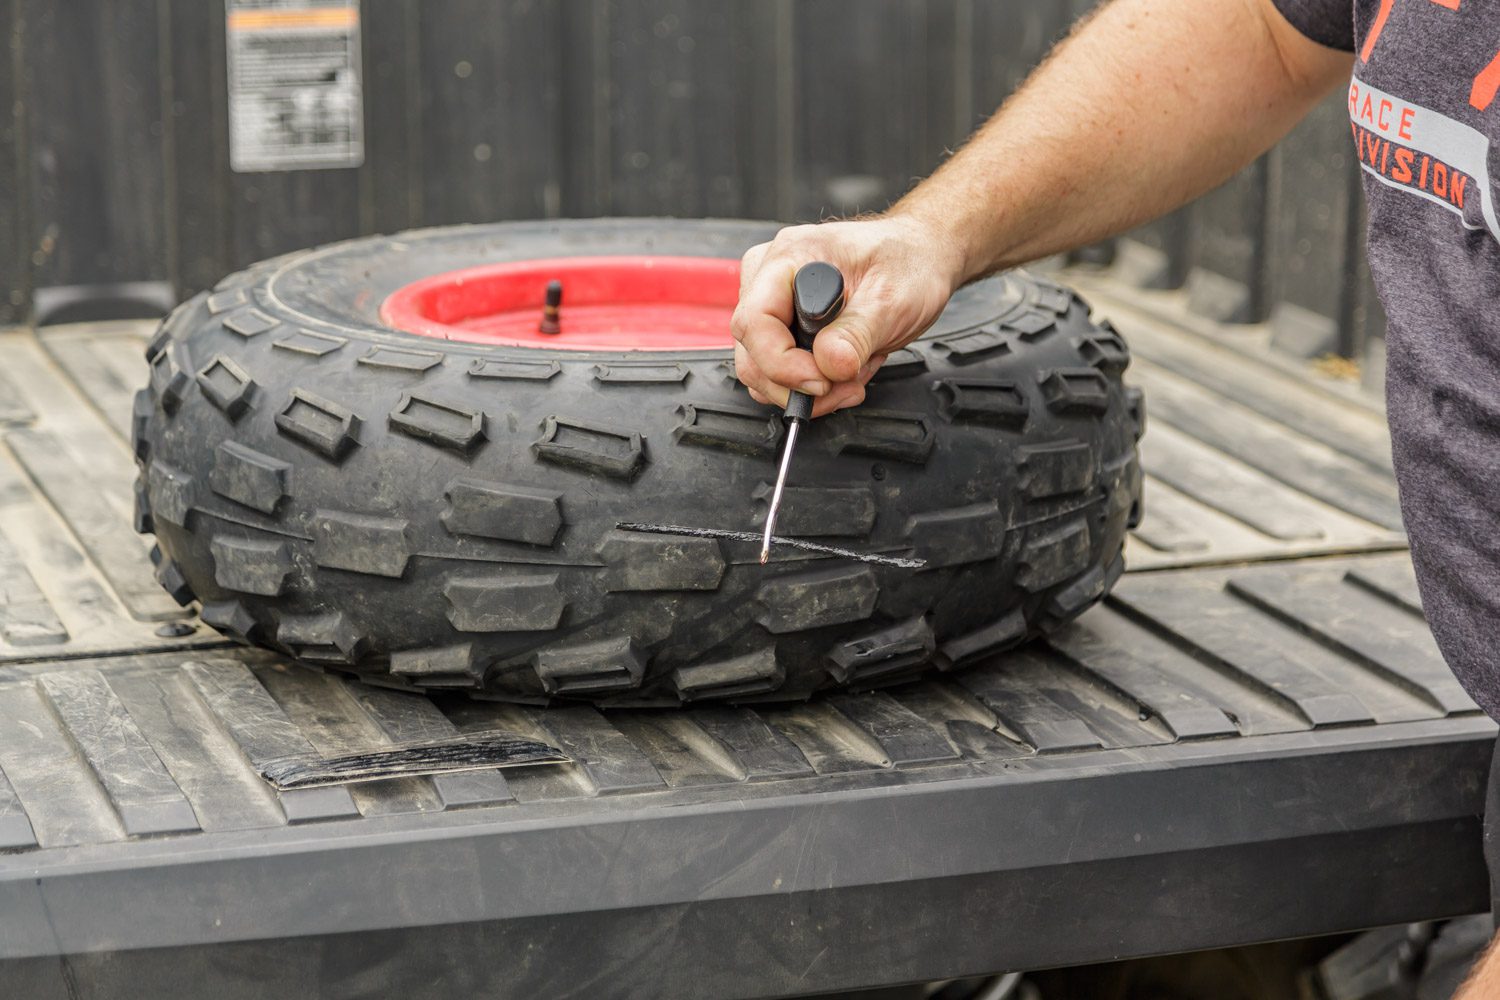
1- Locate the affected area:
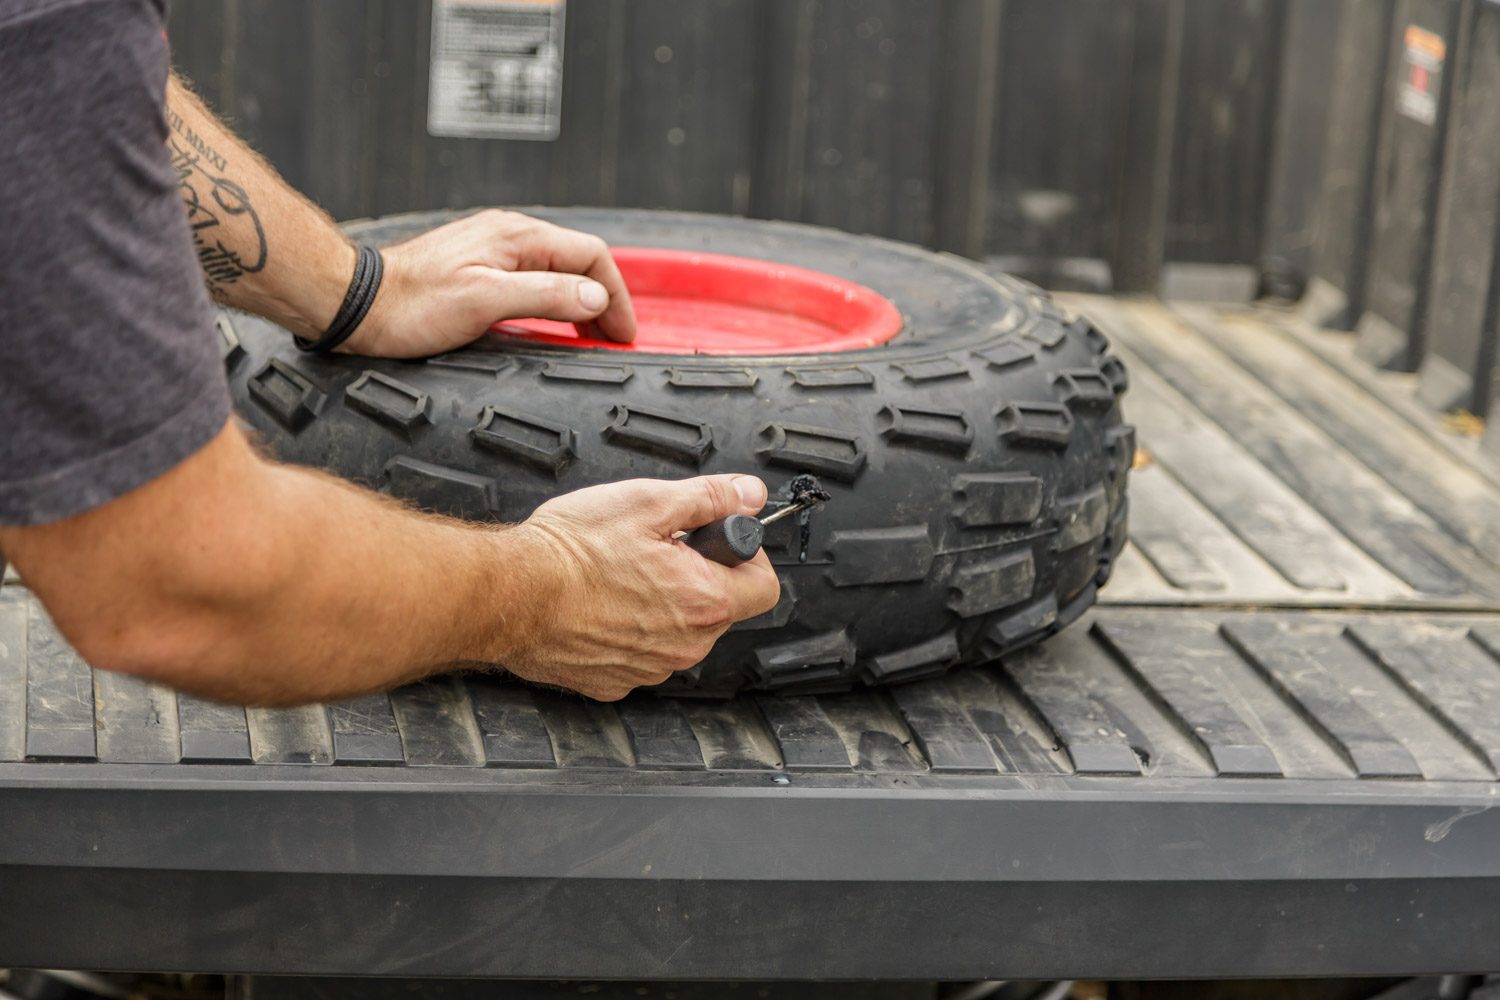
At first glance, you might find that your tire is less inflated than usual, and you don’t know the root cause. It could be that it has a small puncture causing a slow air leak. Since you are in the middle of nature and need to use what you have on hand, at this stage, your sense of hearing will be involved, as the air escaping from the tire will cause a slight hissing sound. The calm of nature and its tranquility will be your allies. If you have a portable air compressor, inject air through the tire’s valve. When you think you have found the possible anomaly, you can confirm your hypothesis on the suspect area by using your saliva to check for the presence of air bubbles. The best would have been to use soapy water, but let me remind you that we are in the middle of nowhere, so we are deprived of this invaluable help.
It could also happen that the culprit of your flat tire remained at the crime scene. It is not uncommon to find a nail firmly stuck on the tread of a tire. If this is the case, the investigation will be shorter, and your visual sense will quickly point to the source of the problem. In this case, I prefer to use side cutters to extract the intruder.
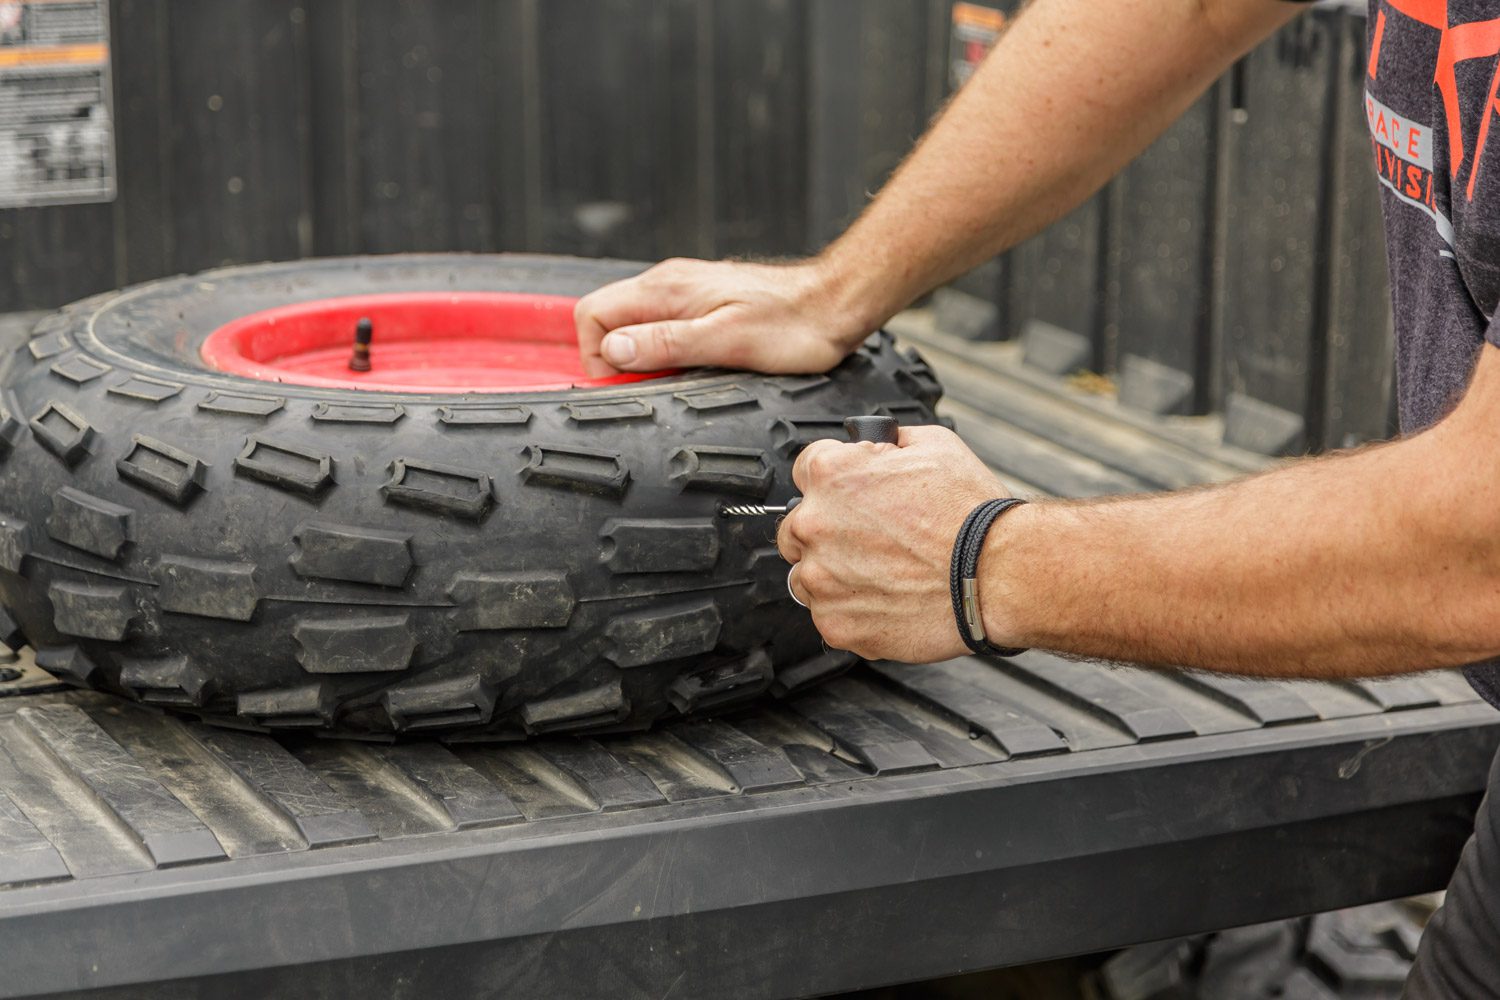
2- Preparation of the perforation to be sealed:
Insert your reamer tool into the hole, then work it up and down a few times while rotating it. This action will widen the hole and roughen the interior surface for plugging. Remove the tool and inspect: if it is still not round and even, reinsert the reaming tool and work it up and down again.
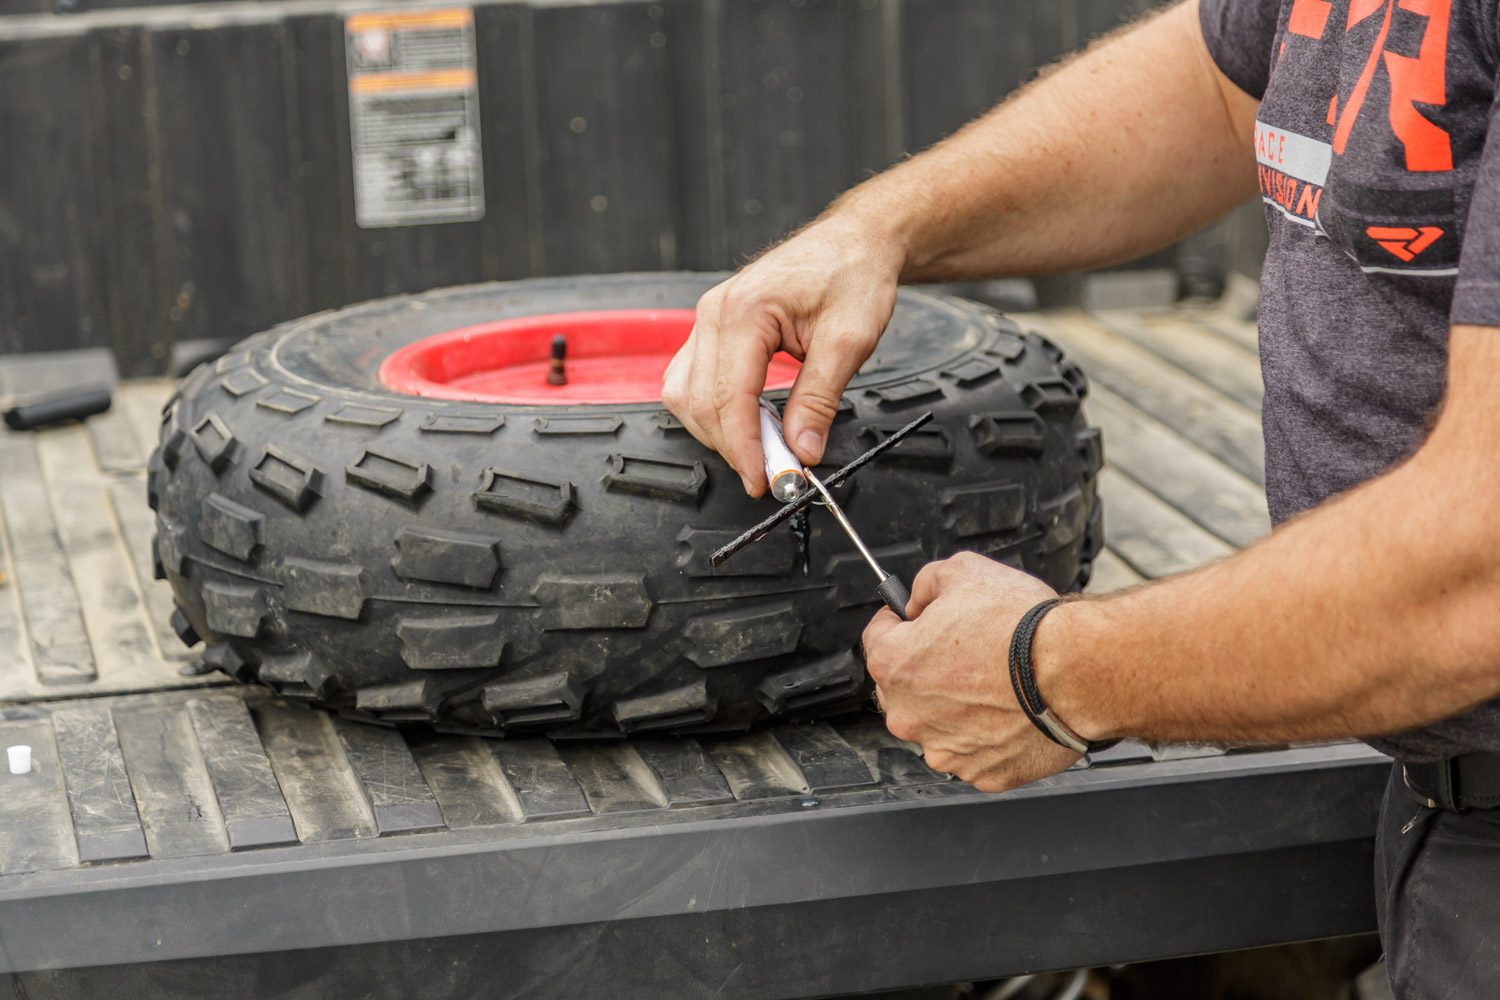
3- Preparation of the insertion tool:
Take a plug strip from your tire repair kit. Pass it through the eyelet of your T-handle insertion tool. Use pliers to help pull it through the eyelet until it protrudes evenly from the eyelet on each side.
4- Apply the glue:
Apply tire sealant to the entire strip, then do the same with the hole in the tire. It will facilitate the insertion of the plug and will help sealing everything perfectly.
5- Insert the plug strip:
Slide your insertion tool (loaded with the glued strip) slowly into the tire hole. You will need to press very hard to insert the plug into the hole.
When the insertion tool is inserted deep enough that only about an inch of it protrudes from the tire, gently pull the handle of your insertion tool upward. The slot at the end of the tool eyelet should allow the plug to slide freely, leaving the strip in the tire.
6- Inflate the tire:
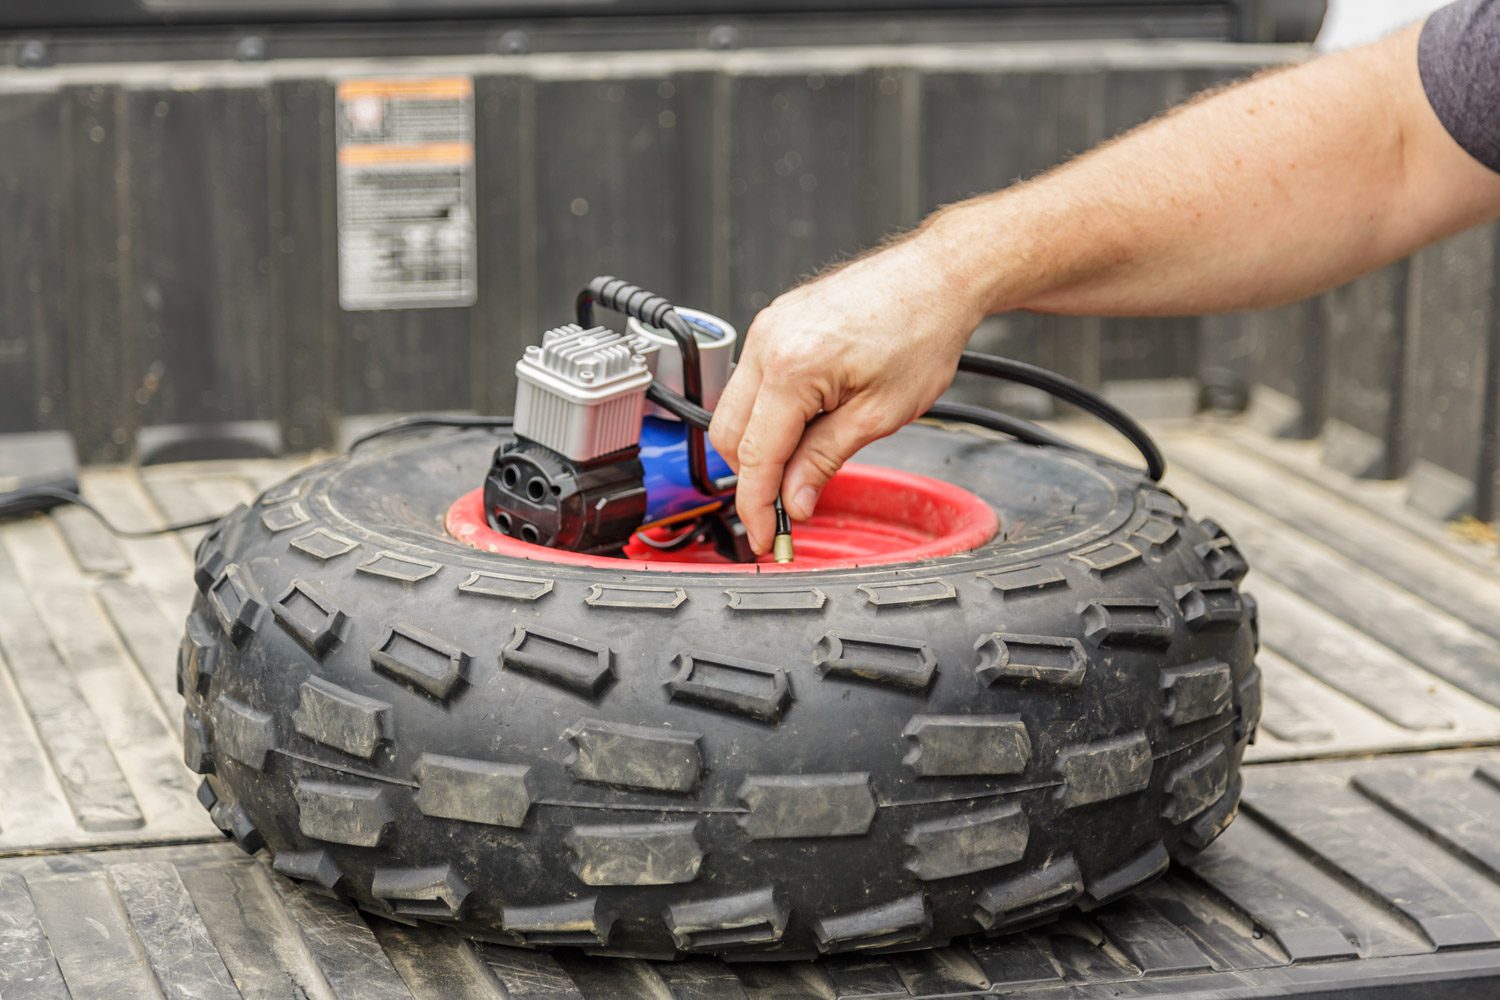
Connect the tire valve to a portable air compressor or pressurized filling bottle, then inflate the tire to approximately 10% below the maximum nominal pressure. Use your saliva again to check that there is no air leakage around the repair plug. The absence of noticeable bubbles means a perfect repair of the initial perforation.
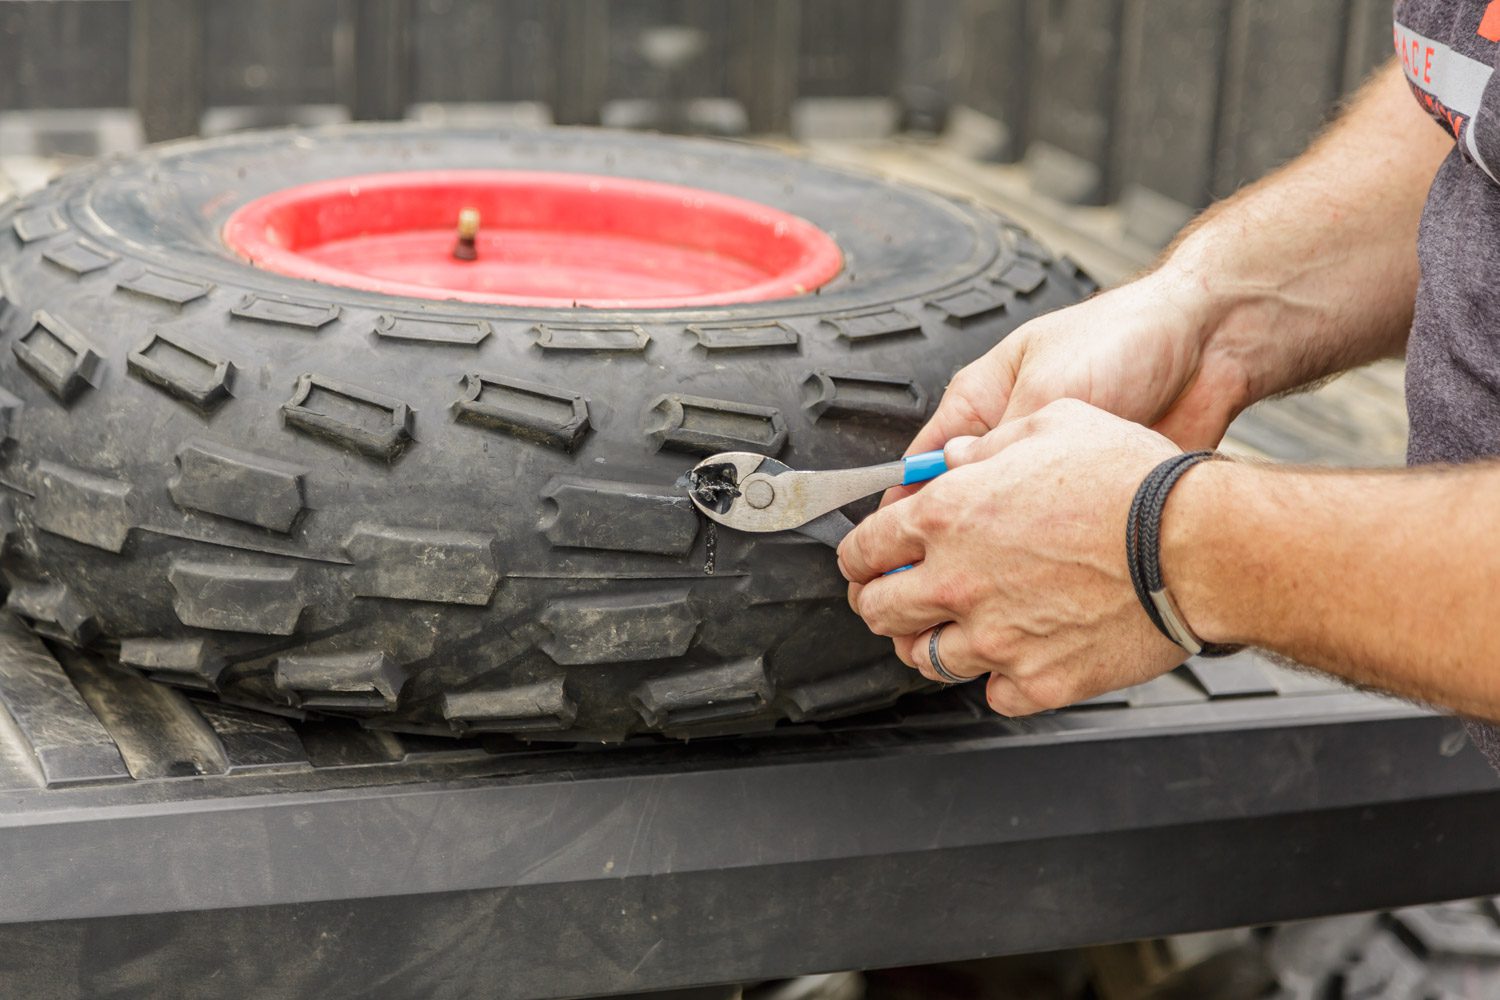
7- Cut the excess:
Wipe off excess tire glue around the repair area with a paper towel. Let the tire sit for five minutes. Use side cutters to cut off most of the extra tape, leaving about 1/8 of an inch protruding from the tire’s surface. Complete the repair by inflating your tire to the required pressure.
In closing, as you have seen, this repair is a straightforward task, provided you have the necessary tools to carry it out. We will insist on one point: this repair must be considered temporary. A visit to your dealer or specialized workshop must be carried out as soon as possible to install a permanent patch inside the tire.