We should never neglect the safety aspect when we practice our activity. Many off-road vehicle laws across Canada require to ride with headlights on at all times. The reason is simple, it helps to be highly visible for riders coming in the opposite direction. It is also a good idea to project more light in front of us to improve our visibility when night falls.
The addition of an LED bar on your vehicle can be performed by anyone without having a high level of skills. Most LED bar kits available on the market come with all the necessary wiring and hardware for quick and easy installation.
But before we start, we strongly recommend that you enquire about the off-road vehicle laws and regulations in your area, so you are aware of any spécial requirement or obligation regarding the use of an LED bar on your vehicle. Of course, common sense prevails so if you meet other users on a trail, you should turn off your LED bars so as not to blind them.
What is an LED?
The acronym LED stands for “Light-Emitting Diode”. The main difference between an LED and a regular lamp is that the LED emits light in a specific direction using a semiconductor rather than a heated filament. In this way, the LED type of lamps uses electric current much more efficiently.
Ready to add an LED bar to your vehicle? Based on our past experiences, here is our recommendation for this project: Kimpex LED bar.
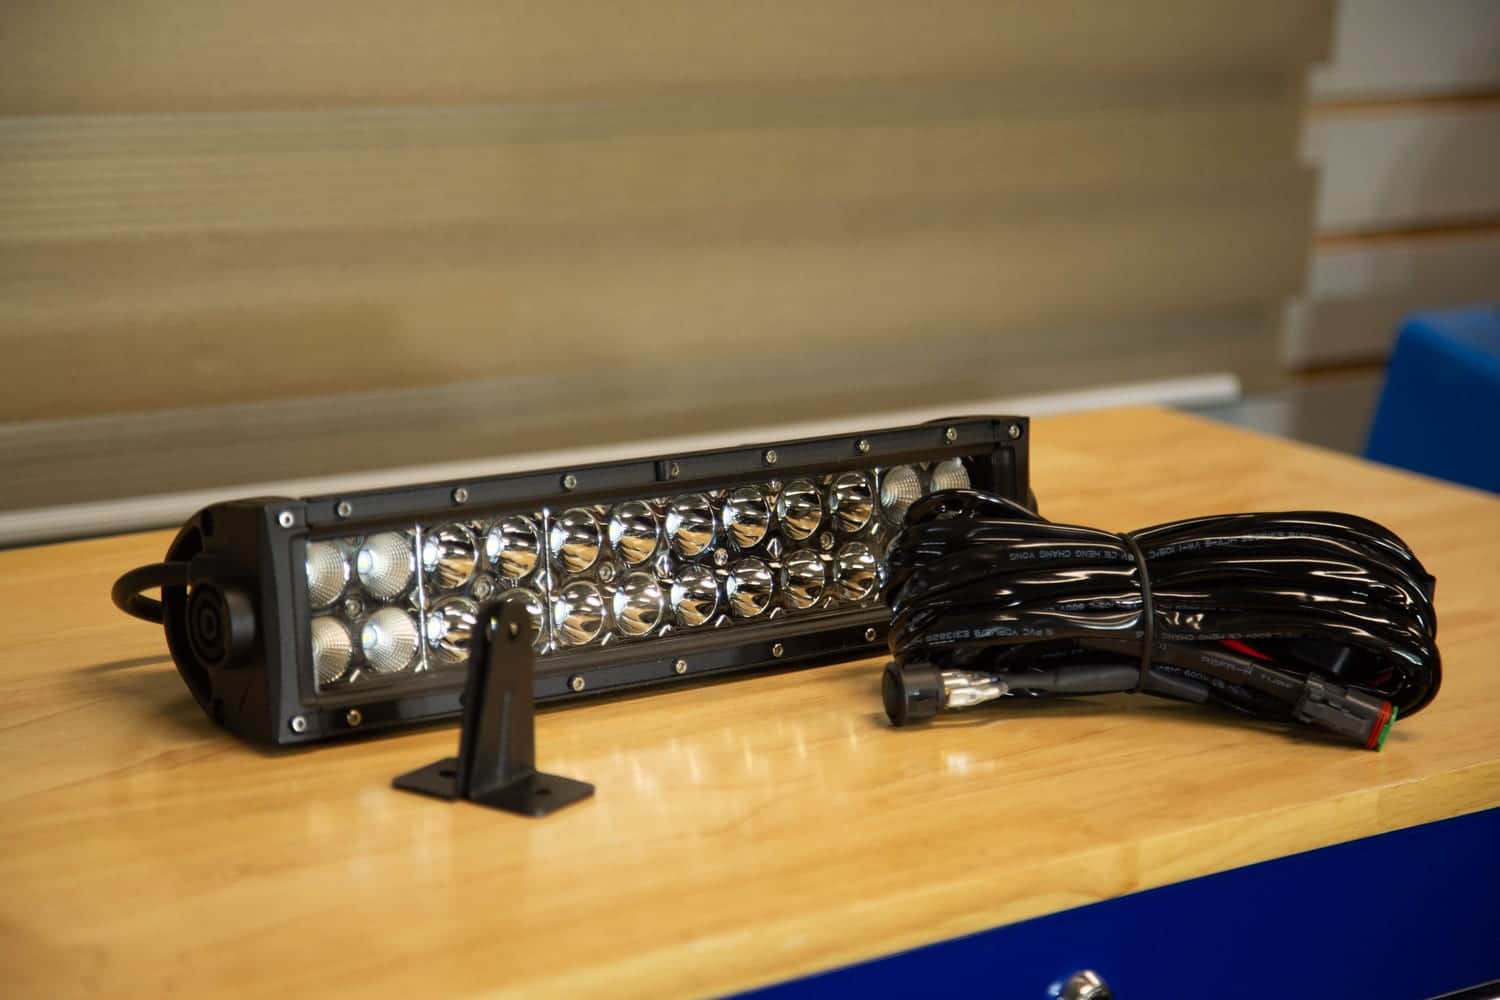
Kimpex offers a vast selection of LED light bars of various sizes meeting the highest standards in the industry. They are known to be durable and efficient, with a high rate of visible light (lumen) per watt used.
They also offer spot and flood combos for full lighting area and increased visibility. Their aluminum cases are impact resistant and are sealed to resist the elements. The 6000K white lighting is close to daylight for a perfect perception of shapes and color. All the necessary wiring and hardware are included to facilitate the installation with peace of mind. Kimpex LED light bars are a logical choice for a high-quality product at a reasonable price, for all ATV and UTV enthusiasts who want to customize their vehicle and gain improved visibility on the trail.
Do-it-yourself connection and installation:
Making the decision to purchase an LED projector is a good choice. However, it is necessary to provide a constant amount of electrons so that it has a good and steady supply. Learning how to correctly wire an LED bar ensures reliability and prevents unsafe operation or damage to your vehicle.
If you’re not too familiar with watts, amps, and volts, the easiest installation is to do a direct battery connection. We decided to plug our LED bar to the headlights circuitry, on the high beams. That way the LED bar will automatically turn off when we turn on the low beam. But before we do this, we need to do some calculations to check the fuse rating and current capacity of the headlights circuit.
In our case, we will install a Kimpex LED bar on a Can-Am Outlander that is already equipped with four 55 watts bulbs. We will add to these an additional 72 watts LED bar. Taking for granted that the 4 headlights and the LED bar will all be turned on at the same time, we would get a total of 292 watts (72 watts + (55 watts x 4)). We also have to take into account the maximum voltage coming from the 12-volt battery which sits at about 12.6 volts.
Watts / Volts = Amps
292 watts / 12.6 volts = 23.2 amps (therefore a minimum fuse of 25A must be used). In our present case, the Can-Am Outlander already has a 30A fuse that protects the headlights circuit, which is more than enough to power the additional LED bar and to protect everything against overcurrent and short circuits.
Here are the steps to make a safe LED bar installation:
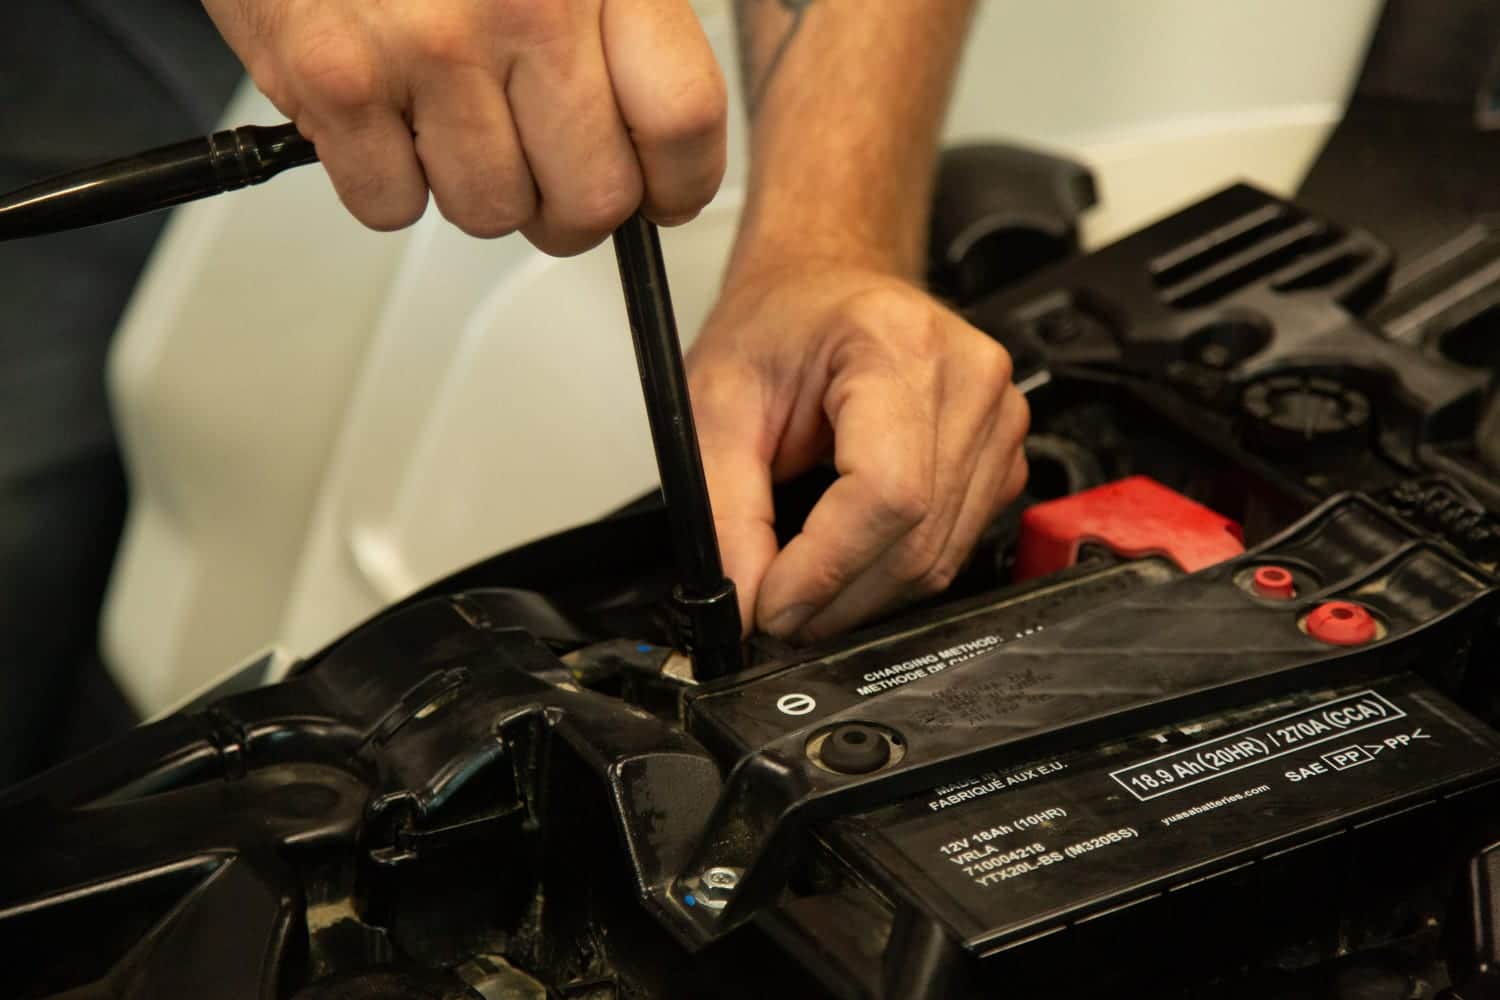
1- Neutralize the energy source. Your vehicle’s battery might seem harmless, but it is a potentially life-threatening storehouse of electrons looking for a way out at the speed of light. Therefore, always disconnect the ground terminal (negative) from the battery first. This greatly reduces the risks of a short circuit. Second, disconnect the positive terminal.
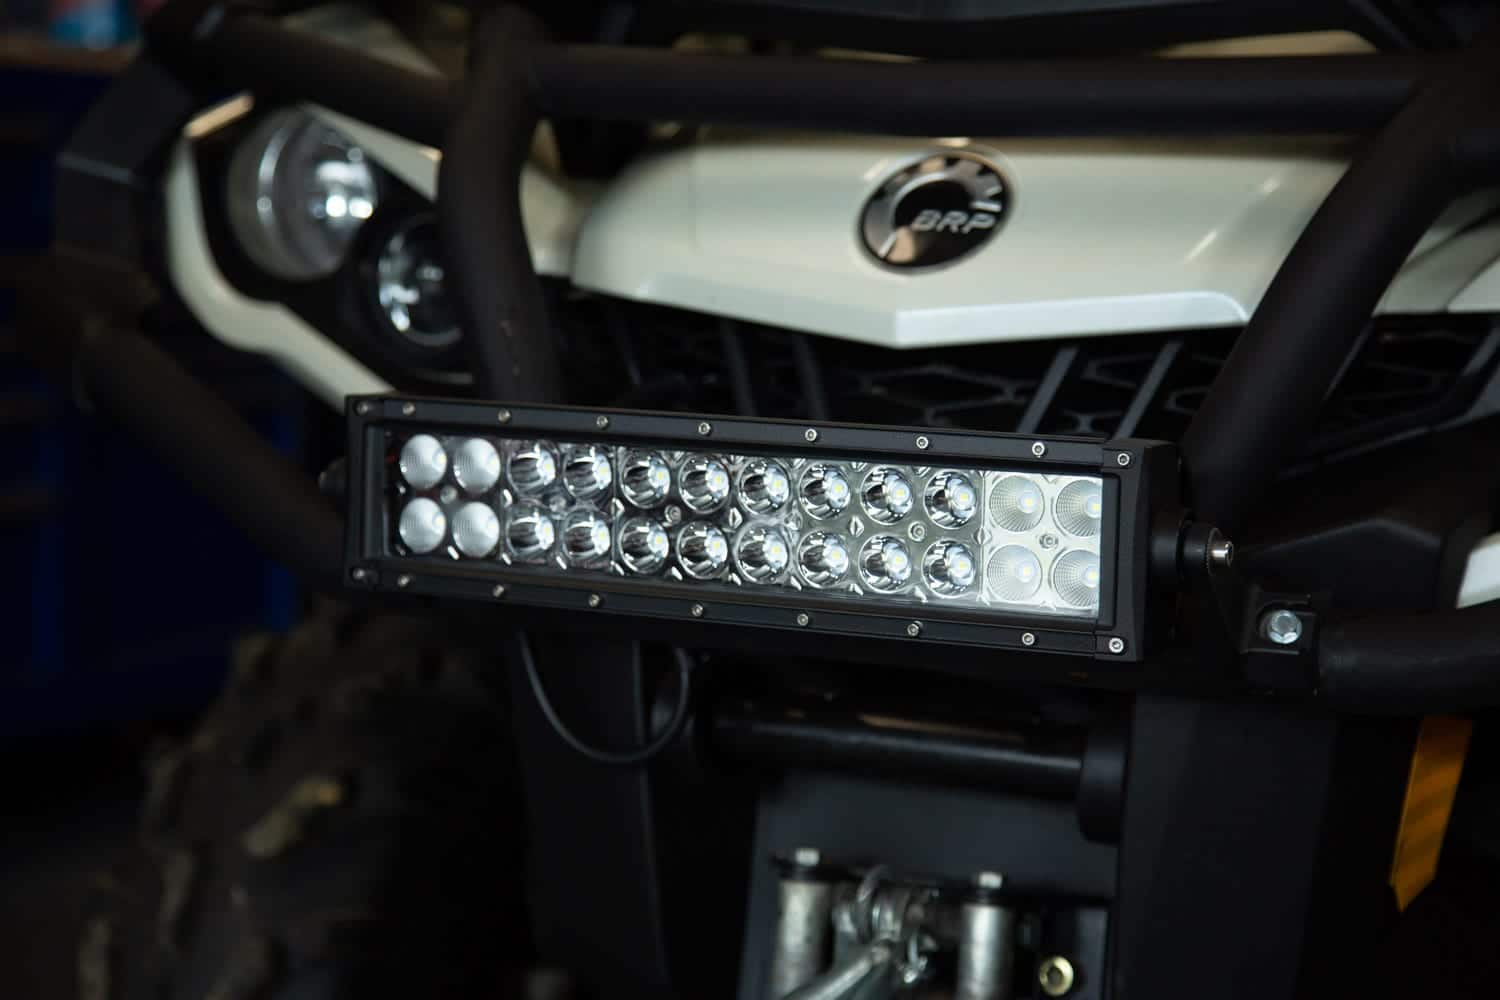
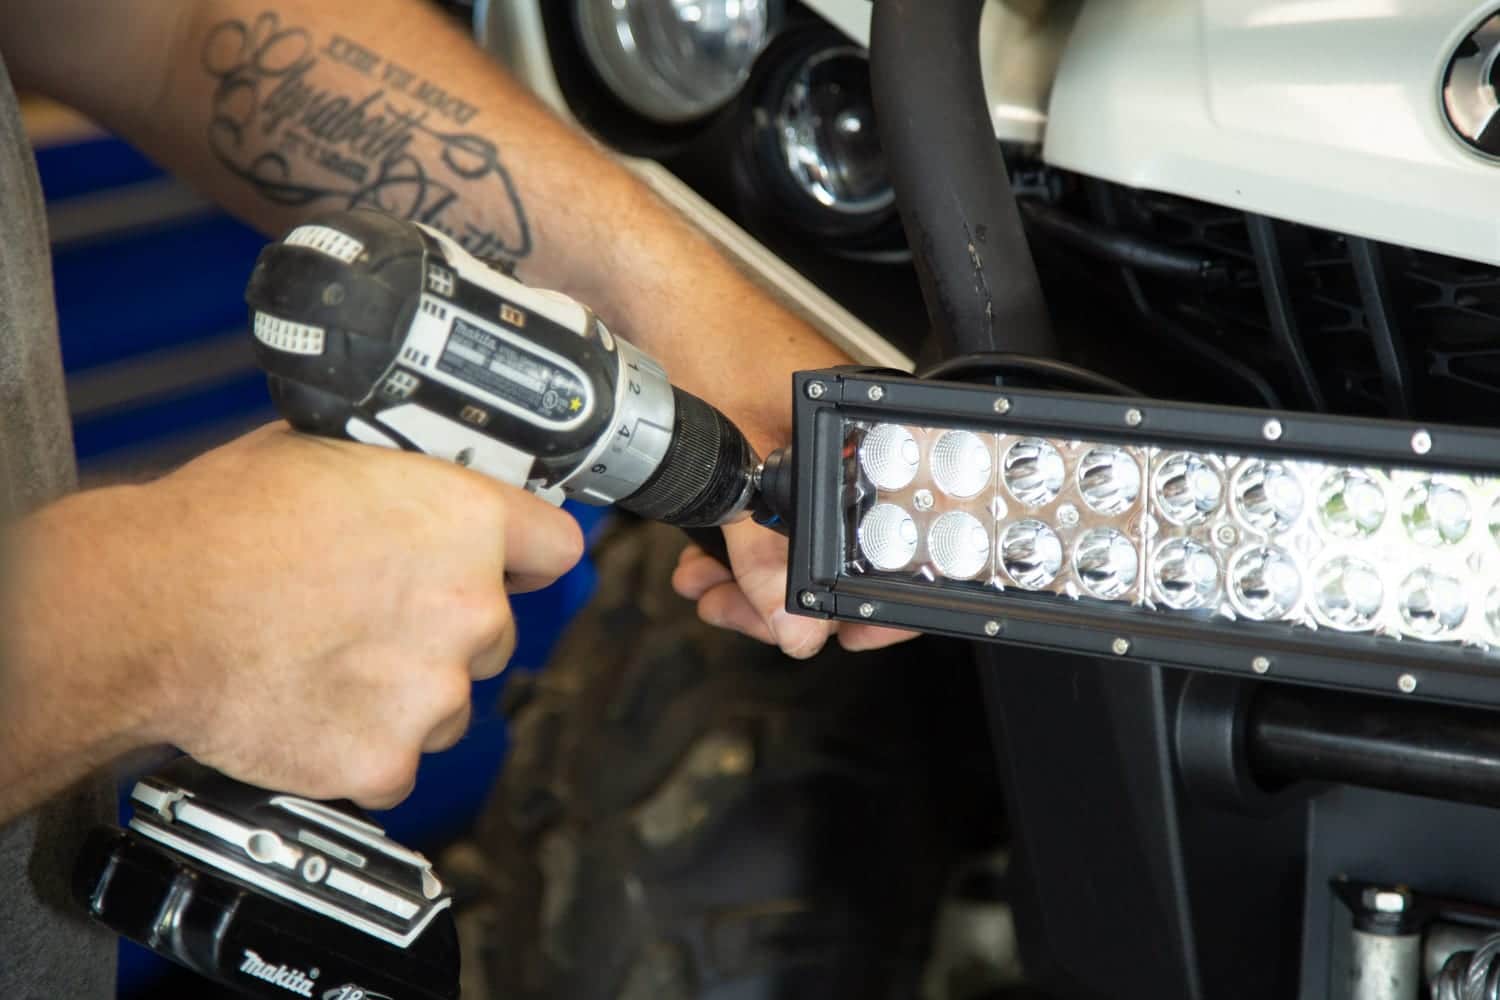
2- Find a suitable mounting location that will allow the LED bar to be installed and the wires to pass through. You can use the mounting hardware supplied with the light bar as well as optional round tube brackets (sold separately). We opted for an installation on the front bumper for convenience. Fit it all up being careful not to fully tighten the hardware, as you will probably need to make a final adjustment at the last step.
3- Determine the exact place from where you will get your 12 volts supply. For our part, we spliced the 2 wires connected to a quick connection carrying the power to one of the headlights.
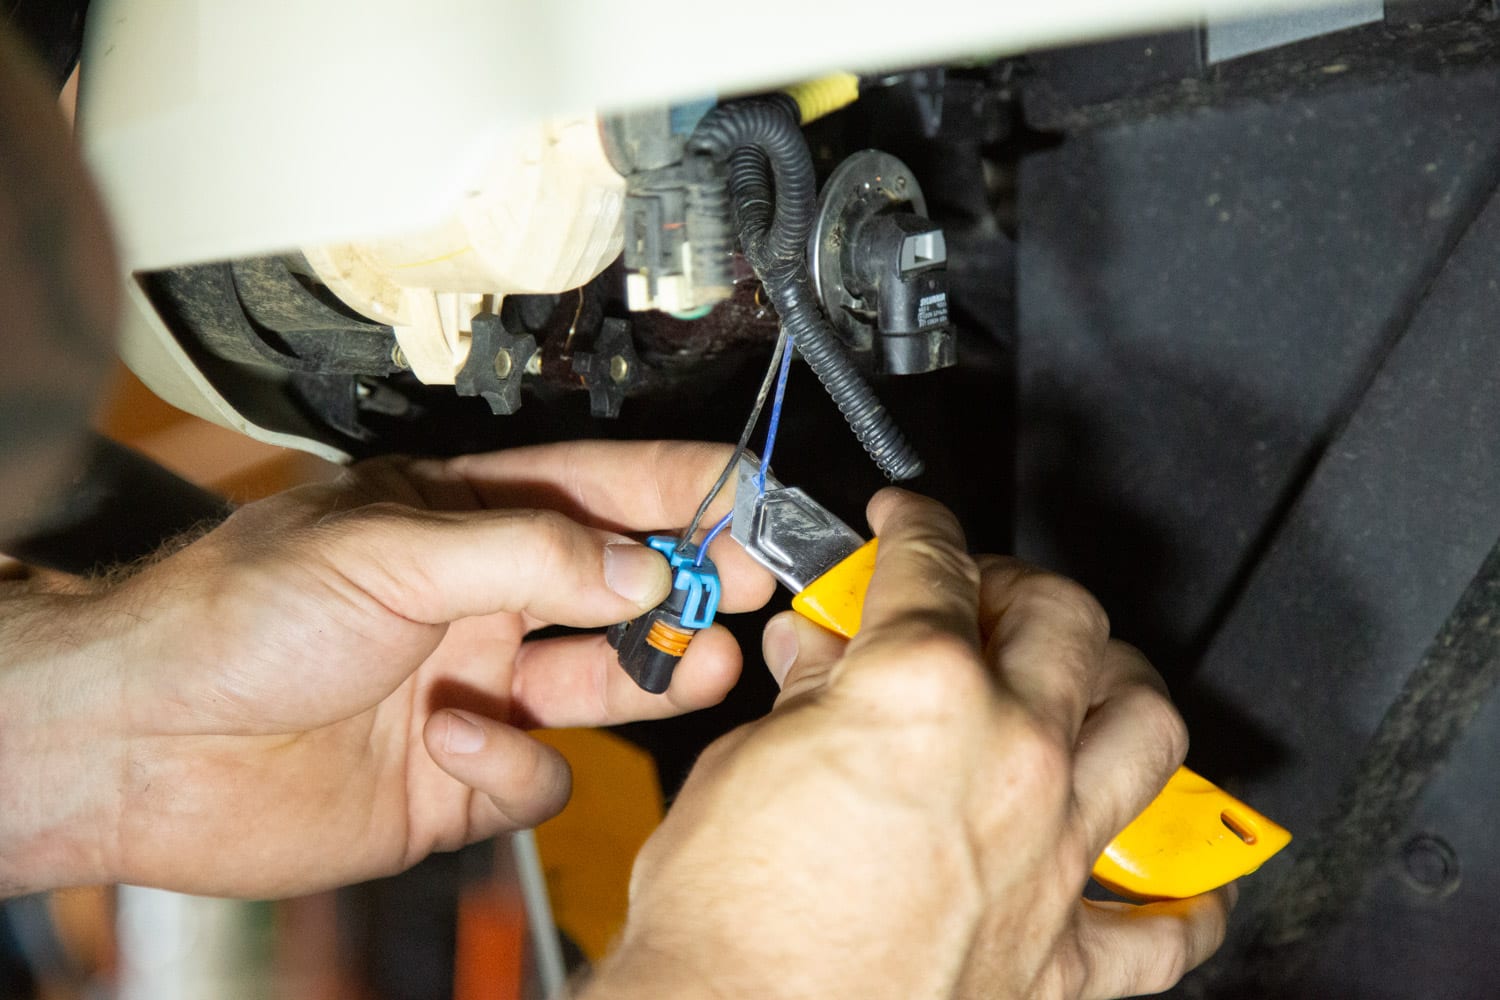
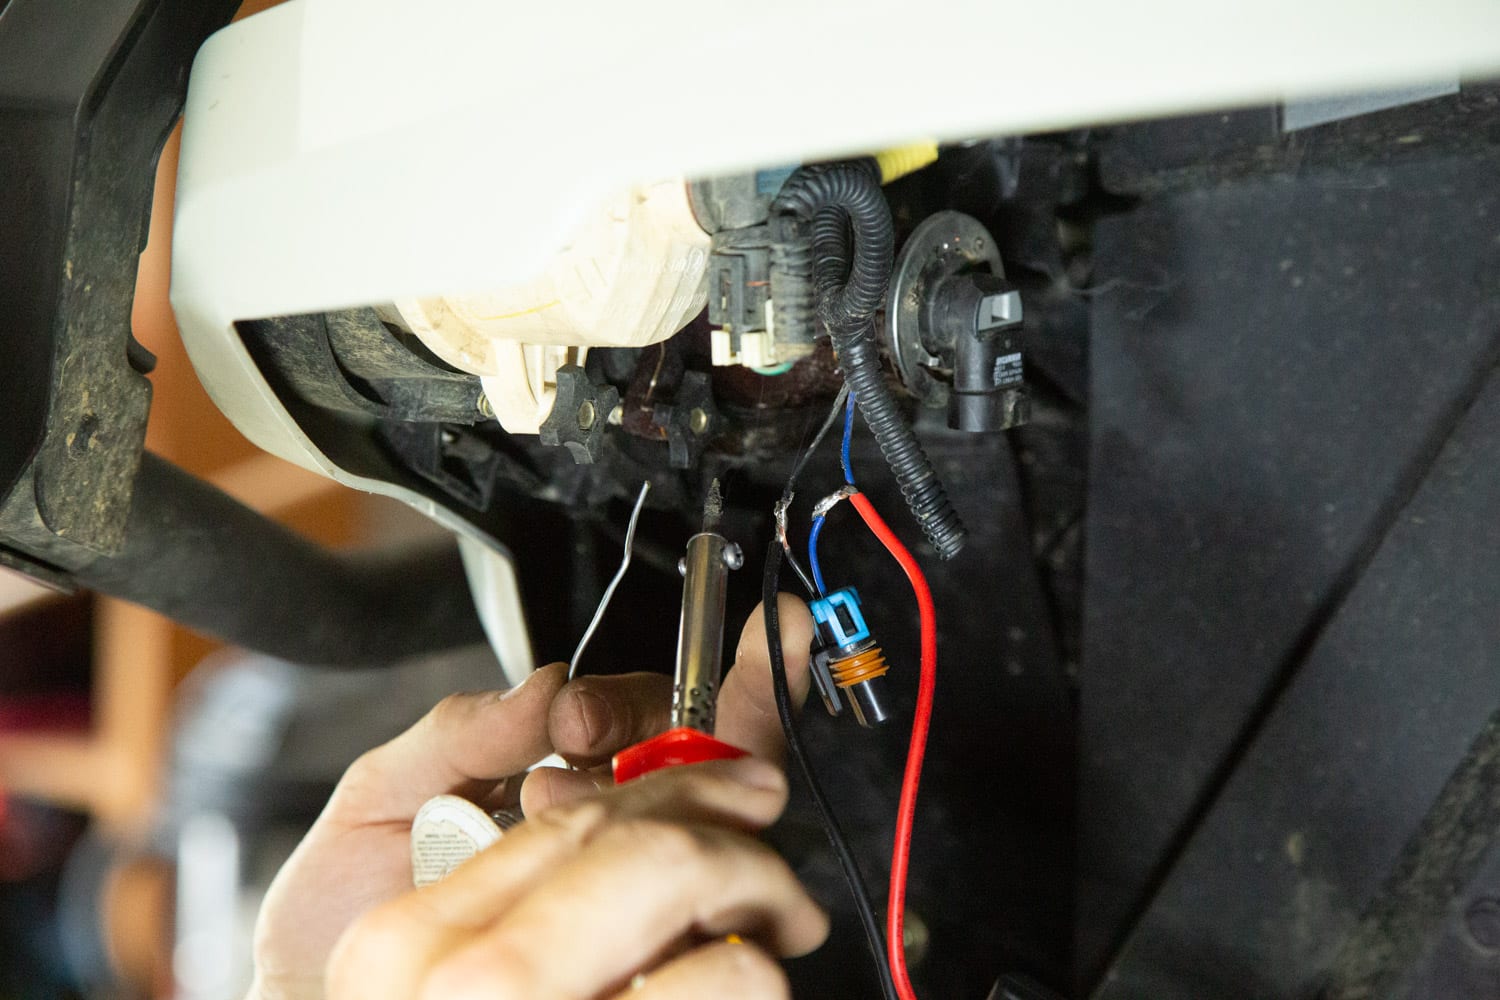
4- Secure your wiring using zip ties, making sure to avoid heat sources and moving parts. Keep in mind that prolonged rubbing of the wires against metal parts can cause a short circuit. Generally, running along the existing vehicle’s wiring is a safe path to follow.
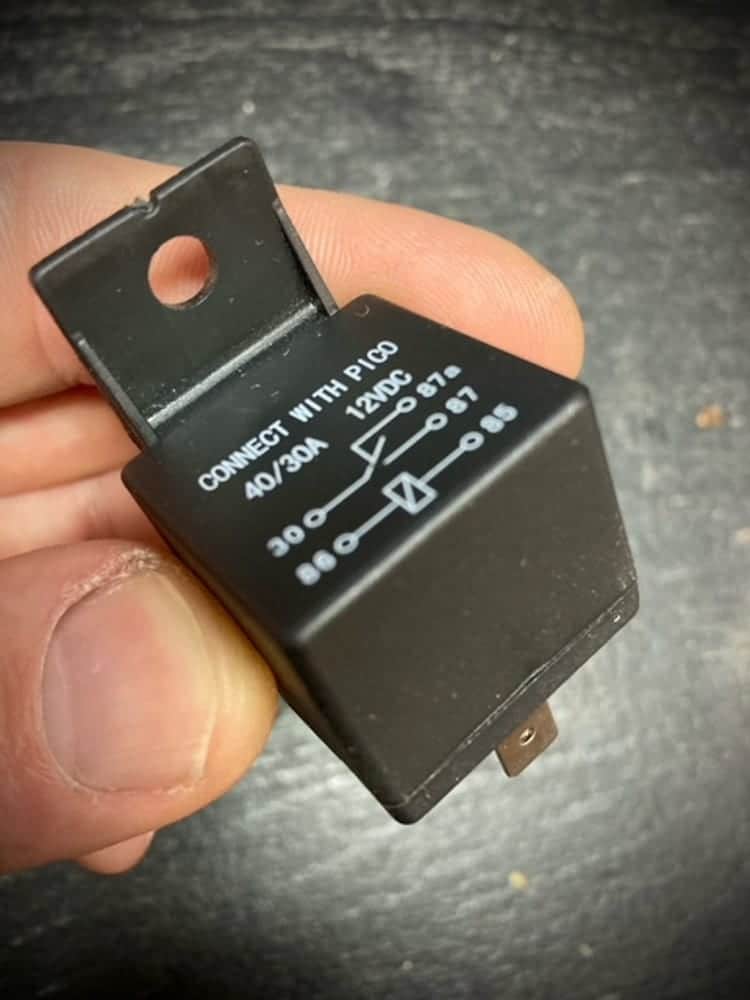
5- A safe installation would require a relay. A relay is an electromechanical or electronic device by which a heavy electrical load can be turned on and off with a small current input. Aside from switching a heavy load, a relay is needed to conserve energy, extend the life of a device, and improve its efficiency. For example take the switching of 2 headlights: if they are activated by a normal switch, the voltage drop from the battery to the lamps through the switch will be huge, and the heat generated in the circuit due to the resistance will be considerable. The heavy current will be drawn by the lamps which will not only heat the circuit but also heavily drain the battery at the same time.
* To ensure full control of your LED bar, we recommend the installation of a control switch as an integral part of your installation. For our part, we have simplified our circuitry by using the hi / lo beam switch.
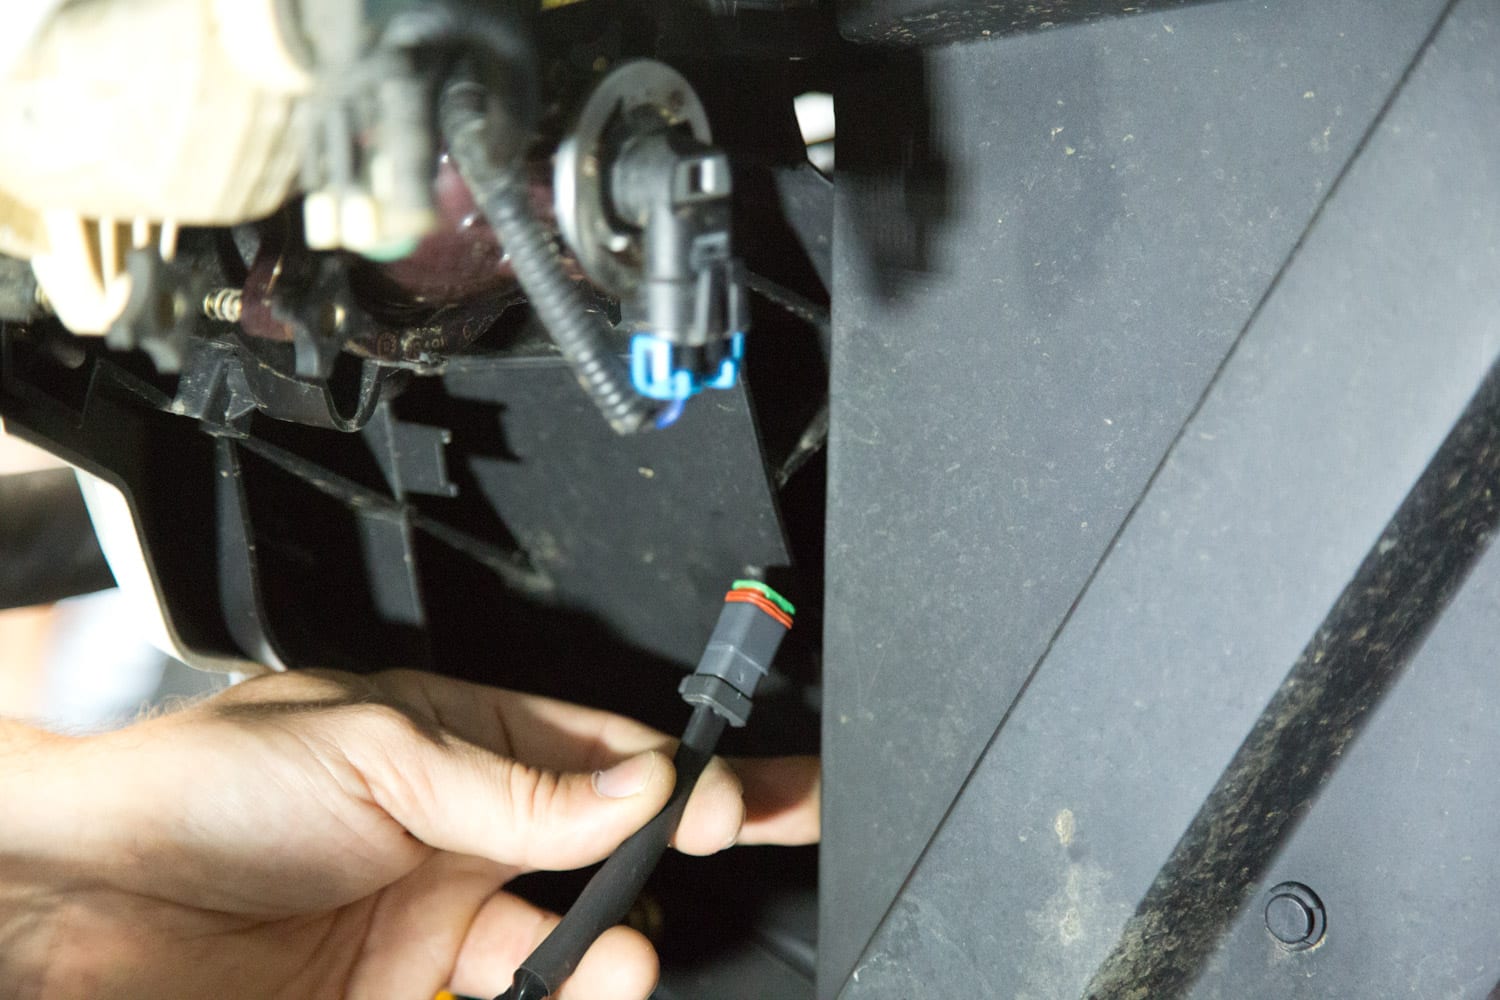
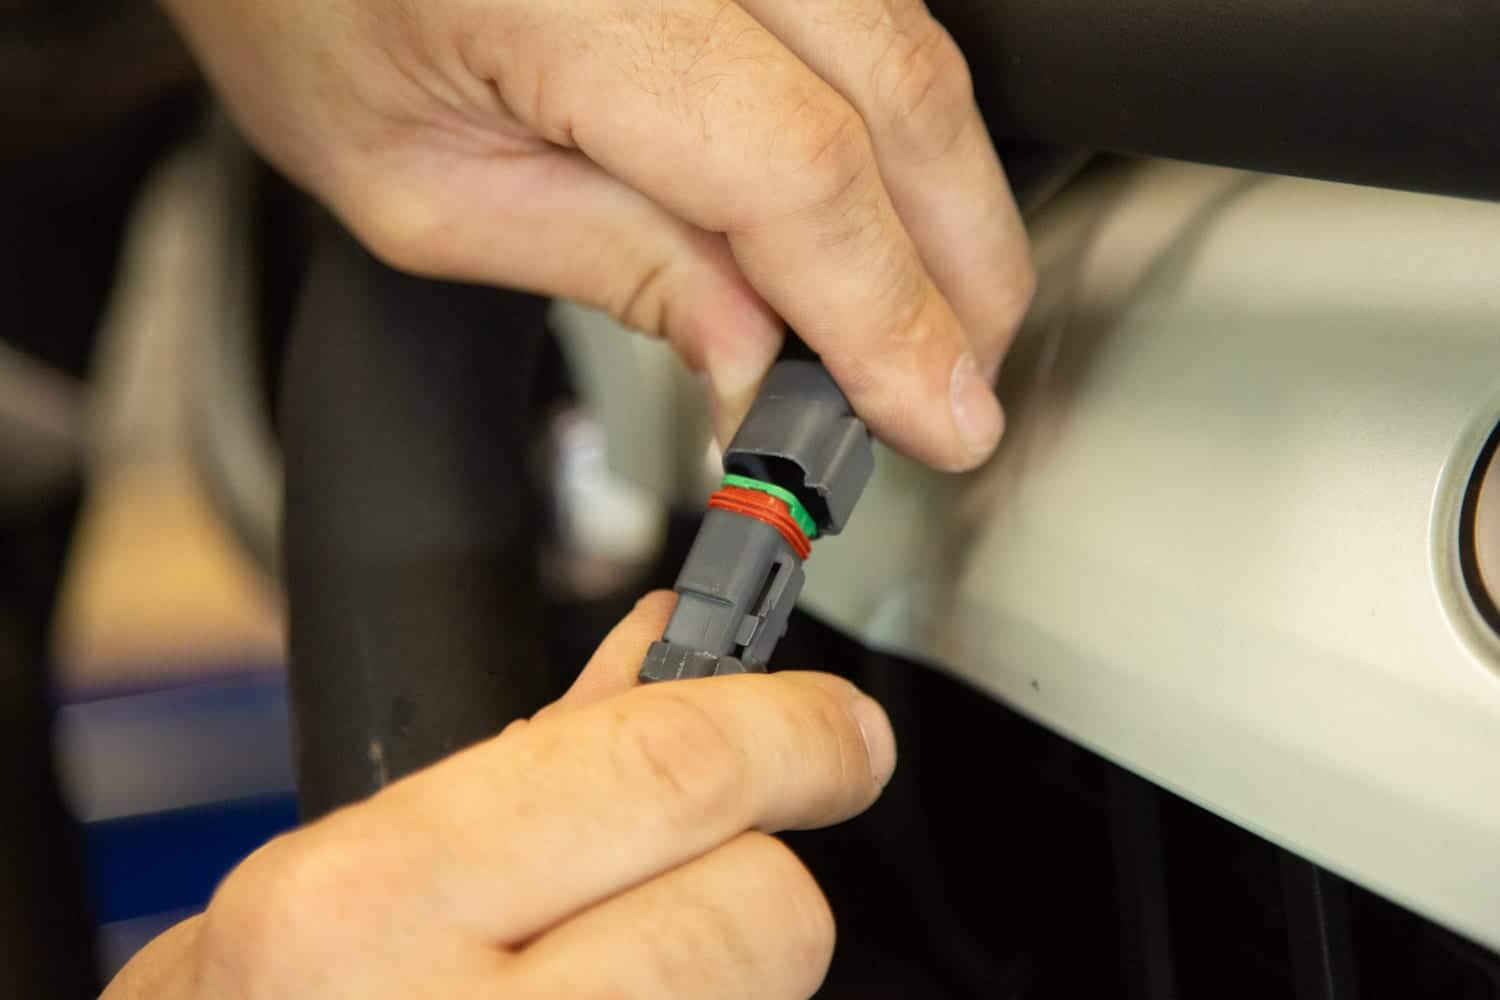
6- When the previous steps are completed and the wiring has been routed to the LED bar, all you have to do is make the final connection using the quick connect.
7- Finally, reconnect the positive terminal to the battery first, followed by the negative. Activate the high beam switch to check your connection and installation. At this stage, proceed with the final tightening of the LED bar hardware.
The installation of an LED bar may vary depending on the vehicle and the power source used. Customization like the one we have just done requires little planning and can be accomplished very easily.
In conclusion, adding an LED light bar is an inexpensive improvement compared to the benefits it provides. Our night rides are much safer now and this increased visibility is greatly appreciated during our ATV riding activity.