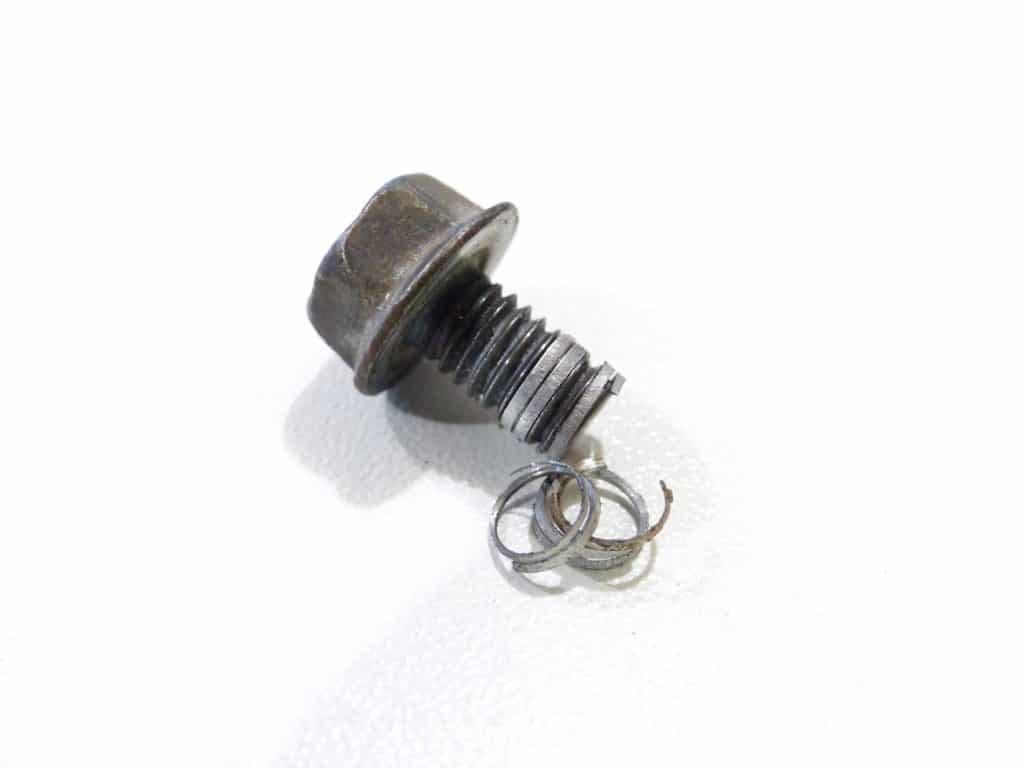
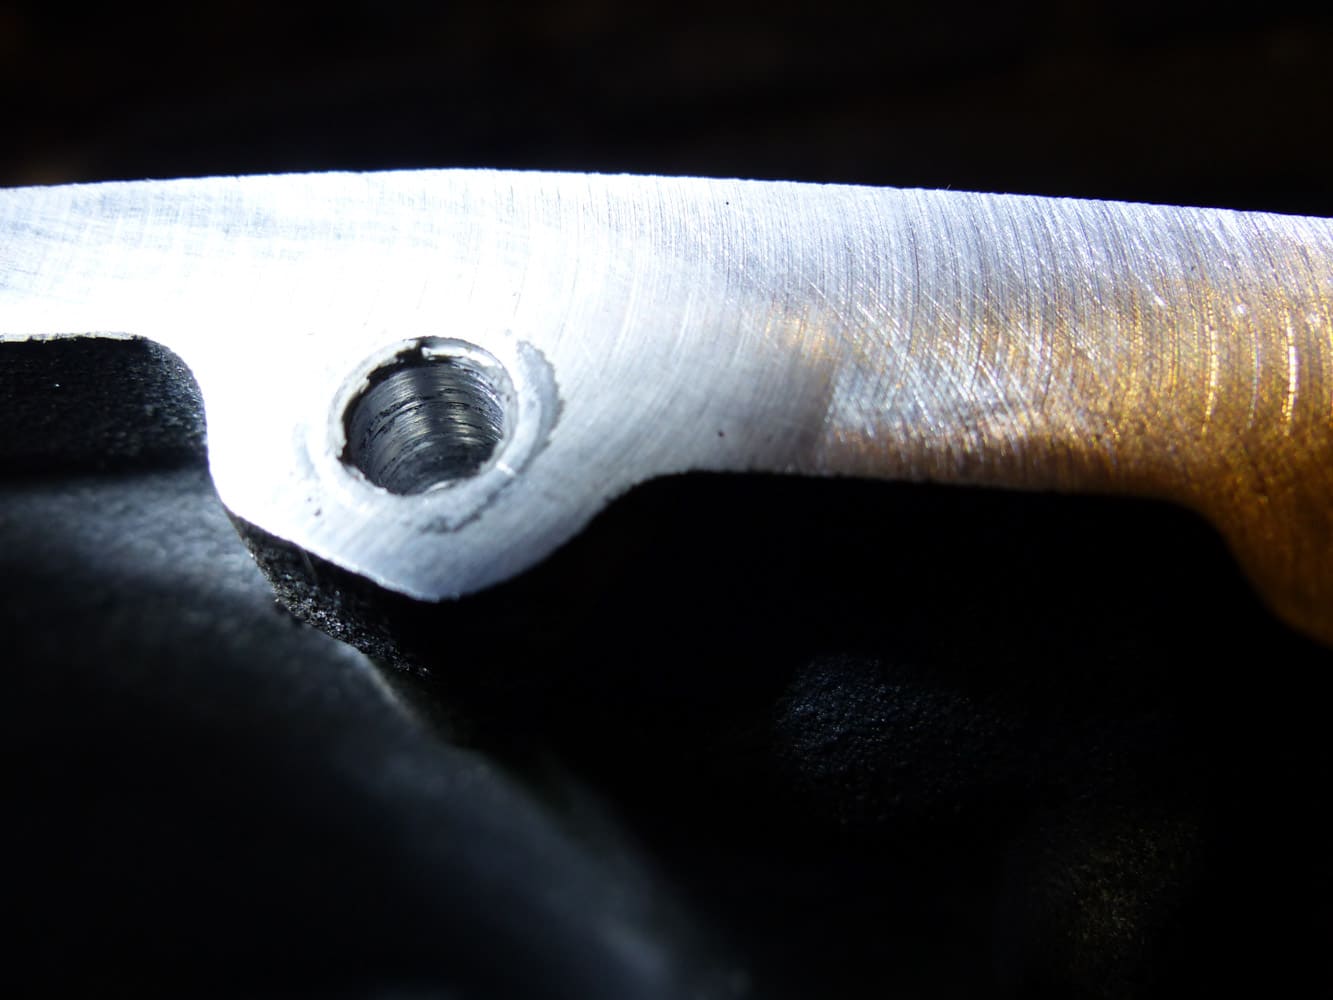
For various reasons, it happens that when you remove an engine casing, a support, or even your ATV’s oil drain plug, threads are damaged. Anyone who ventures into mechanical repairs is likely to end up with damaged threads one day or another. When this happens, we feel cursed, and punishment is sent to us while doing a simple maintenance operation. Obviously, the stripped threaded hole is no longer usable.
Fortunately, there are solutions
It should be noted that the somewhat redneck solutions you might want to use to get out of this unfortunate situation rapidly will usually turn against you one day or another. What I mean by redneck solution is using a self-tapping metal screw, tapping the damaged hole to a larger dimension, using glue, or even worse, silicone. Sometimes people will leave the stripped hole free and just forget about it, thinking the ATV manufacturer probably put one extra bolt there for no reason.
Above all, these risky solutions are not really helping you out and will rather avoid the possibilities of doing a reliable and effective repair.
How did you end up with this damaged threaded hole situation?
The first cause is usually too much tightening torque applied to the bolt.
The second is the lack of tightening torque, which will happen on a spark plug thread, for example. A loose spark plug will vibrate a lot when the engine is running, and this vibrating movement will gradually wear the cylinder head threads to the point of thread breakage.
Another cause of thread breakage is corrosion. Corrosion buildup on the screw or bolt threads will cause them to be torn off during disassembly.
The solutions
First, it is always advantageous to repair your machine while keeping the same screw size, thread type, and length. It will avoid problems in future maintenance. It will also preserve the integrity of your machine’s frame.
The self-tapping oil drain plug
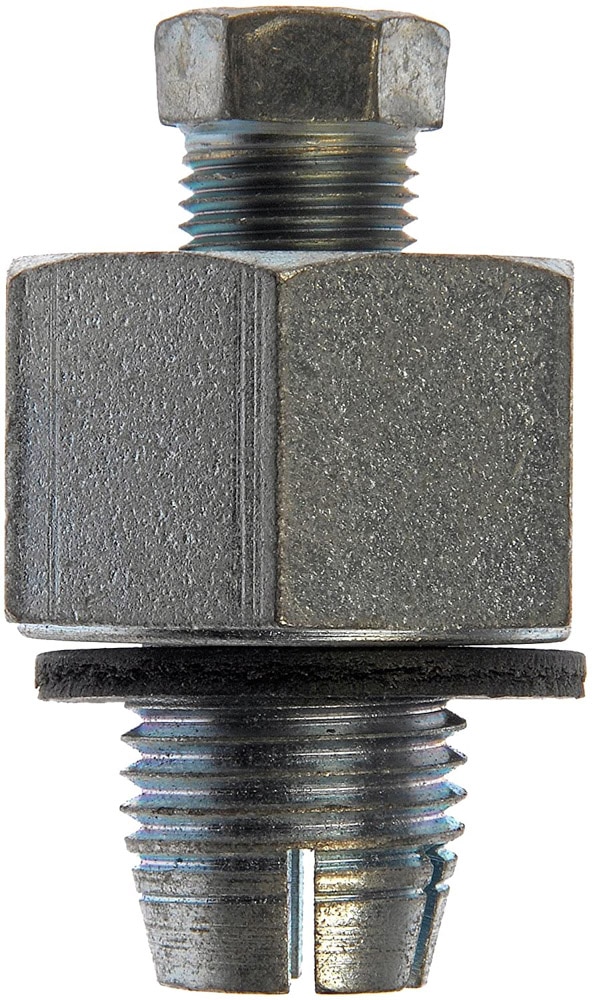
In the event of damaged oil drain plug threads, there is an option to use a self-tapping replacement plug. It should be noted that if the oil pan of your quad is thin or has only a small protrusion at the level of the oil drain hole, this solution is not an option. In this case, the self-tapping oil drain replacement plug might damage the oil pan or crankcase, thus destroying repair chances.
Heli Coil thread inserts
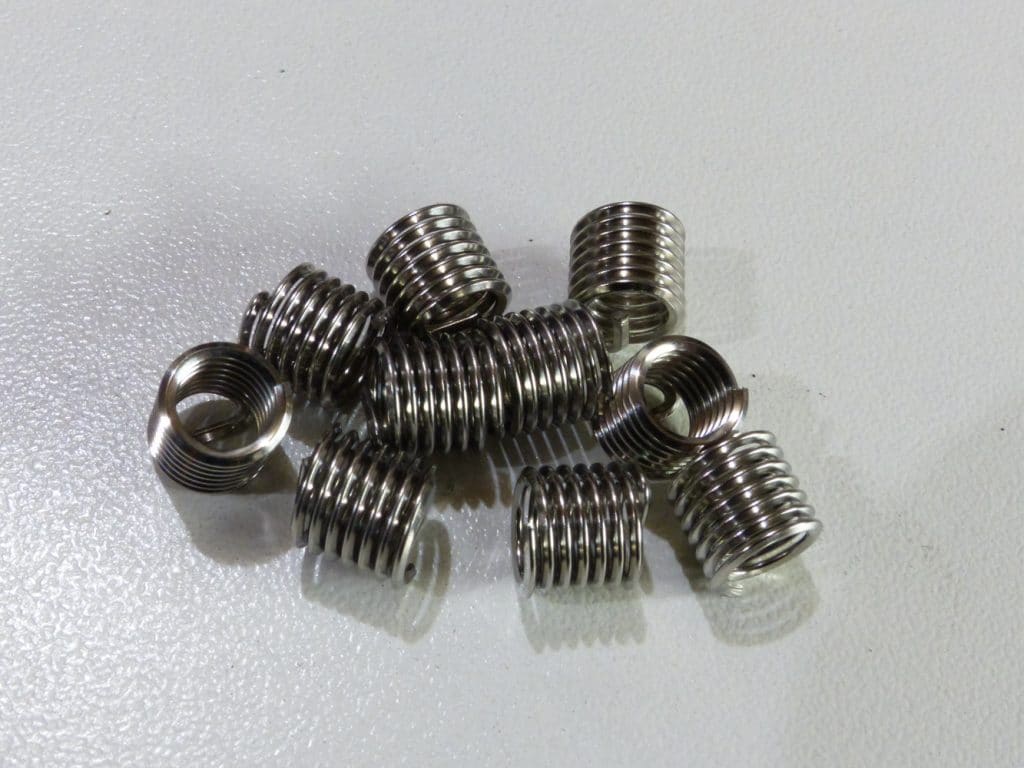
The Heli Coil threads are thread inserts that respect the diameter and pitch of the original screw according to the desired application. This type of repair is the most common and can be used in aluminum and steel holes. Its installation is permanent and durable. However, acquiring an installation set including a drill bit, tap, and the installation tool is essential.
Time Sert thread inserts
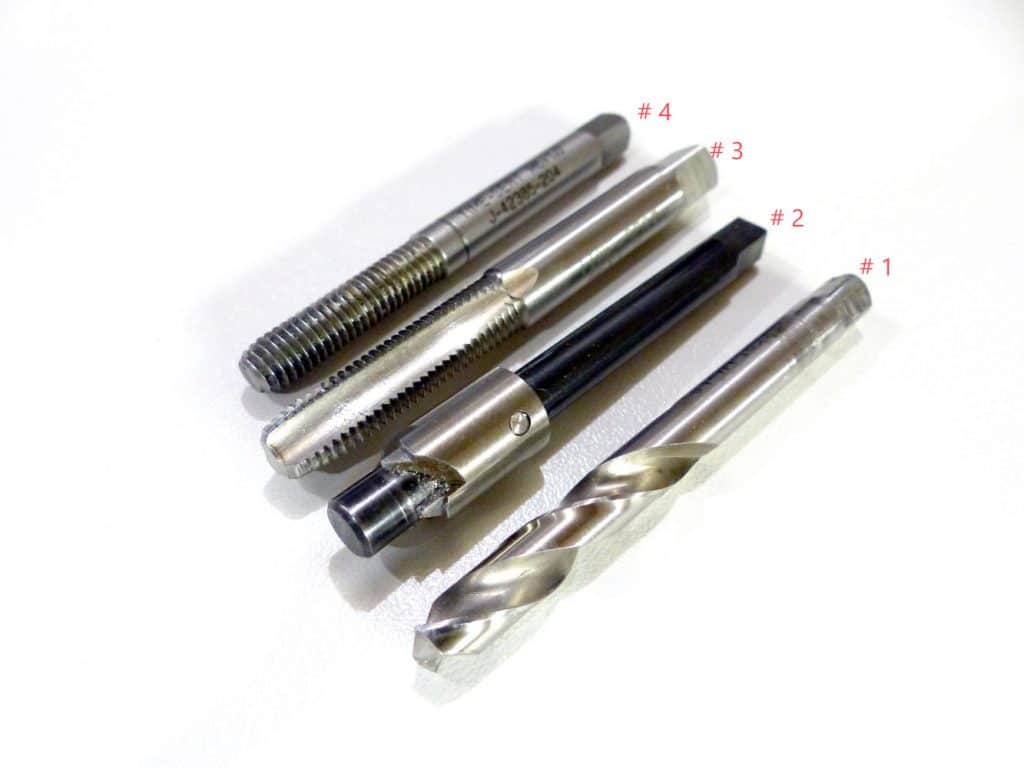
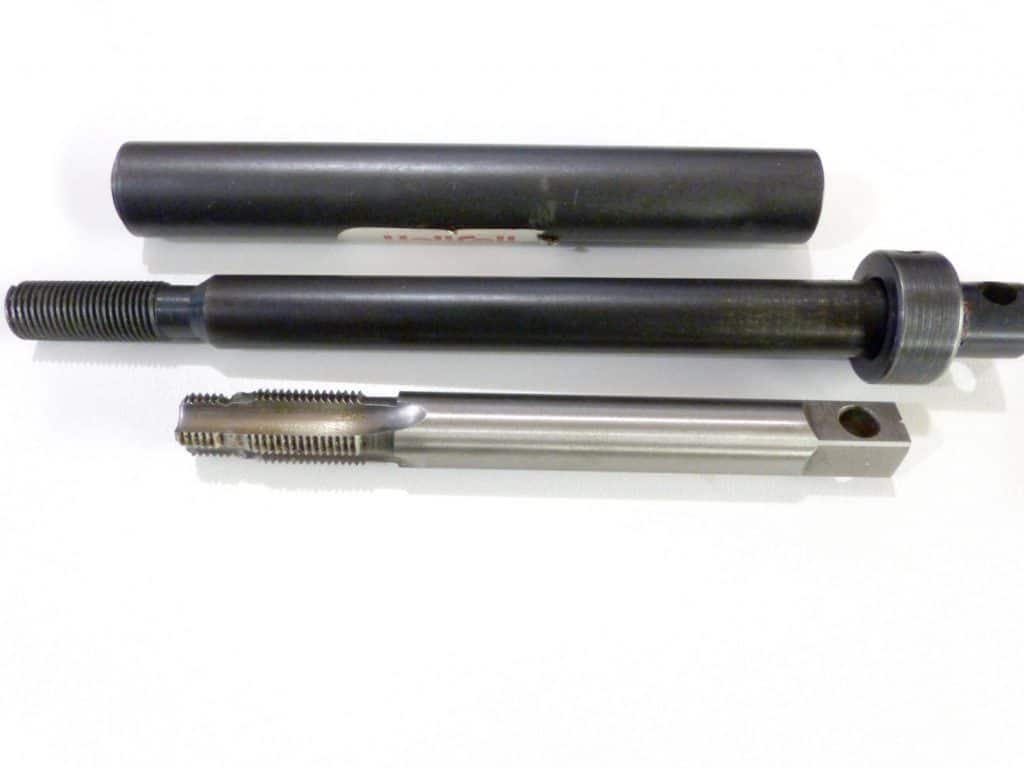
The Time Sert thread inserts happen to be an internally and externally threaded sleeve. This repair is very solid but is not applicable in certain situations. For example, when the threads to be repaired are under a dowel pin, the use of a Time Sert is not possible, as its shoulder will damage the stud cavity when installed. The use of a Heli Coil is therefore recommended in this situation. The installation of a Time Sert also requires an installation kit consisting of a bit #1, a reamer #2, a tap #3, the installation tool #4, and finally thread locking compound.
Preparation and installation of a Heli Coil
First, make sure you have the Heli coil installation kit that matches the diameter and pitch of the original screw or bolt. The hole to be repaired must be clean. Cleaning it with a jet of compressed air between each step is sufficient.
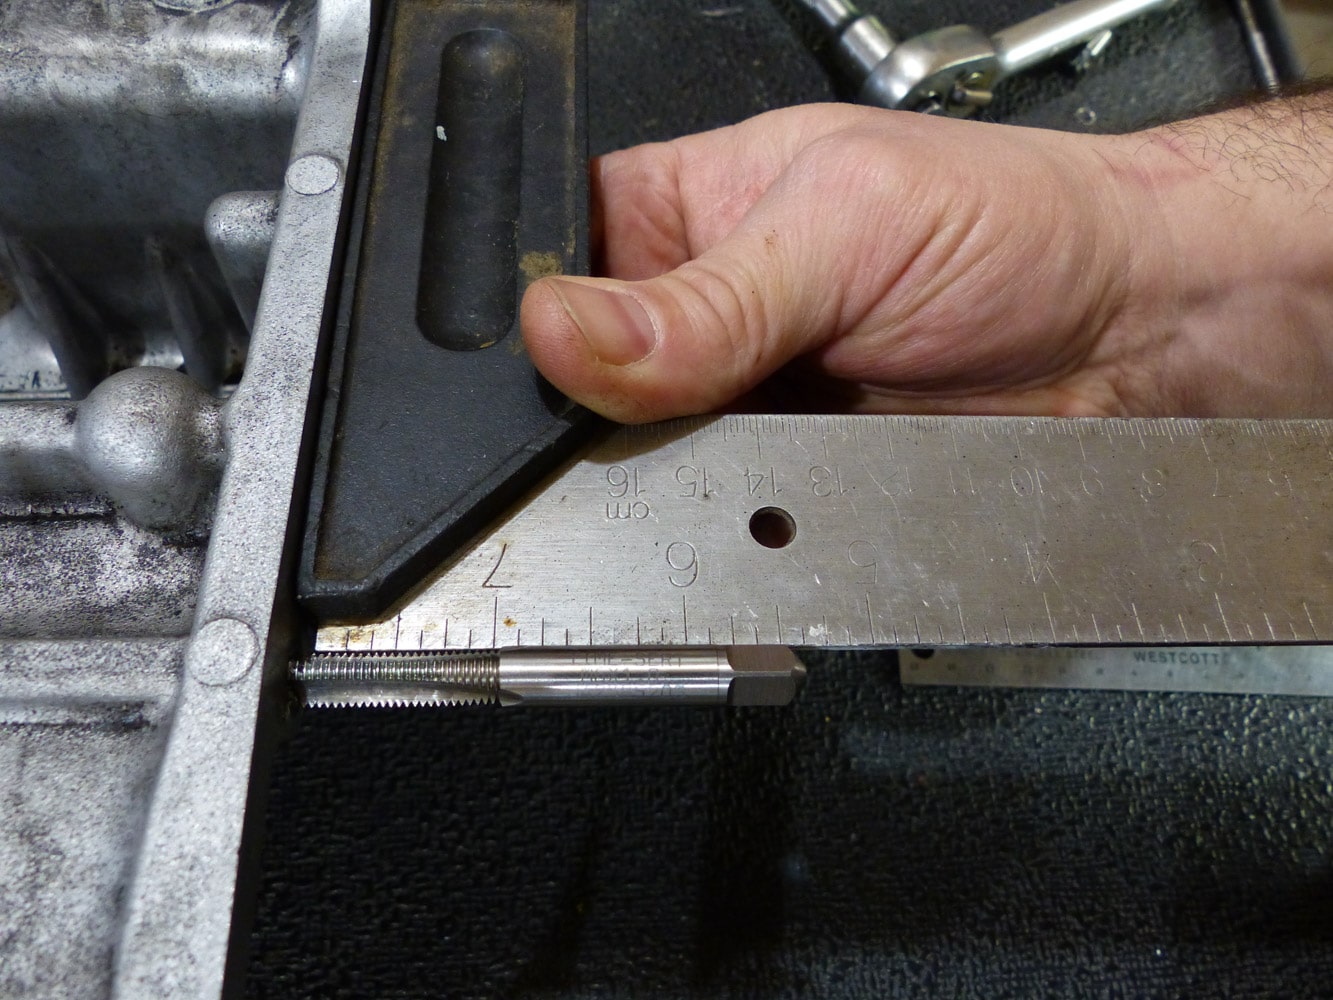
Use the drill bit provided and drill the hole to be repaired to remove the rest of the damaged threads. Be careful not to drill deeper than it was initially. During the drilling operation, regularly check with a square to ensure that the hole remains perpendicular to the surface. Then, it will be necessary to tap the hole to receive the Heli Coil. Using the tap provided, apply cutting oil to the tap and the hole to be repaired. If you don’t have cutting oil, a few drops of WD-40 lubricant will work. As with the drill, make sure you are straight with the help of a square. Carry out the work by screwing one turn, unscrewing a half-turn, back and forth to the desired depth.
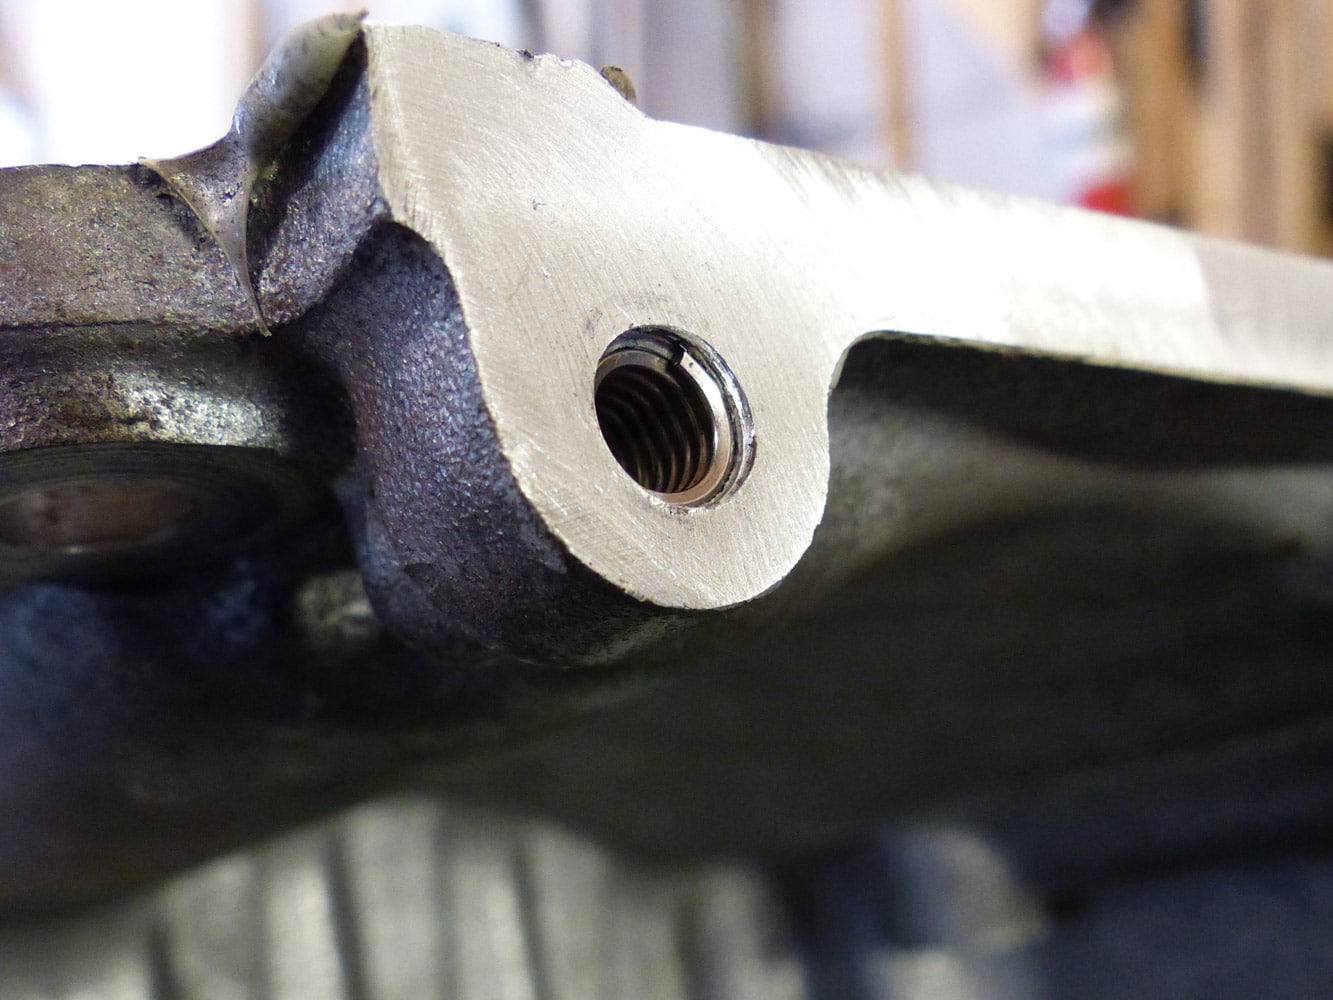
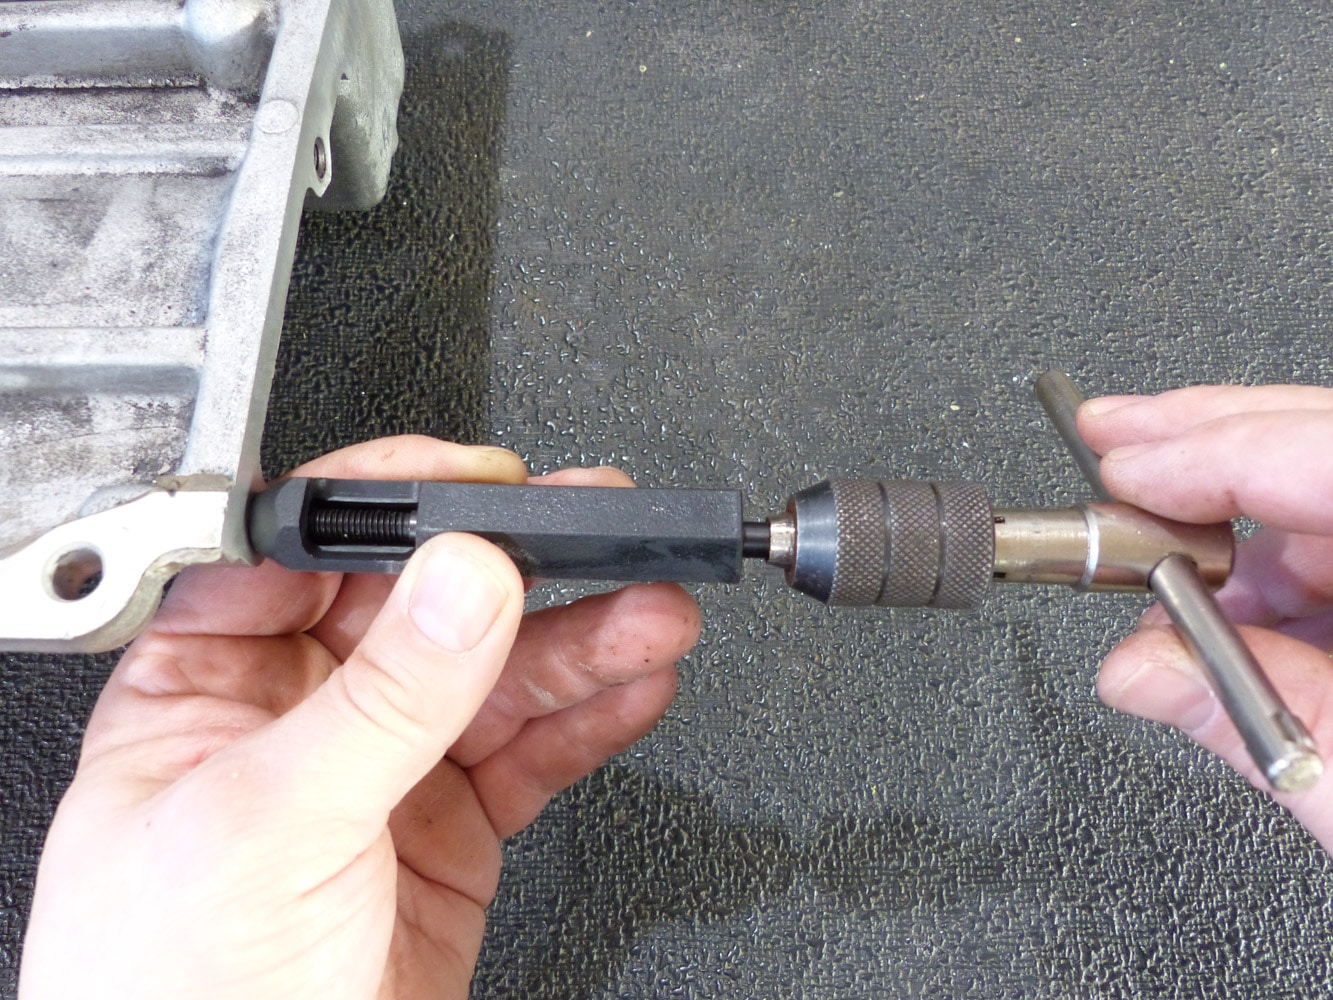
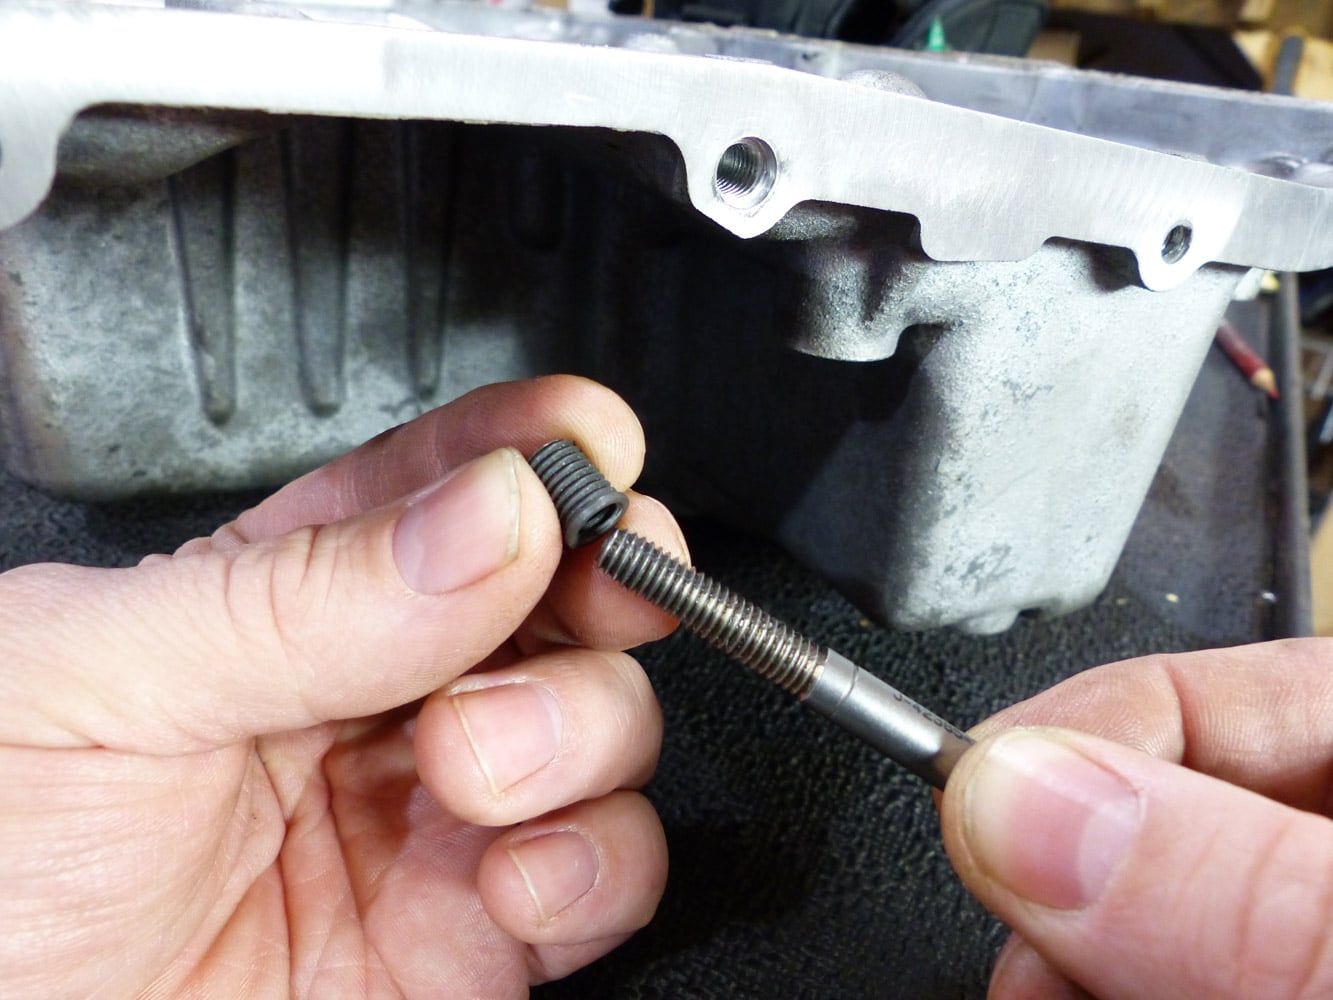
The hole is now ready to receive the thread insert. Install the Heli Coil on the installation tool. Screw it in, taking care that it starts in the first tapped thread. When the last thread of the Heli Coil is level with the surface, screw in an additional turn. The end of the last thread should be ½ to 1 thread from the edge of the tapped hole. Contrary to some beliefs, do not use thread locking compound as thread inserts have no tendency to come undone. Finally, remove the installation pin of the Heli Coil with a small screwdriver. After bending it 2-3 times, it will fall off. The repair of the damaged threads is complete.
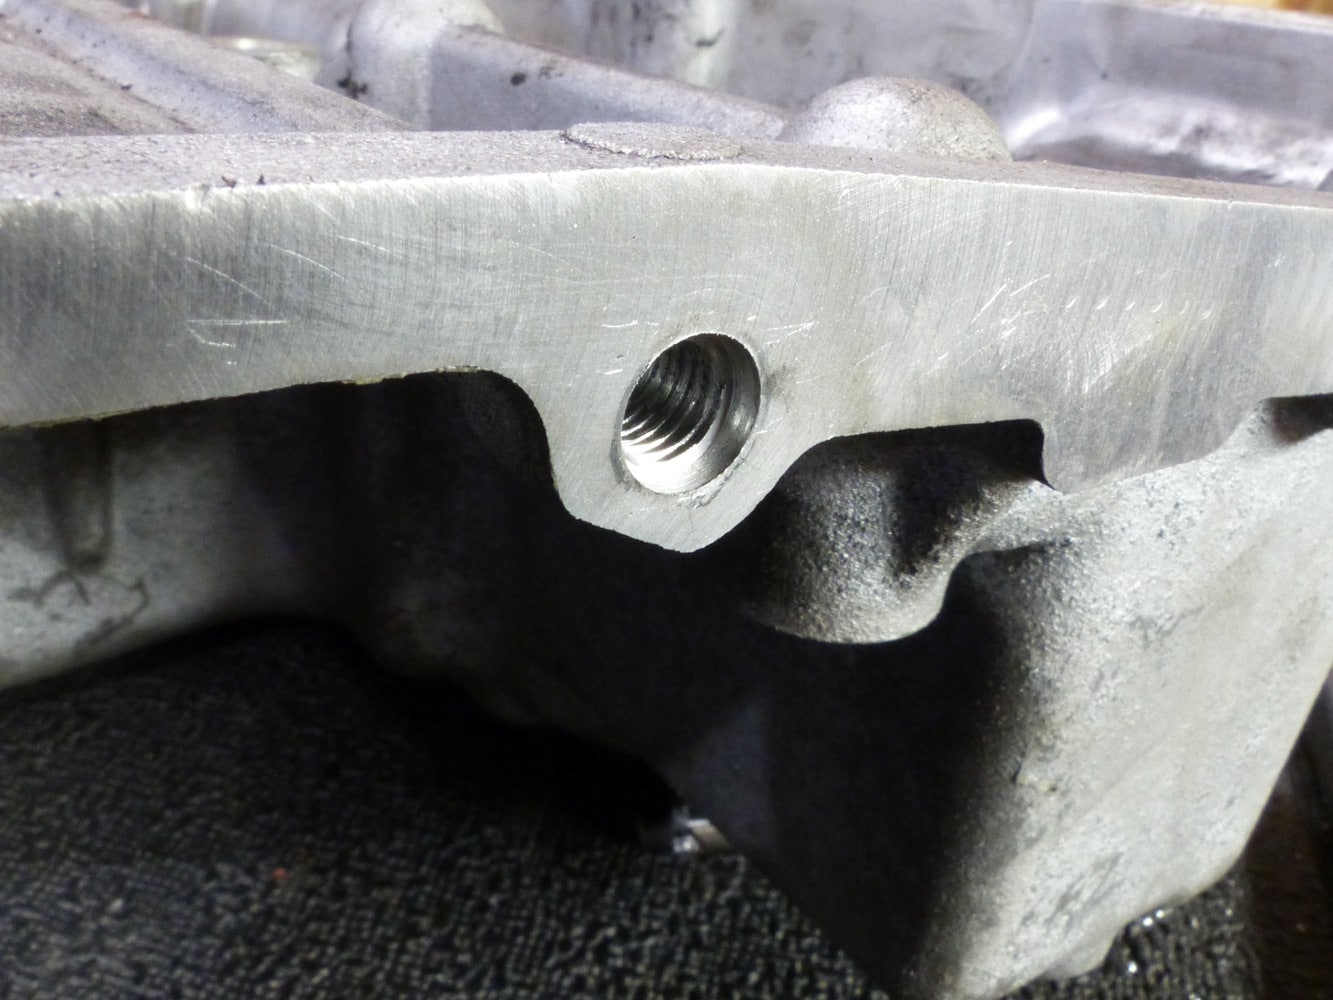
Preparation and installation of a Heli Coil for an engine oil drain hole.
Although this repair can be done using a standard Heli Coil kit, a kit specially designed for aluminum greatly simplifies the task. This repair set does not contain a drill bit; a specially designed tap will replace it. The first part of the tap is the diameter of the original hole to be repaired. It allows the tool to be engaged perfectly straight. As the tap advances, it will gradually machine the hole to the size needed to install thread inserts. Let’s see how to use it.
First, it is essential to prevent debris caused by the repair from ending up in the engine. Generously coat the tap with grease. The grease will trap the shavings from the tapping operation. Screw the tap into the hole to be repaired. Do not hesitate to remove the tap during the procedure to clean it and put fresh grease on it to avoid debris in the motor. Do not screw the tap any further than necessary to prevent internal engine component damage.
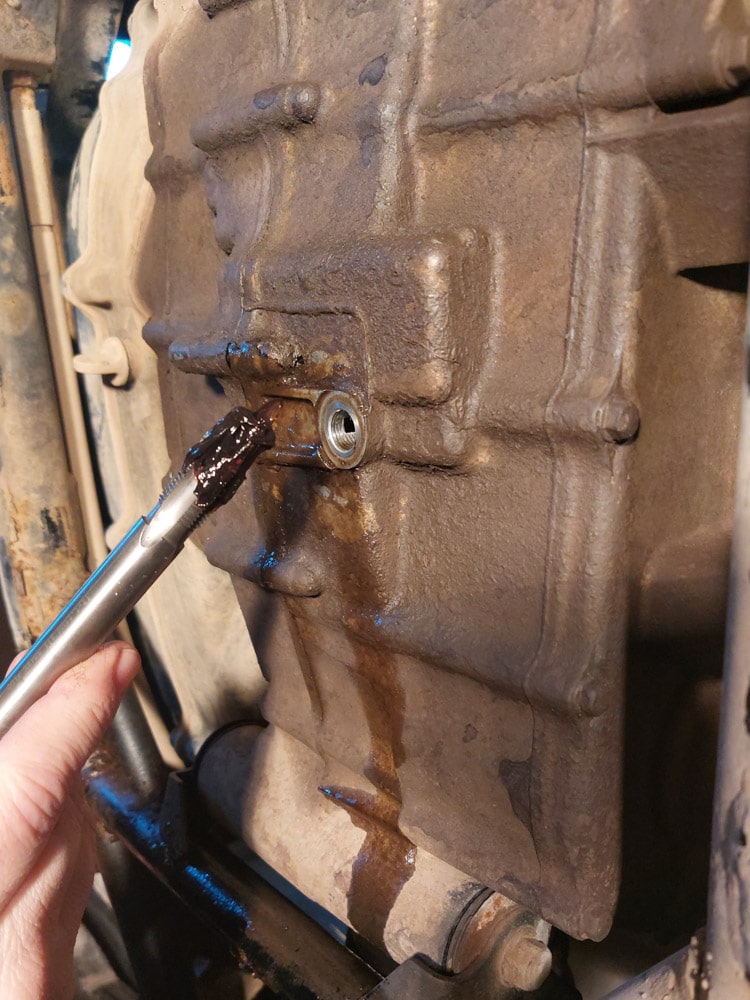
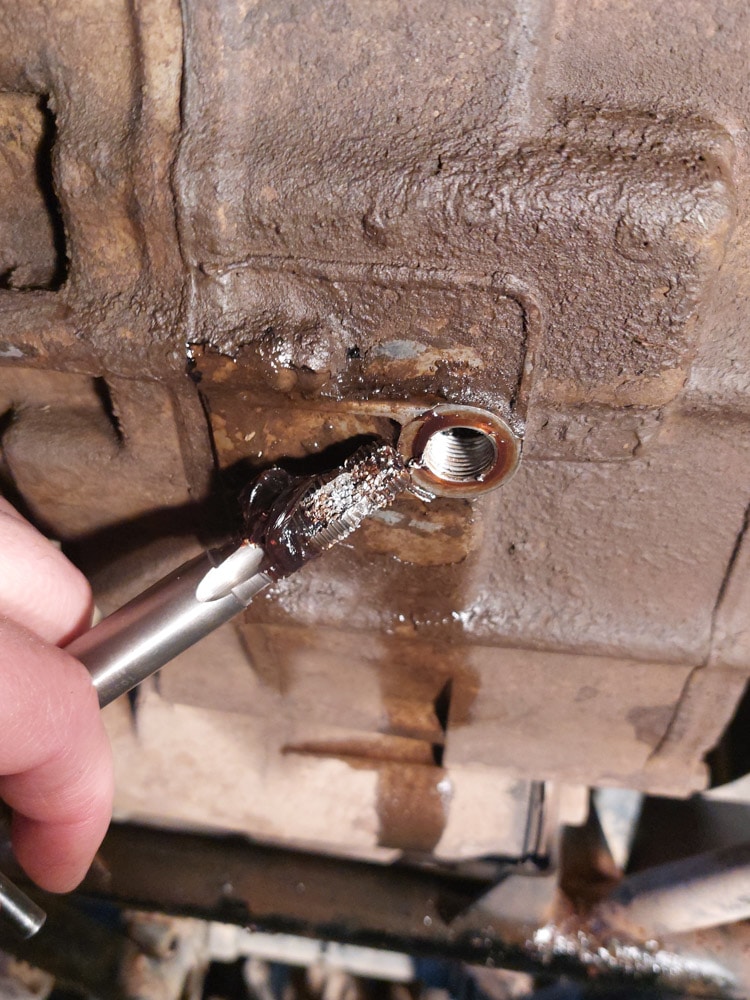
Then, just install the thread inserts exactly like the standard one.
Preparation and installation of Time Sert
The Time Sert requires a slightly different preparation from the Heli Coil technique. Make sure you have the exact set that matches the original bolt. Clean the hole between each step. Drill the hole with the drill bit the same way as the Heli Coil.
Then, use the reamer manually to make a chamfer that will house the Time Sert shoulder. Now tap the hole. Don’t forget the cutting oil.
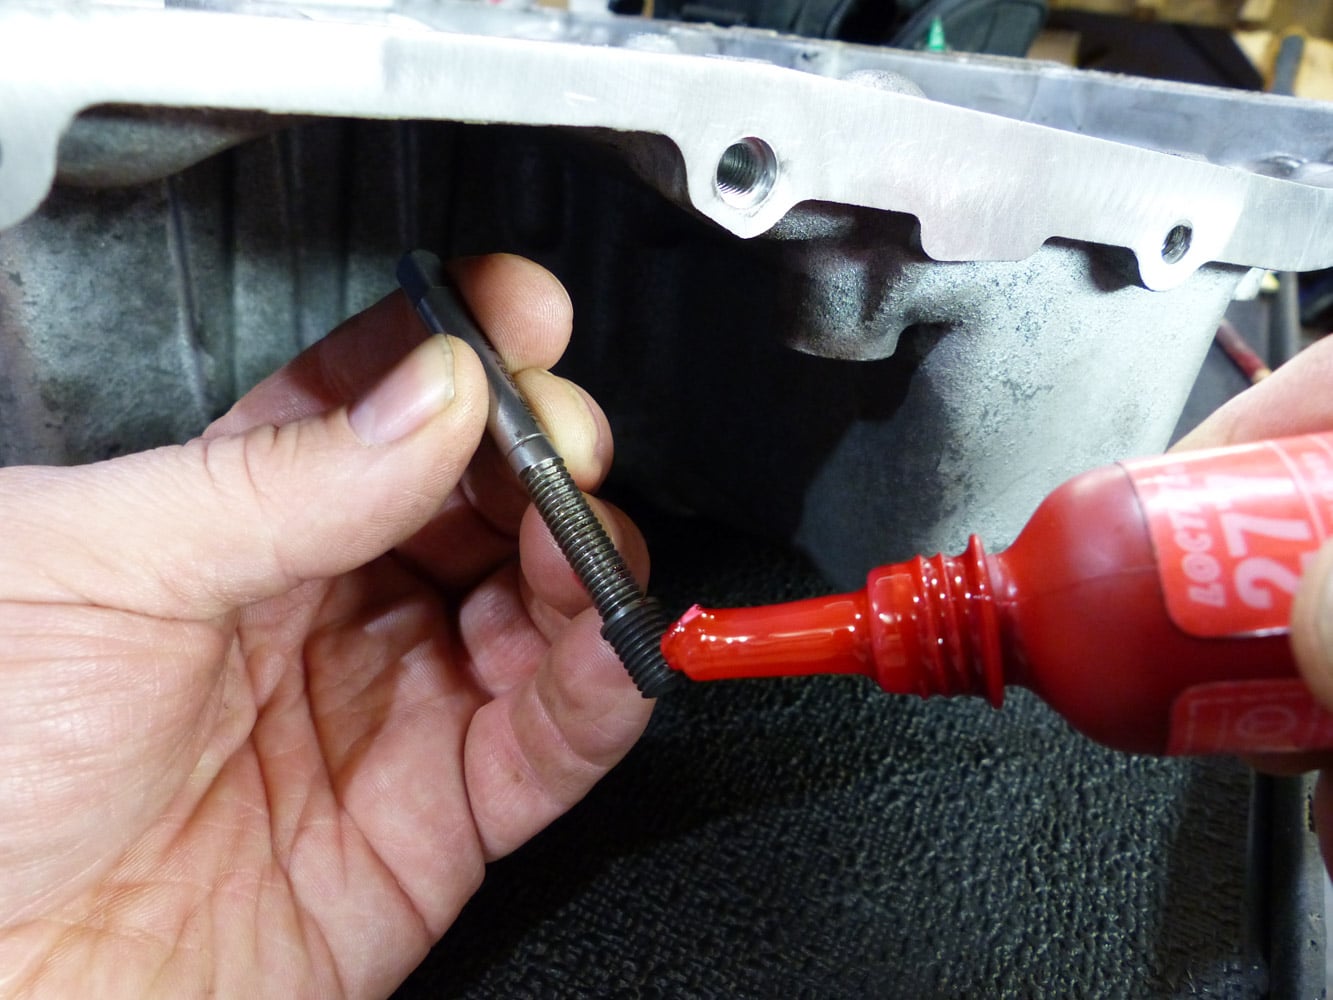
Finally, insert the thread insert. Unlike a Heli Coil, the Time Sert must be glued with a thread locking compound. To allow the locking compound to stick well, it will be necessary to remove traces of oil from the hole with a degreaser. Then attach the Time Sert to the installation tool, put a single drop of thread locking compound on it and screw in the thread inserts until the shoulder fits perfectly into the chamfer.
Confirm the strength of the repair
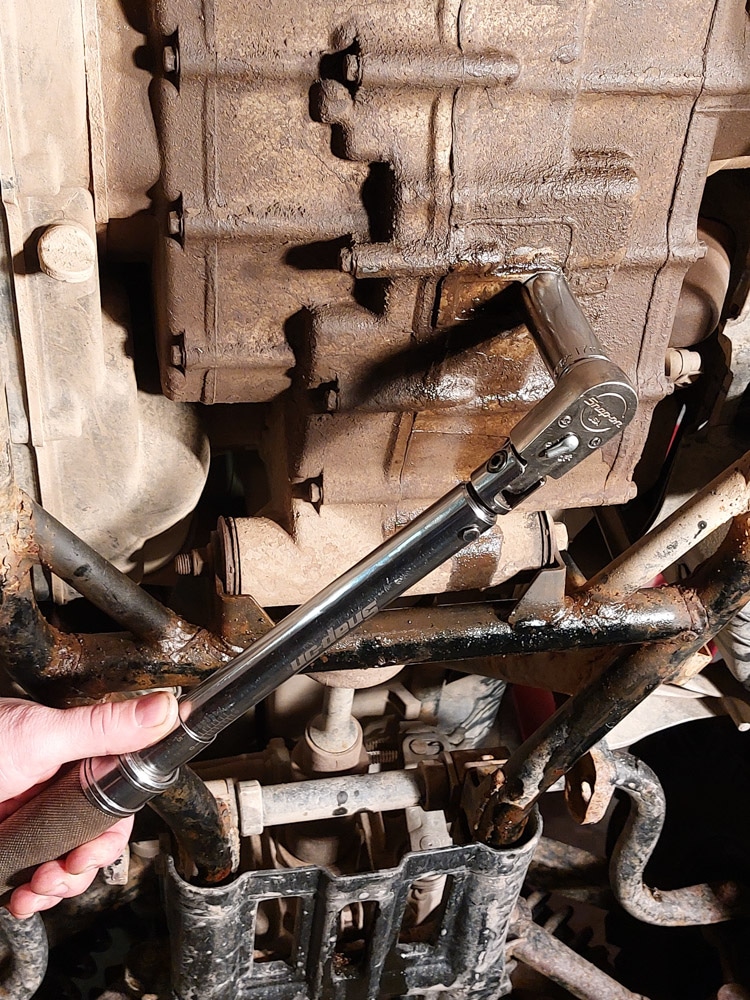
Many people wonder about the solidity of such repair. It’s very simple: during reassembly, tighten the bolts to the torque specified by the manufacturer. It is strong enough if the repair allows tightening to the recommended torque.
Sadly, I regularly see transmission pan mounting bolts or air filter housing mounting bolts missing due to stripped threads, resulting in a transmission that leaks or an engine that breathes dust. In the long term, this will eventually lead to a mechanical disaster. If you have stripped threaded holes on your machine, make it a repair project next weekend.