Carrying out some periodic maintenance on our recreational vehicles is an integral part of the care we must provide to keep them in good mechanical health. Even if many enthusiasts keep this task for their trusted dealer, a large majority of them prefer to do this maintenance themselves.
It should be kept in mind that we do not all have the same level of competence in the mechanical field and that for some people, an oil change is a simple and easy operation, while for others, this action can be a mountain of questions. For those of you in the second category, we will take the opportunity to simplify the steps to demonstrate how easy you can achieve them. After that, you will be able to brag to all your friends about your great mechanical exploits!
Why do I need to change the engine oil?
Over time, the fast-moving parts break down the oil and reduce its ability to absorb heat and lubricate the engine. For that reason, your vehicle needs to have its oil changed! If you keep using the same oil, your machine has good chances of overheating or even seize. Fresh oil from an oil change allows the engine to run smoother, cleaner, and longer.
How often should I do the oil change?
It depends on many factors, such as the type of vehicle you drive, how often you run it, and if you use your machine intensively. To avoid confusion, manufacturers have created standardized intervals based on traveled distance in kilometers. Each manufacturer makes its own intervals, and you will find the ones specific to your vehicle in the owner’s manual. However, changing the oil at shorter intervals will never hurt.
Which oil grade to use?
Engine oil viscosity refers to the ease with which the oil flows at a specified temperature. Light oils have a lower density and pour more easily at low temperatures than thicker oils, which have a higher viscosity. Light oils reduce friction in engines and help engines start quickly in cold weather. Thick oils are better at maintaining film strength and oil pressure at high temperatures and loads. To find out the exact oil grade for your vehicle, refer once again to your owner’s manual, or ask your representative at the parts counter at your dealership for advice. Follow these guidelines, and you will also know the correct engine oil capacity for your vehicle. Several manufacturers provide complete kits to facilitate the oil change operation, including the exact quantity of oil, the perfect grade, the appropriate filter, and everything you need to accomplish this task.
What is the oil filter used for, and is it necessary to replace it?
The oil filter is an essential component of any vehicle. Never underestimate the importance of its function. The reliability and life expectancy of major engine components depend on the quality of the oil delivered. The oil filter removes debris and contaminants and ensures that the engine is always supplied with clean oil.
Contaminated oil can cause significant engine components to fail, resulting in high repair costs as some major parts may require replacement. High-quality oil should always be present in the engine. It is crucial to maintain the efficiency and quality of the lubrication of your vehicle’s engine. Therefore, filter replacement is essential for this purpose and is an integral part of a complete oil change.
Changing Engine Oil and Filter on a Can-Am Defender:
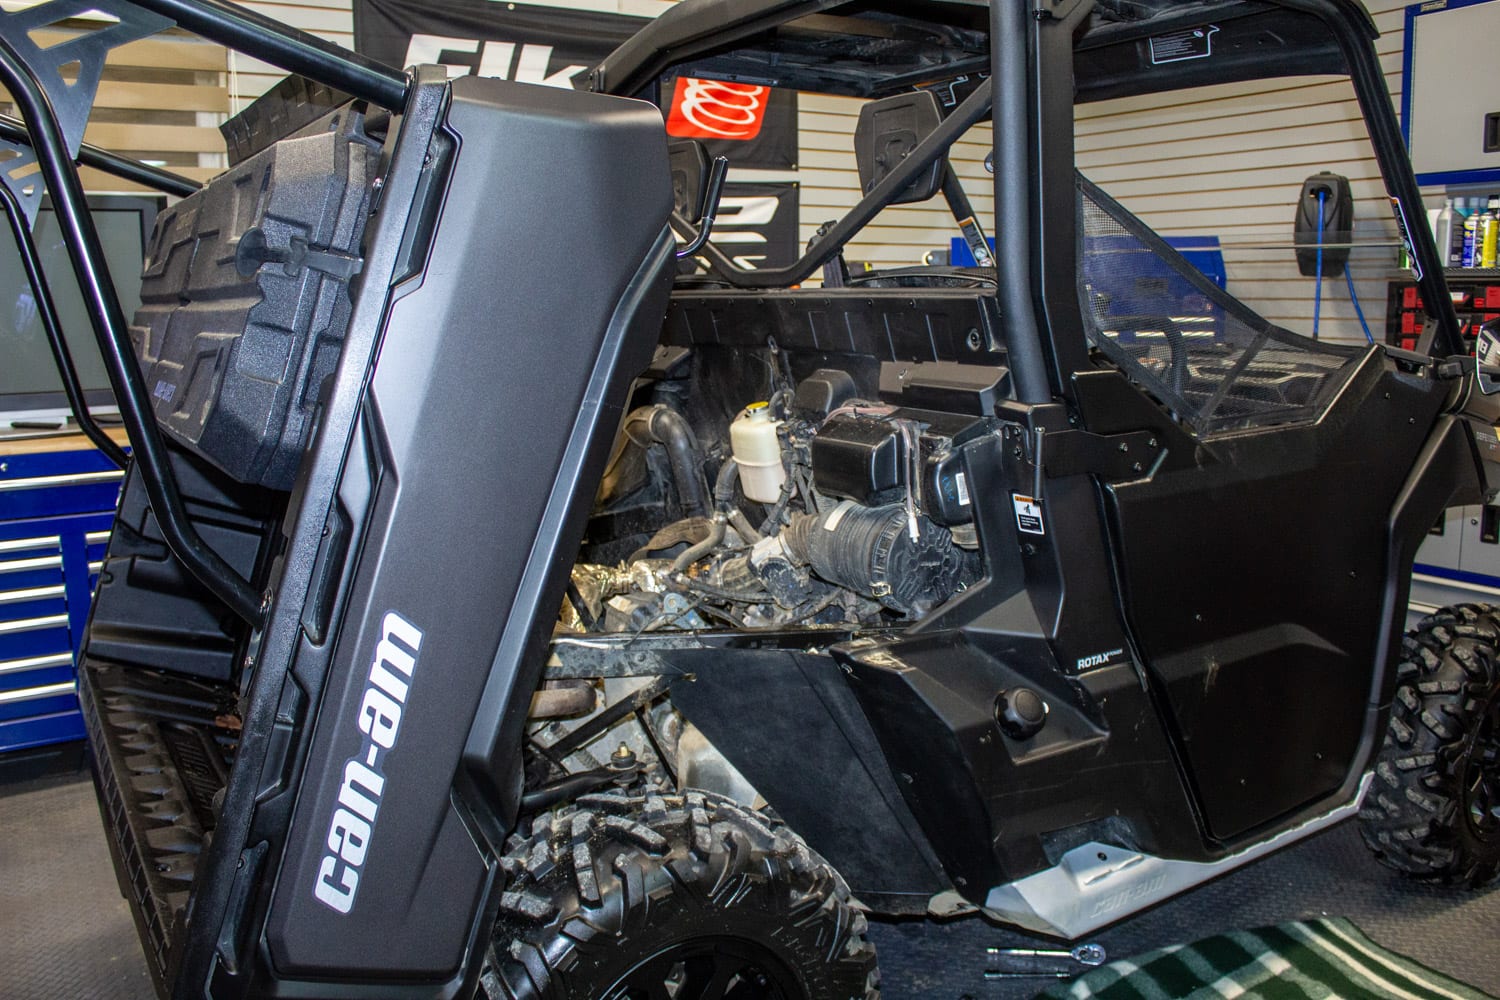
First, it is essential to understand the components that are specific to each vehicle. Their locations vary but are relatively similar. For our demo, we are fortunate to have a Can-Am Defender with a tipping rear bed that clears the engine bay and gives us all the space we need for an easy and straightforward oil change.
1- Warm up the vehicle engine:
It is an excellent idea to run your vehicle a few minutes beforehand. The primary function of this is to warm up the oil to increase its fluidity. The oil will drain easily and more rapidly.
2- Raise the vehicle:
This step is optional, but it will make this maintenance much easier if you have access to a mechanic’s hydraulic worktable. Otherwise, it is no big deal as draining the oil is an easy job anyway. Just be sure to place the vehicle on a level surface.
3- Raise the rear cargo bed:
In our case, to get the maximum space to perform the task, it was necessary to tilt the rear cargo bed up. It was also needed to remove the metal pin connected to the cylinder to tilt the bed backward to increase clearance.
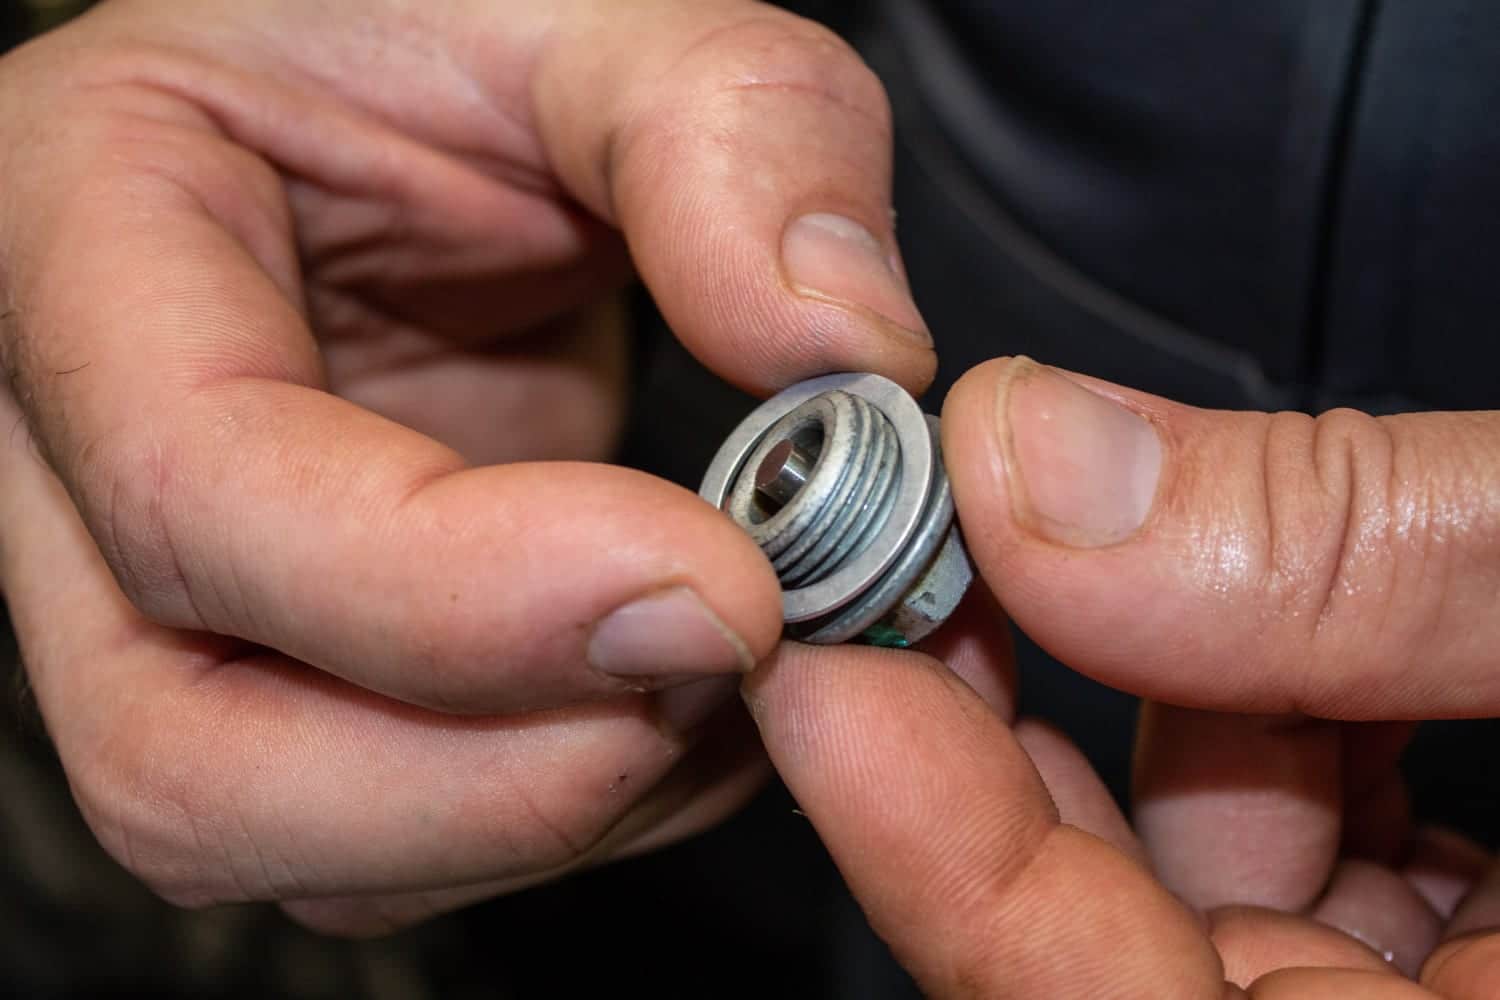

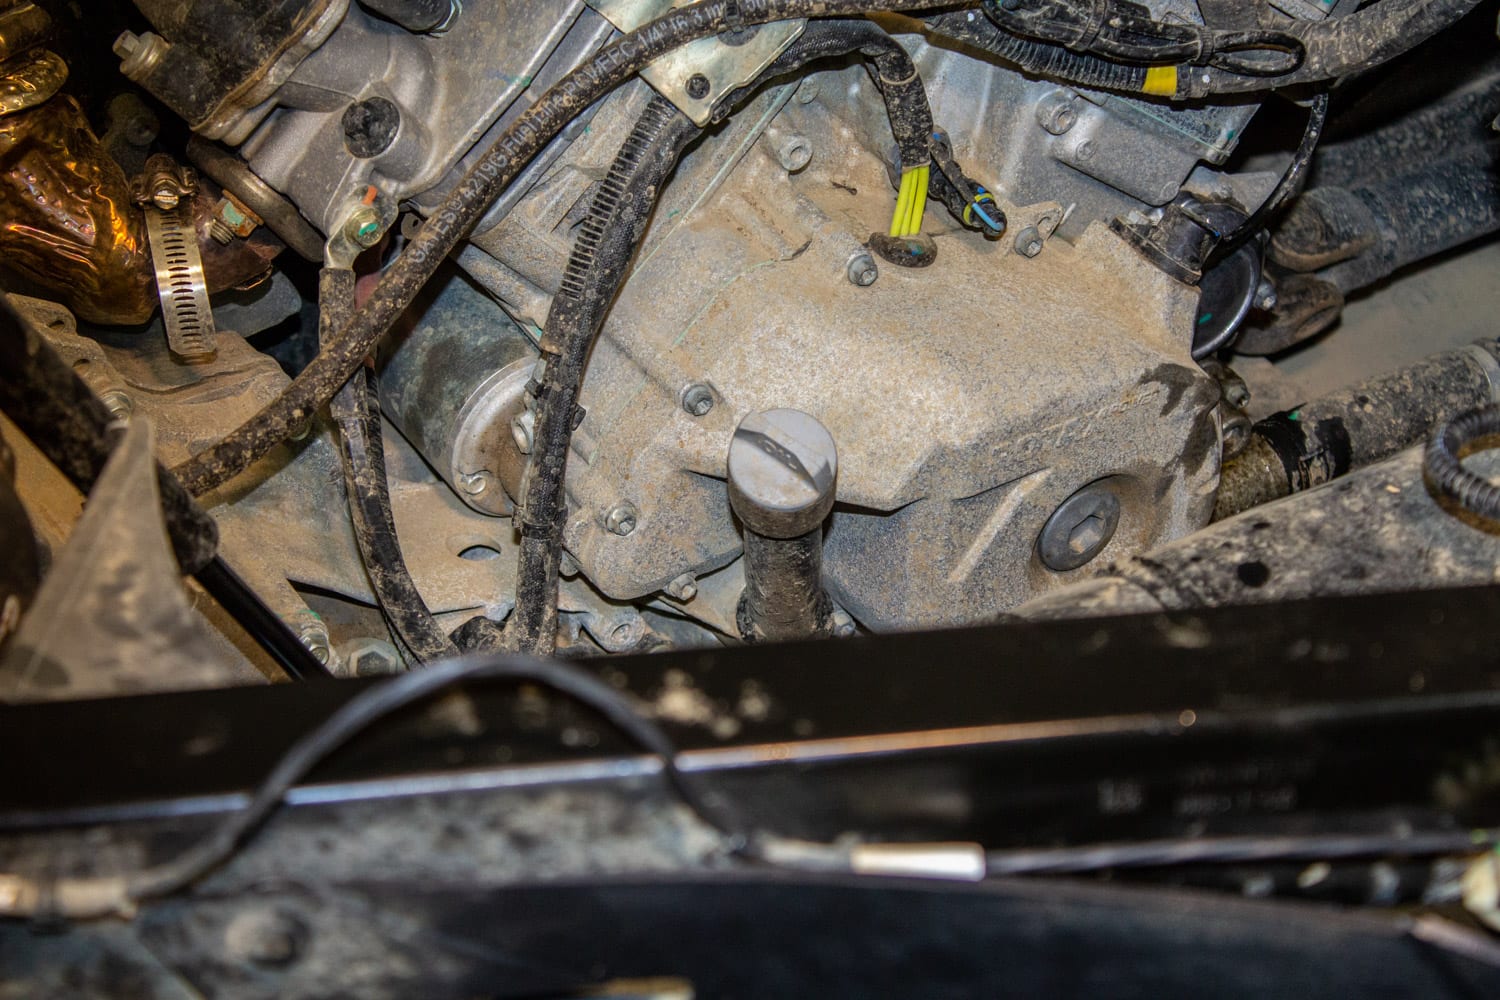
4- Remove the oil drain plug:
This step is the messiest of the process, so you should prepare yourself for any eventuality. Get an oil drain pan designed for this purpose nearby. Locate the oil drain plug under the vehicle and proceed to loosen it with the appropriate tool. When you can manually turn it, i.e. without the tool, place the drain pan directly under this location and fully remove the plug to drain all the engine oil.
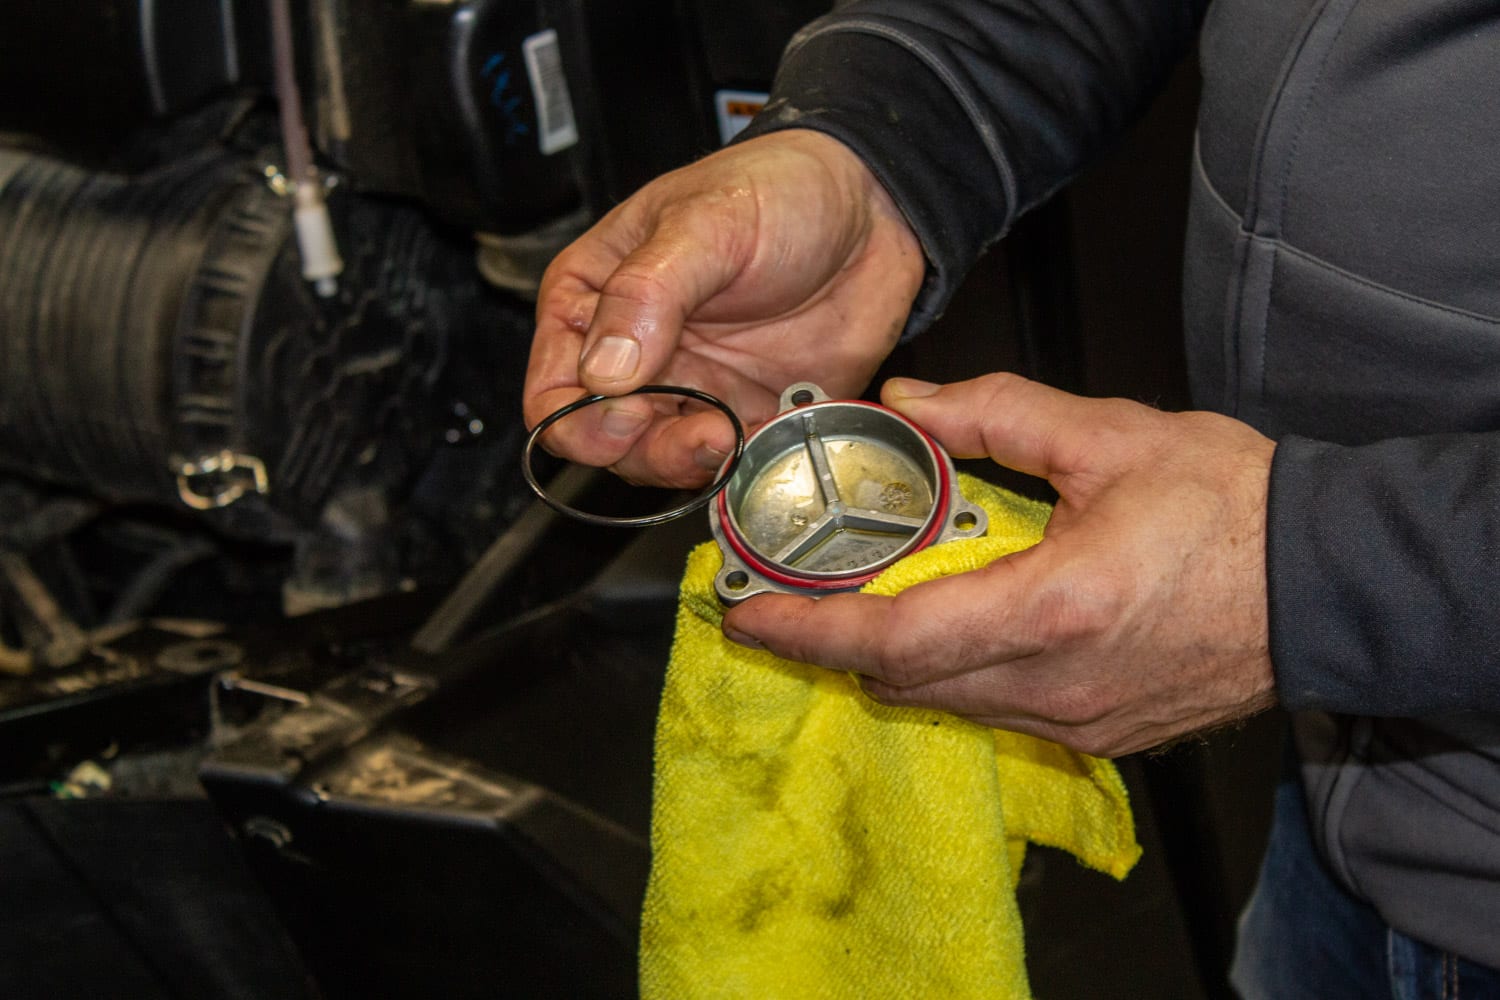
5- Inspect the drain plug:
While the engine oil is draining, take a moment to check the drain plug sealing washer and replace it if necessary, as this is what prevents potential oil leaks. Wipe the plug with a clean cloth and, at the same time, check for the presence of metal particles, which would be an indication of premature wear of the mechanical components.
6- Reinstall the plug:
When the engine oil has completely drained, proceed to reinstall the drain plug on the engine. Be careful not to over tighten it.
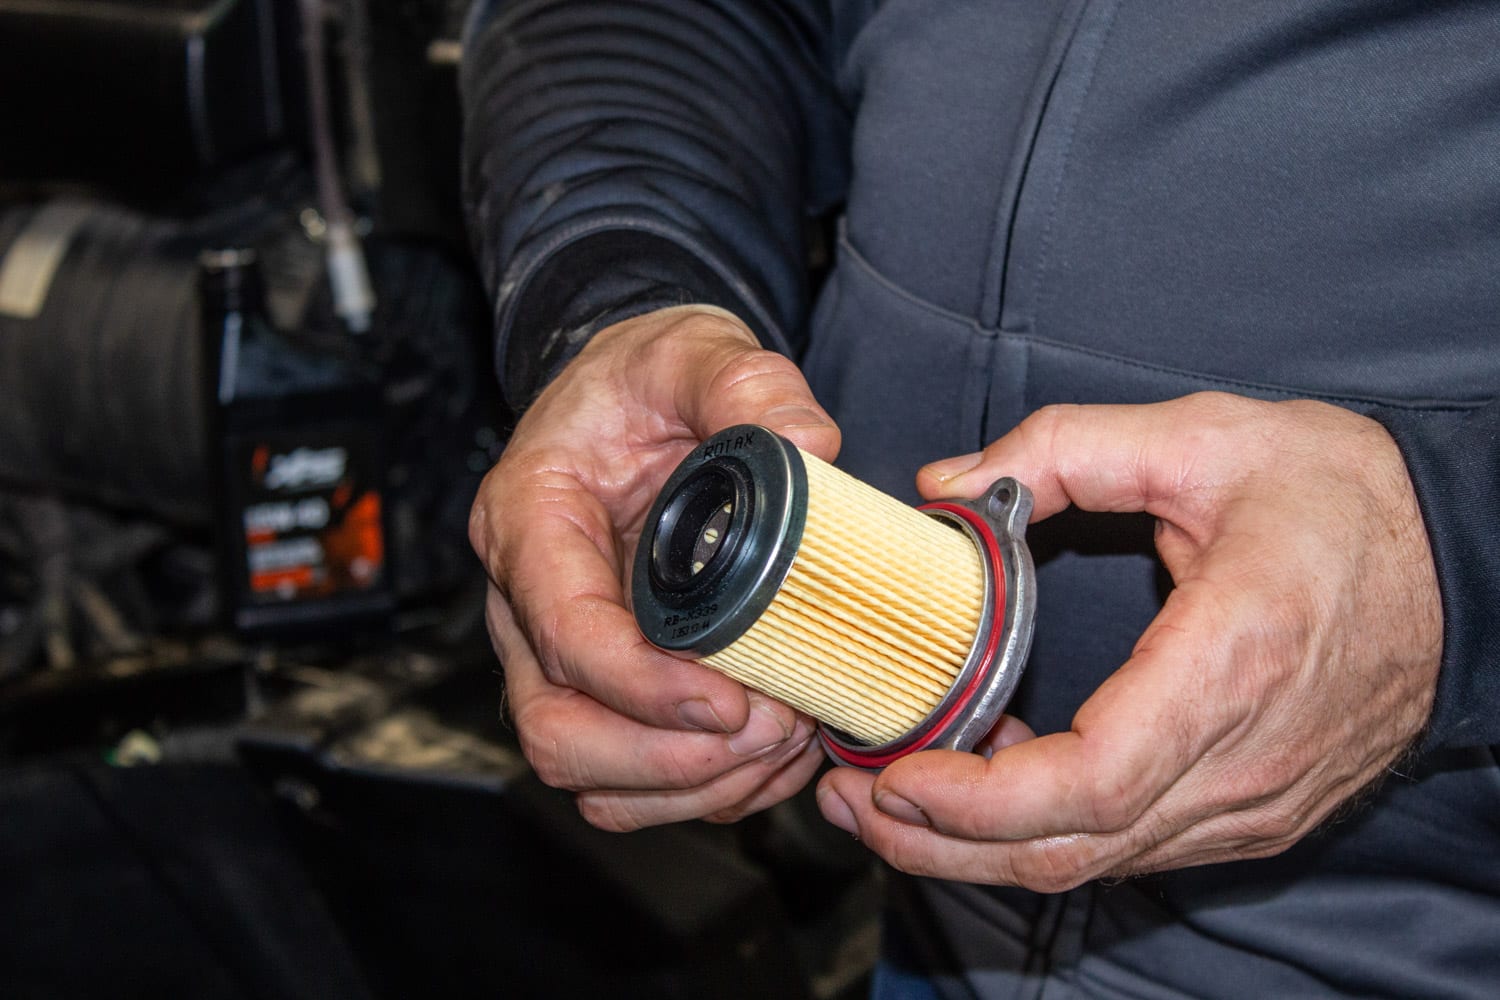
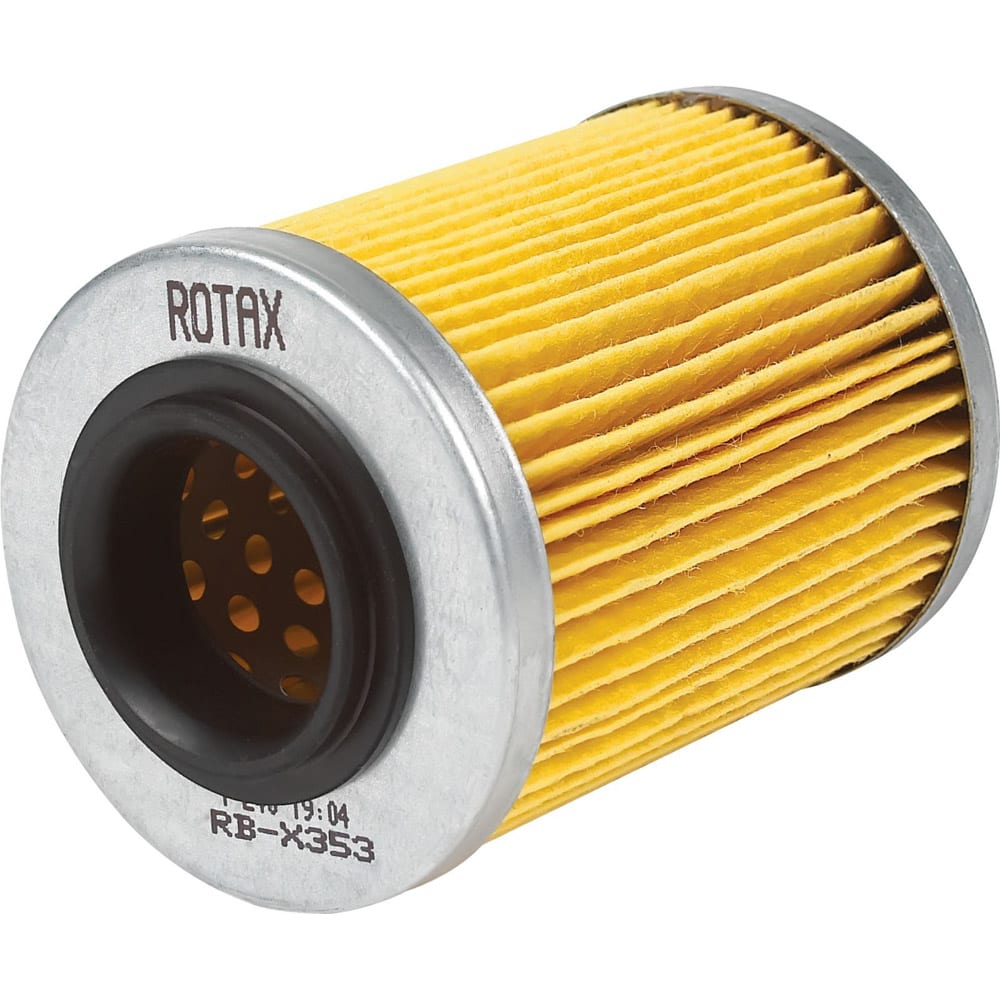
7- Remove the oil filter:
In the case of the Can-Am Defender, the oil filter is inside the engine. You have to locate 3ea. 8mm bolts and fully loosen them, remove them, and then remove the oil filter cover. When removing the old filter, take care to have previously placed a container under the engine in this location, as oil could leak out.
8- Replace the oil filter:
Be sure to replace the cover gasket provided in the BRP XPS kit specifically designed for an oil change on a Can-Am Defender. Apply a thin film of grease to the filter gasket using your finger. Place the filter against the cover and insert everything into the engine space designed for this purpose. Reinstall the 8mm bolts and retighten.
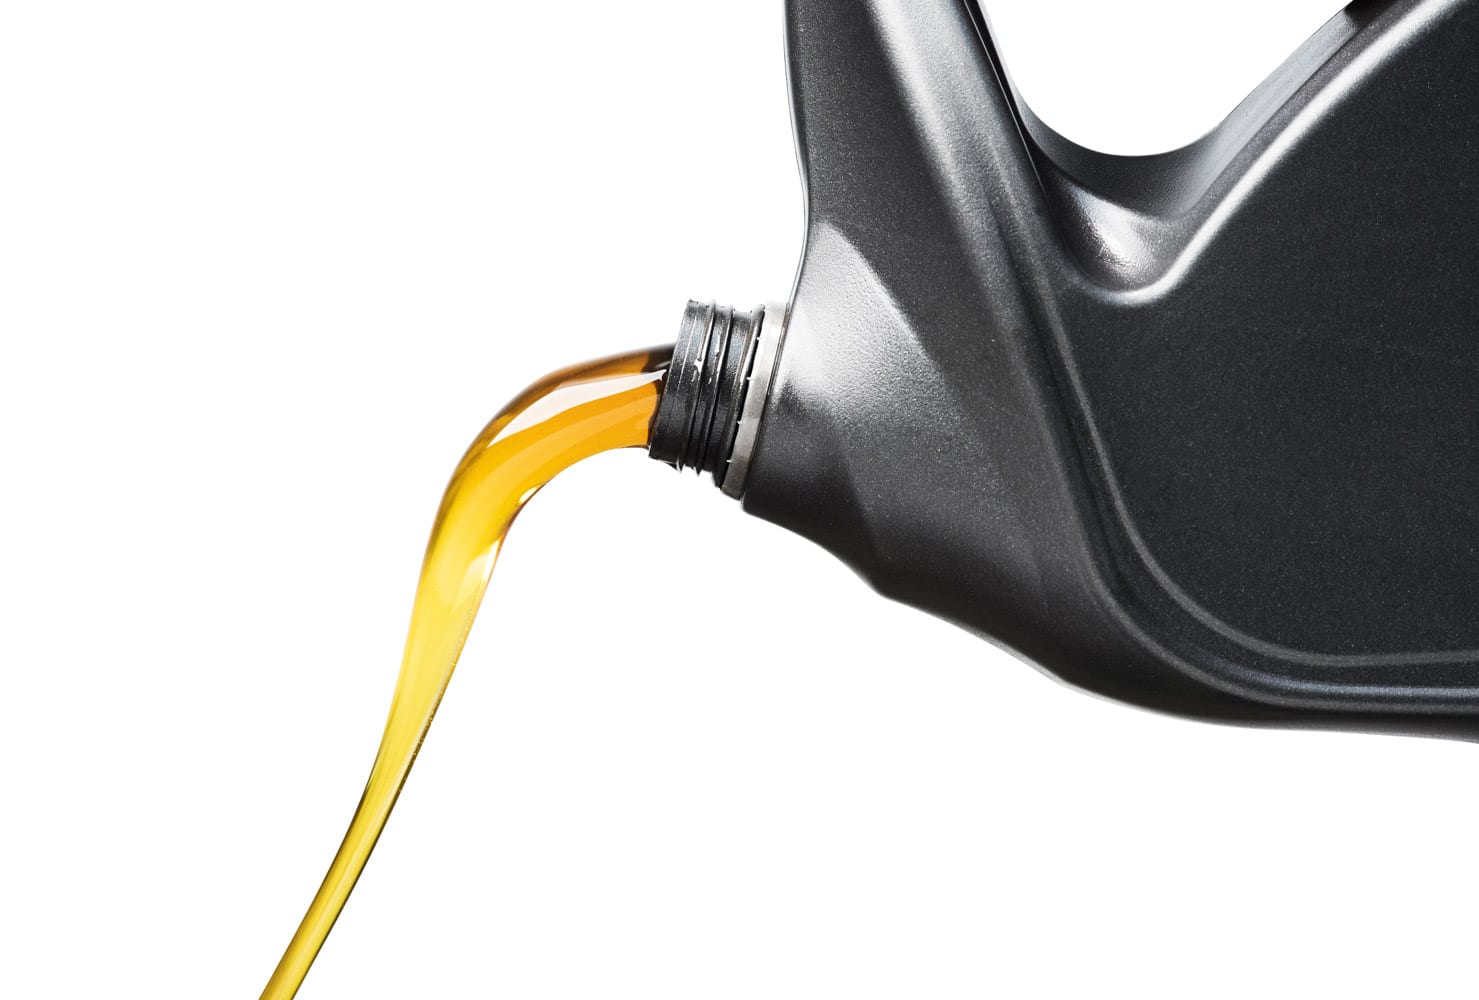
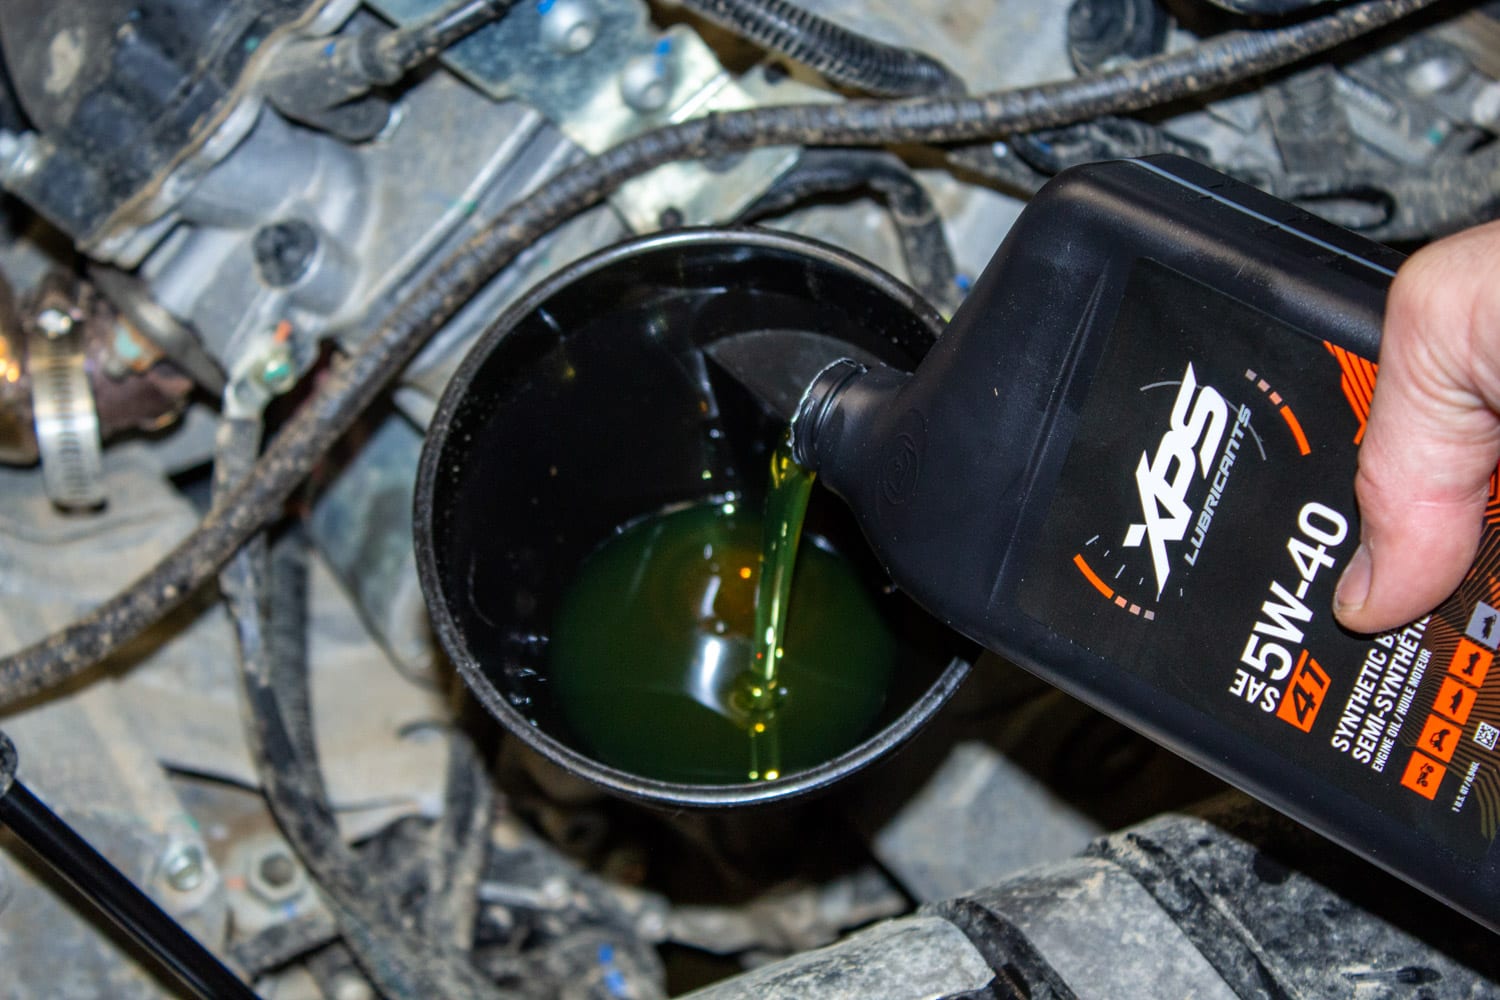
9- Add fresh engine oil:
Remove the oil dipstick and, using a funnel, pour in the recommended amount of engine oil. Put the dipstick back in place when finished.
10- Check the oil level:
Run your vehicle for a few minutes to let new engine oil flow. Shut off the engine, remove the dipstick, wipe it off with a clean rag, and put it back. Remove it again and ensure that the oil level is between the “min” and “max” marks on the gauge.
11- Put the cargo bed back in place:
Put back in place the previously removed cylinder pin connecting the lift cylinder to the tilt bed. Lower the cargo box down until it engages.
In conclusion, remember that if you follow these easy steps, your vehicle will have its engine oil replaced adequately, and your engine will have a longer life. Also, keep in mind that your oil change his not finished until you have disposed of the old oil and filter in the collection points specially designed for this purpose, as this will help preserve the environment for future generations.