A nice ATV ride without any problems is very pleasant. On the other hand, a ride with a flat tire, a breakdown or any kind of mechanical problems can transform this supposed beautiful day into a bitter tasting souvenir for you and your companions.
To prevent many of these pitfalls, let’s do an ATV pre-departure check. You don’t need a lot of mechanical knowledge to get there. A bit of manual dexterity and a few basic tools are all you need.
First, all you need to do is start the ATV. Take advantage of this moment to give it a listen for a few minutes. At this stage, be alert for noises and vibrations. Especially at the CVT level. Take advantage of the fact that the engine is running at low speed to power on all the accessories: heating, lights, 12-volt accessory sockets, etc. Once these steps are completed, get the ATV in the garage and turn off the engine.
The tires
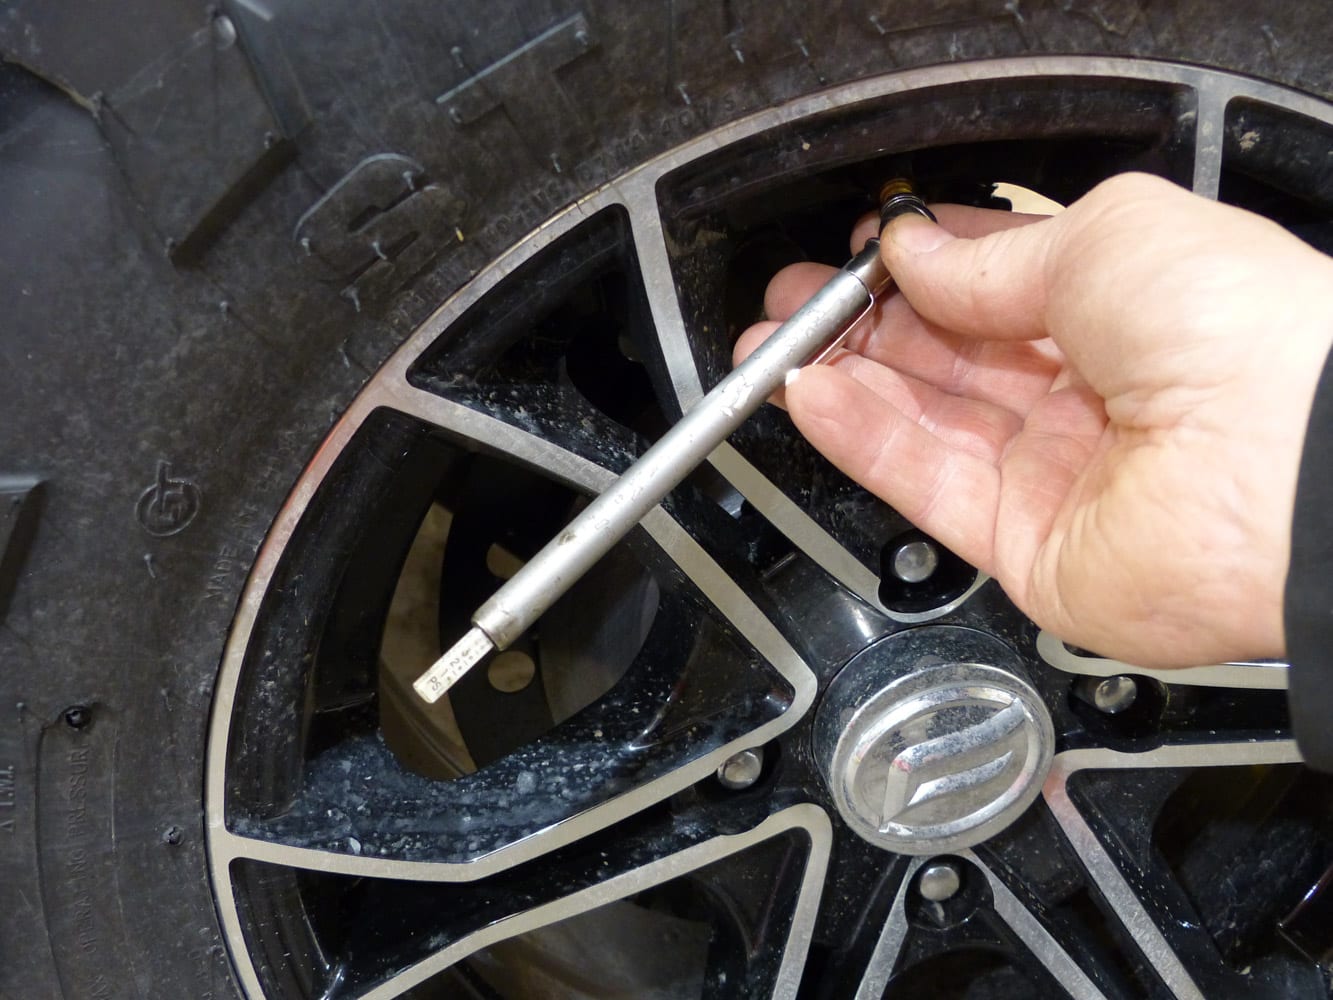
Go around your ATV and check the tires. Look for cracks in their structure. Measure the tire pressure and compare it to that suggested by the manufacturer. This is usually posted on the ATV or the sidewall of the tire.
The wheels
You can never double check the tightening torque of the wheels too often. Sometimes the nuts loosen and then the wheel takes off. A periodic check may save you a good scare.
Engine oil
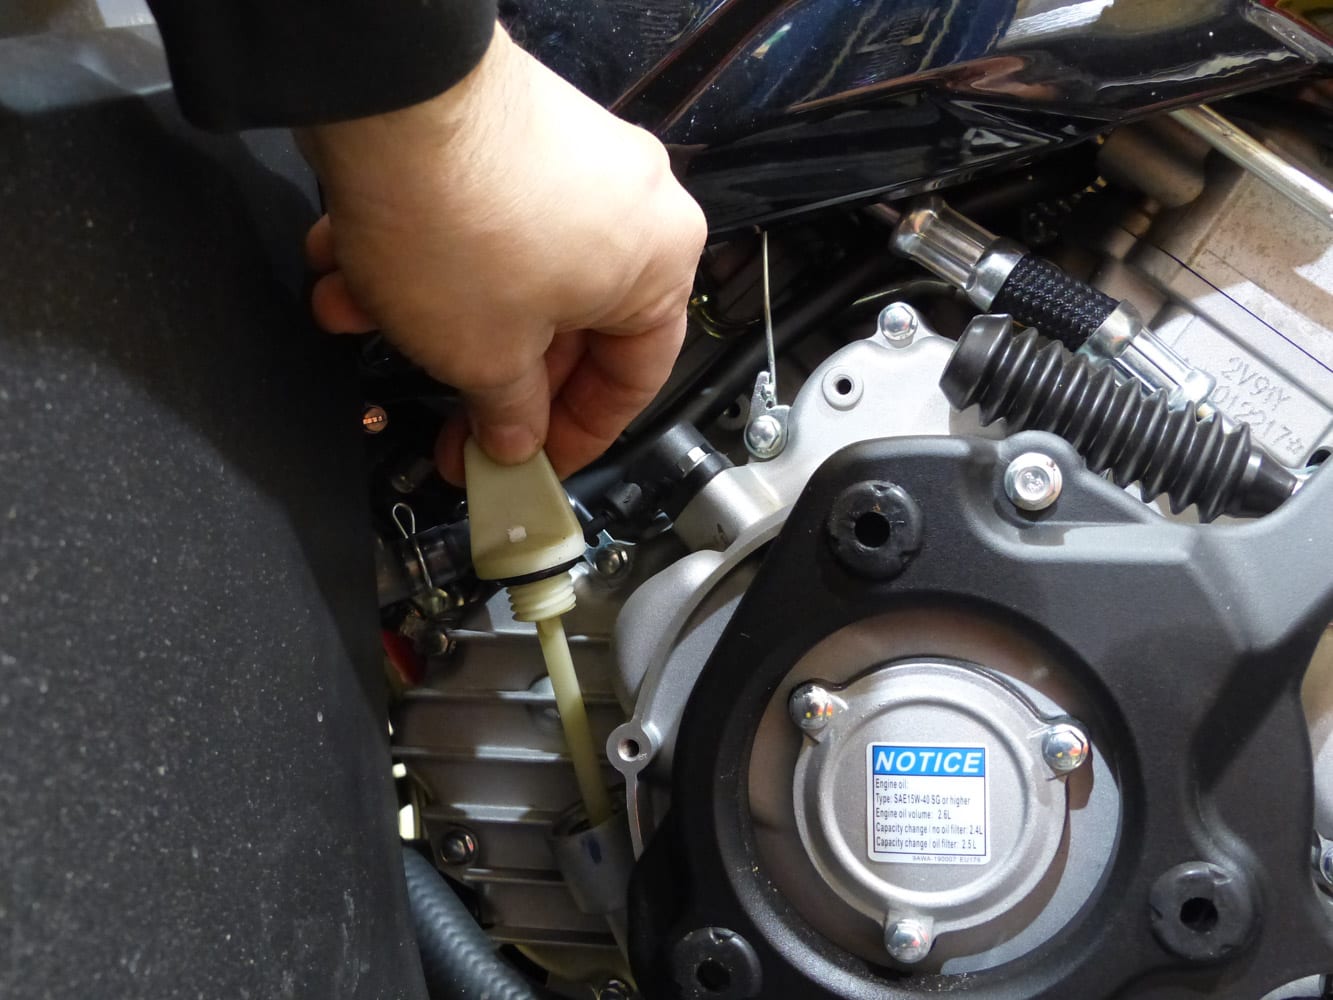
First, check if the engine oil is due for replacement. Check its level. Okay, now is the time to clarify something about checking the engine oil level with the stick. The terrifying question: should we screw the dipstick to measure the engine oil level or not? The difference in oil level between the two methods is substantial and not negligible. In fact, there is no good or wrong answer. Each maker has its way of doing things. To give a few examples, for a Polaris 570 the dipstick must be fully screwed to take the measurement. At CF Moto, Honda or Suzuki, generally you insert the oil stick, but without screwing it to measure the level. I strongly suggest that you refer to your owner’s manual and get the correct information in the Maintenance and Lubrication section.
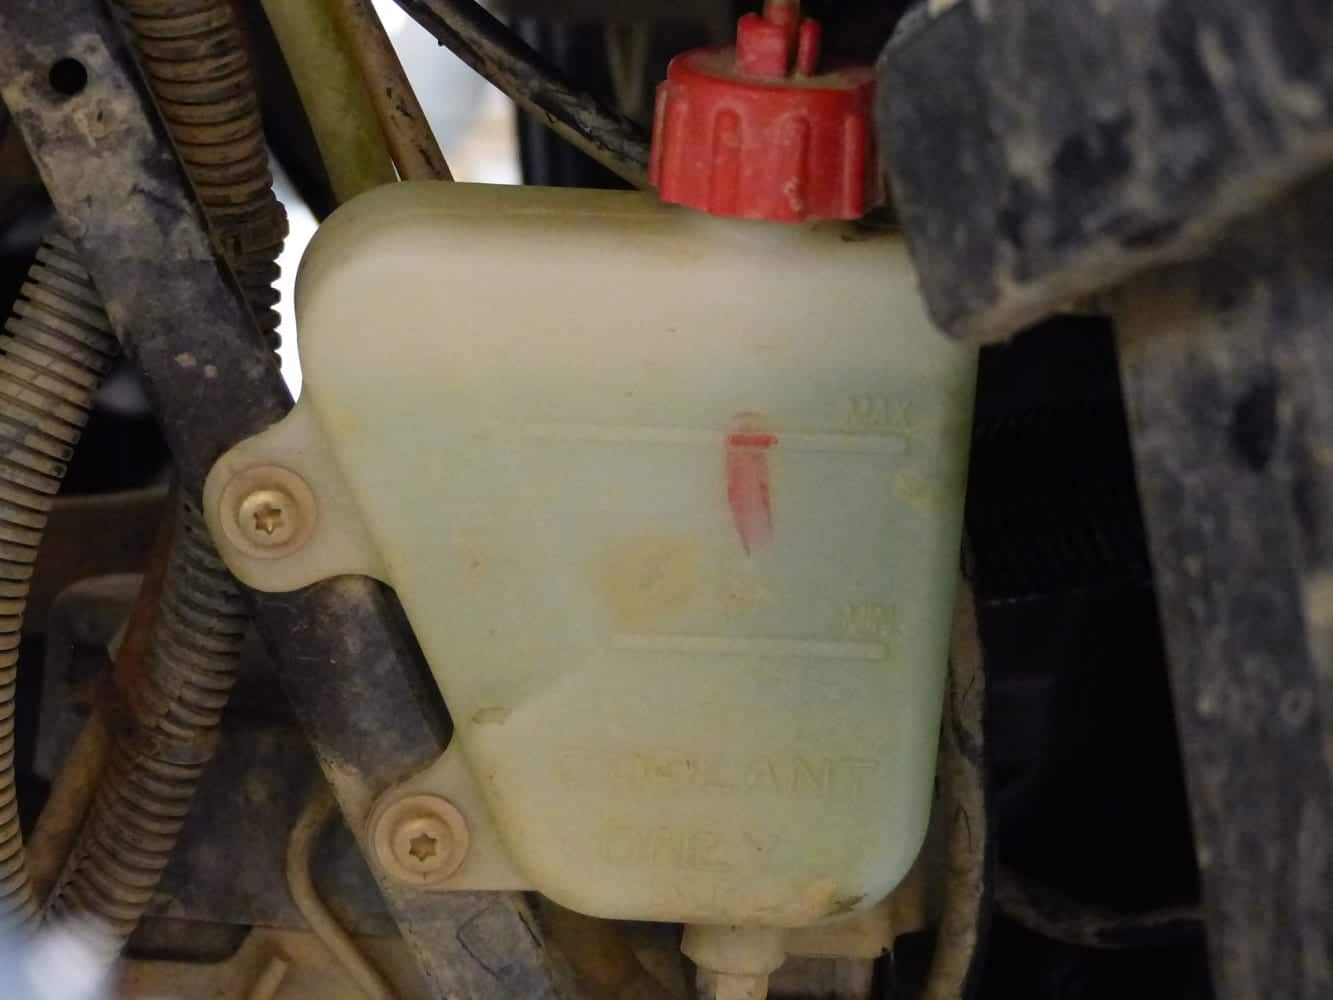
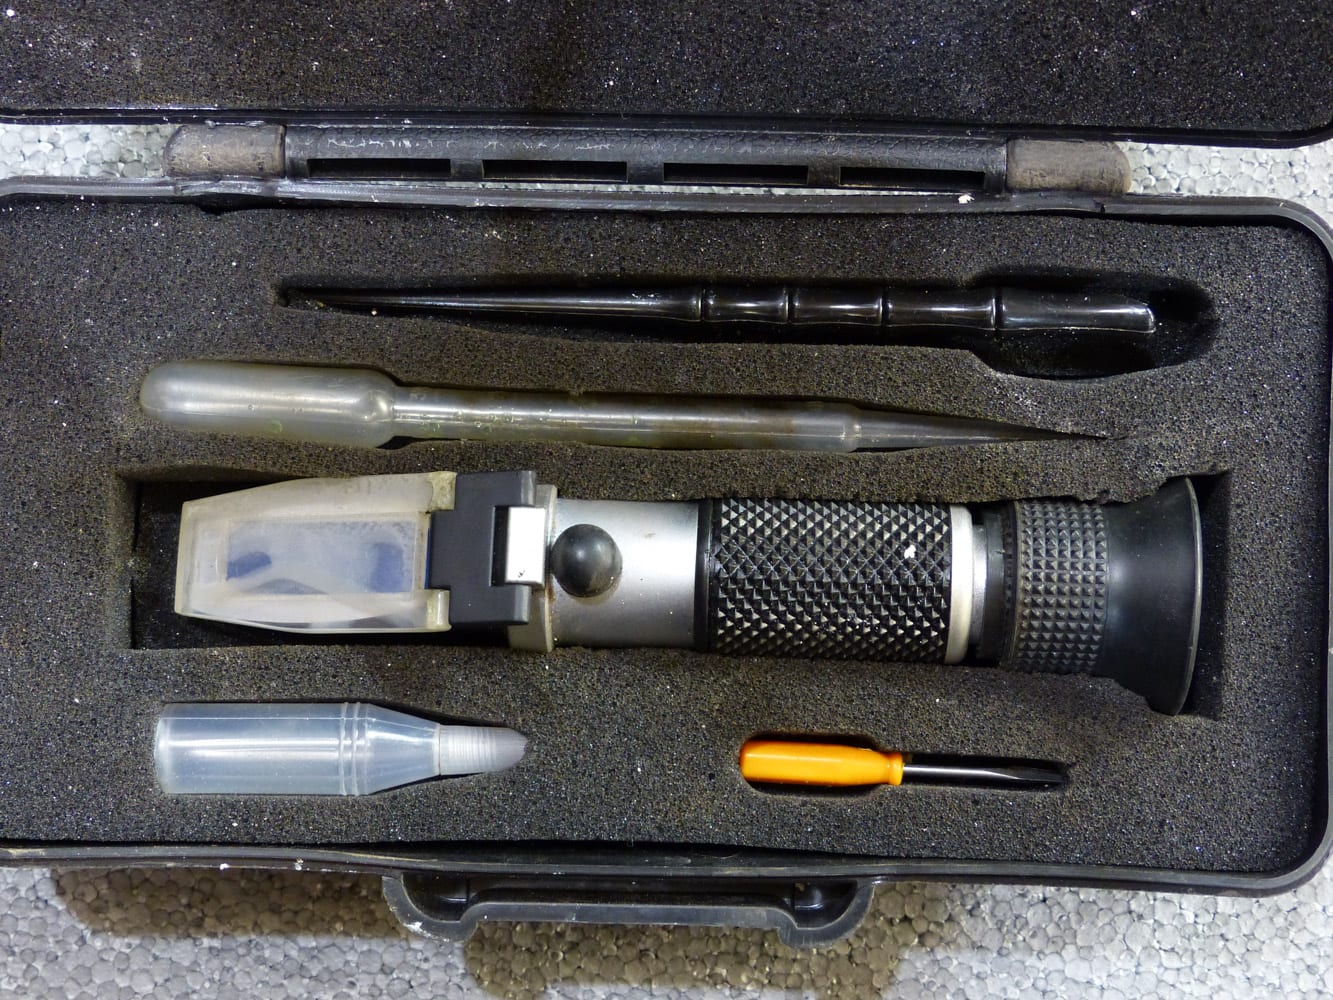
Coolant
Check the engine coolant level. You just need to spot the expansion tank and take a look at it. Observe the coolant level and color. It would be good to measure its concentration once a year: the use of a refractometer is ideal. High coolant concentration is harmful to the transport of heat and with too low concentration there is a risk of freezing or even corrosion to the ATV cooling system. A measure of frost at -37 degrees Celsius is ideal.
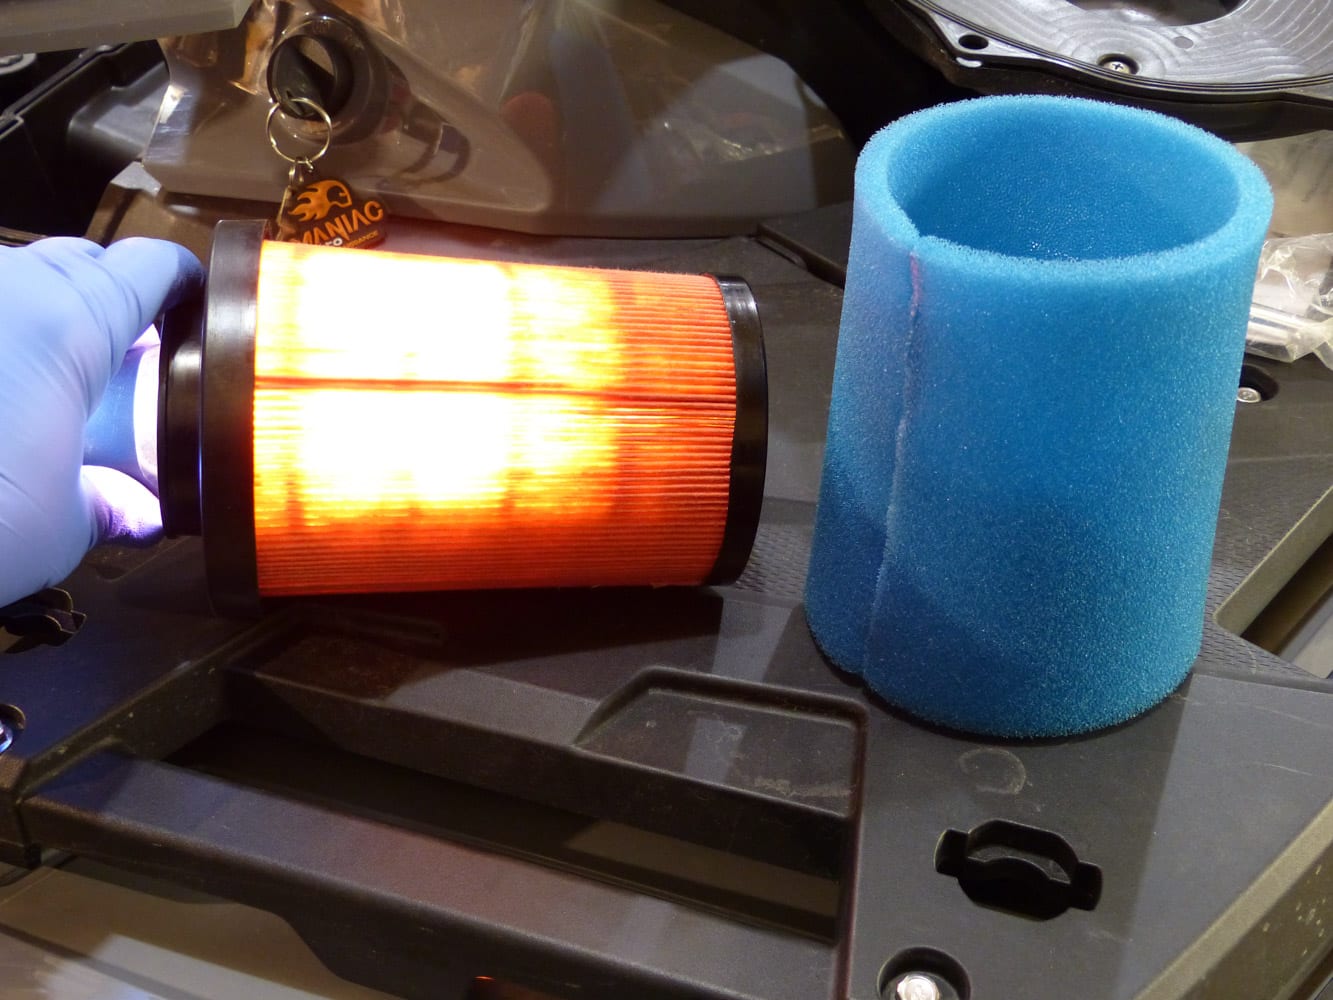
Air filtration system
Too often the air filter is neglected by the owner. The air filter prevents water, snow, mud, and dust from entering the engine air intake. Without it, the engine would wear out very quickly. The ATV industry offers two types of air filters. The washable oiled foam filter and the disposable paper filter. Verification is very simple: remove the filter and insert a light into it. The light level that goes through it indicates its state. Clean or replace the filter as necessary.
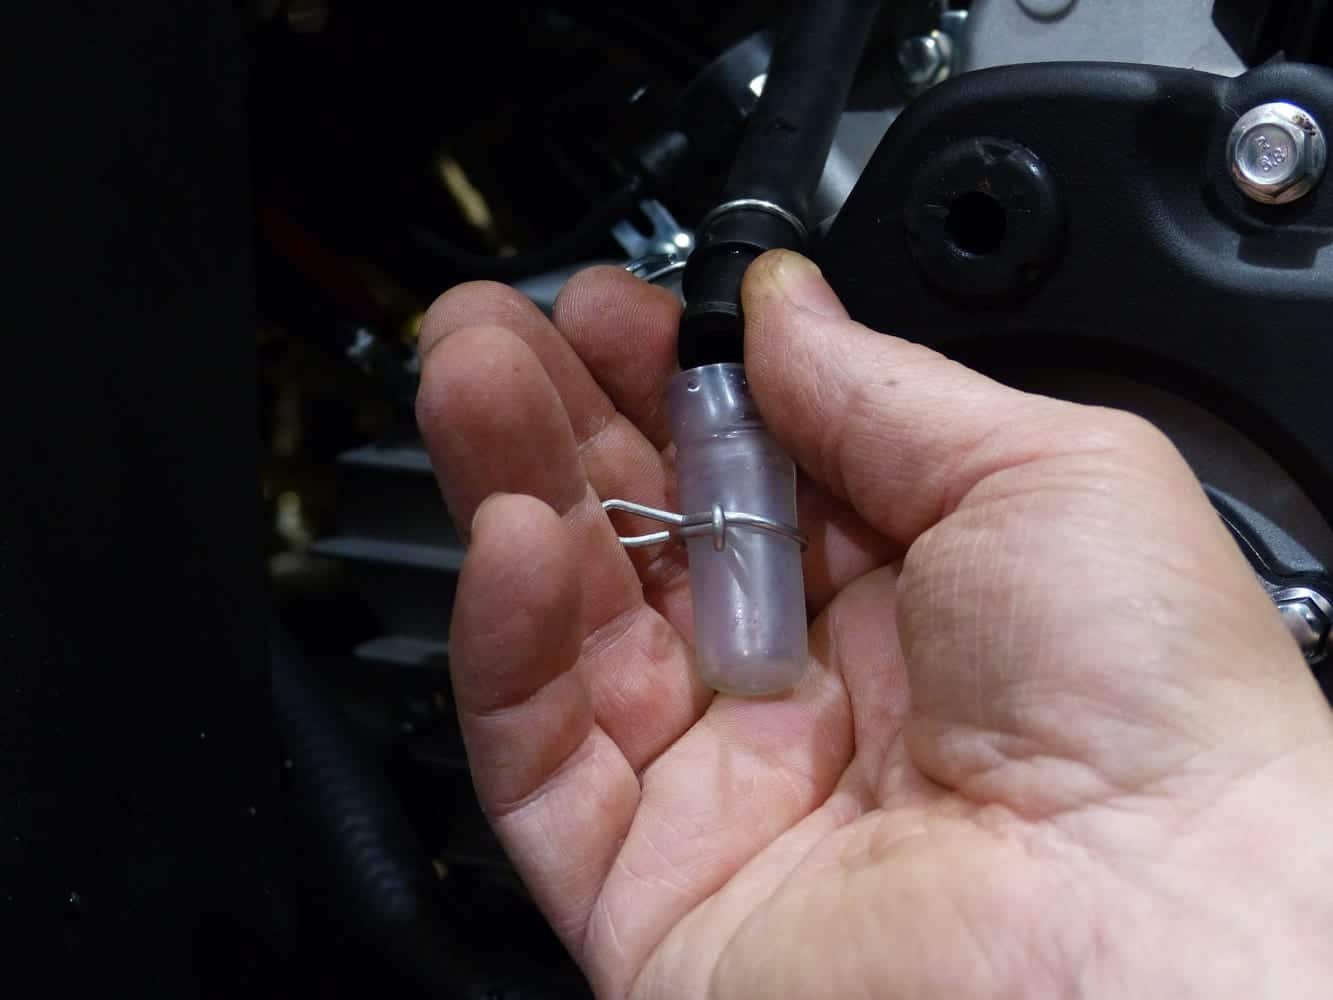
The air filter drain
Remember to clean the water drain on the air filter housing. Some manufacturers route a long pipe from the air filter box to the bottom of the ATV. A drain plug must be removed to allow the accumulation of water to flow down. Other manufacturers provide spot in the air filter box where water collects; there should be a plug that is removed to allow the water to flow out.
If we sum up
Turn on the engine; on the way to the garage door, take the opportunity to listen to engine noises and try all the accessories; once in the garage, do a quick look at tires, coolant, and engine oil; take a look at the air filter; adjustments or replacement are made if necessary. The ATV is ready for adventure. Very little time well spent will certainly save you a lot of trouble.
For those who wish to deepen their mechanical verification, here we go.
The exhaust system
To properly check this part of your vehicle, it is a good idea to remove some plastic body panels from the ATV. This way, you will be able to check the whole ATV exhaust system without obstructions. With the engine running, check the exhaust pipe and muffler for leaks and that there are no missing or cracked parts. Oily residue at the end of the pipe can indicate worn baffling inside the muffler.
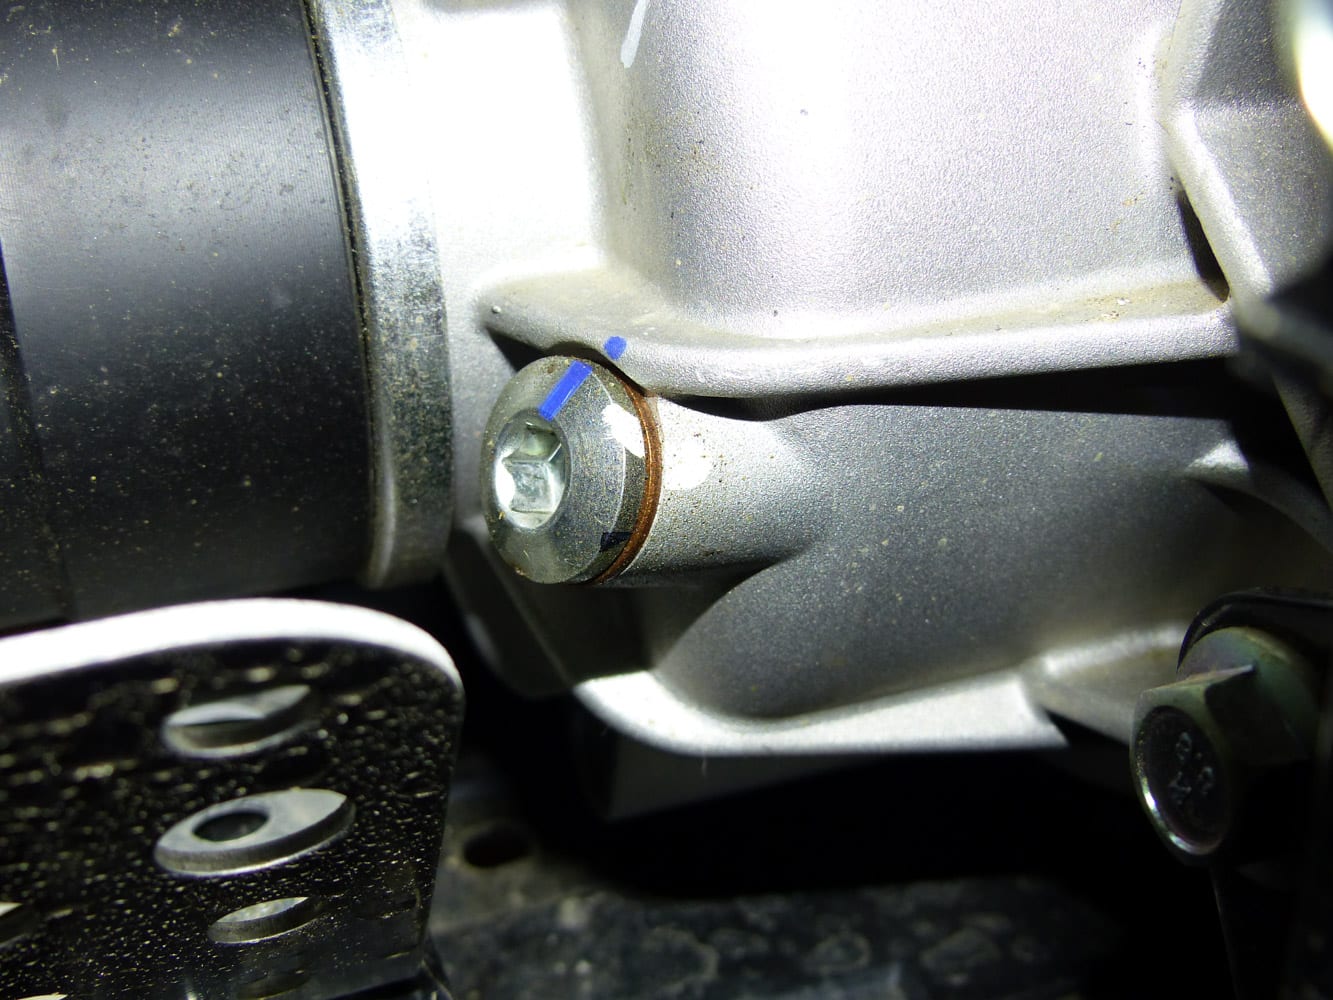
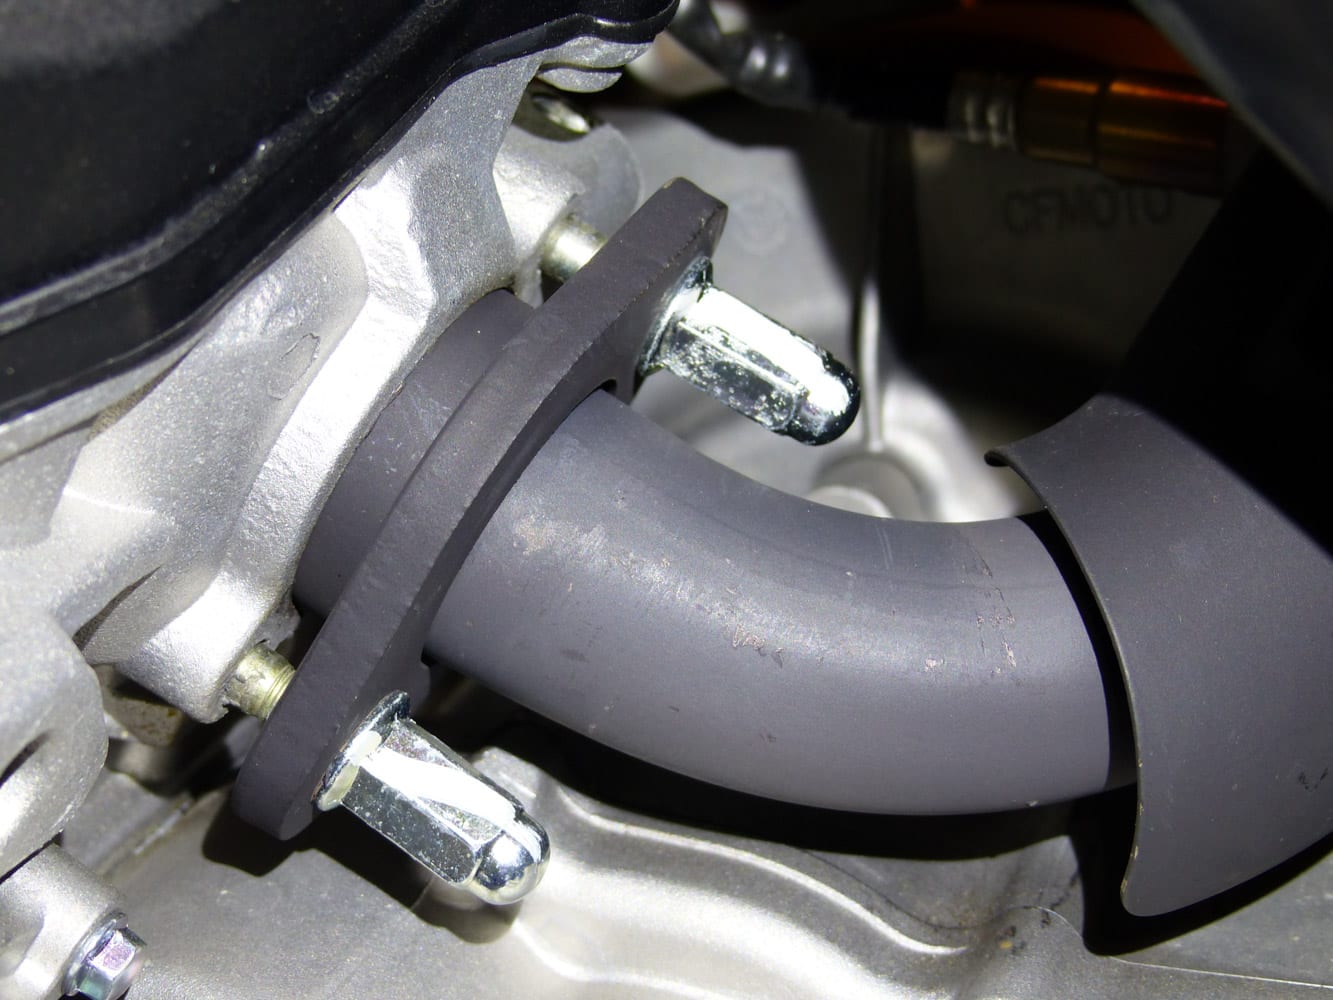
Transmission and differential oils
Inspect the transmission oil level and its condition as well as that of the differentials. If the oil is creamy or gray coffee color, this indicates that water has mixed with the oil. The Oil must be replaced. If the oil is dark black, replace it too. In some cases, a dipstick is used to check the transmission oil level. But in most cases, the transmissions and differentials casings are fitted with an overflow type filler cap. The principle is very simple, the filling plug is the same as the one used for inspection. Removed the plug and fill the oil until it reaches the threads of the plughole.
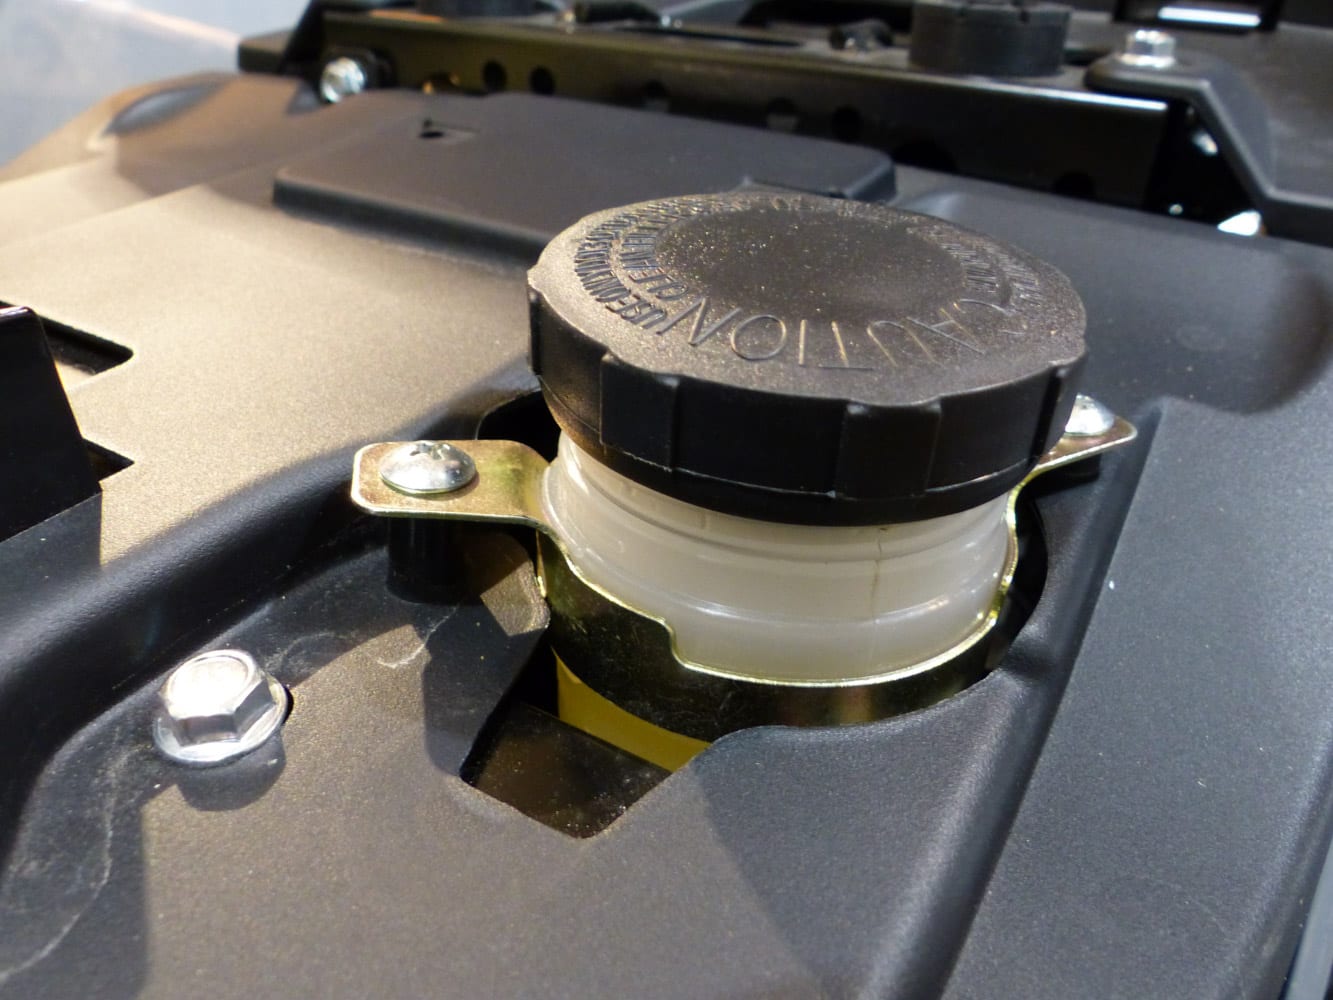
Don’t forget the brake fluid
Inspect the brake fluid color. If it is cloudy or discolored, replacement is suggested as this means the fluid is contaminated. The fluid level will be low if the brakes shoes are worn: the wear of the brake pads is compensated by the caliper pistons. The brake fluid will then occupy the space that the pistons freed up by adjusting. So unless there is a leak, in reality, you should never have to adjust the brake fluid level; make sure pads wear is not the cause.
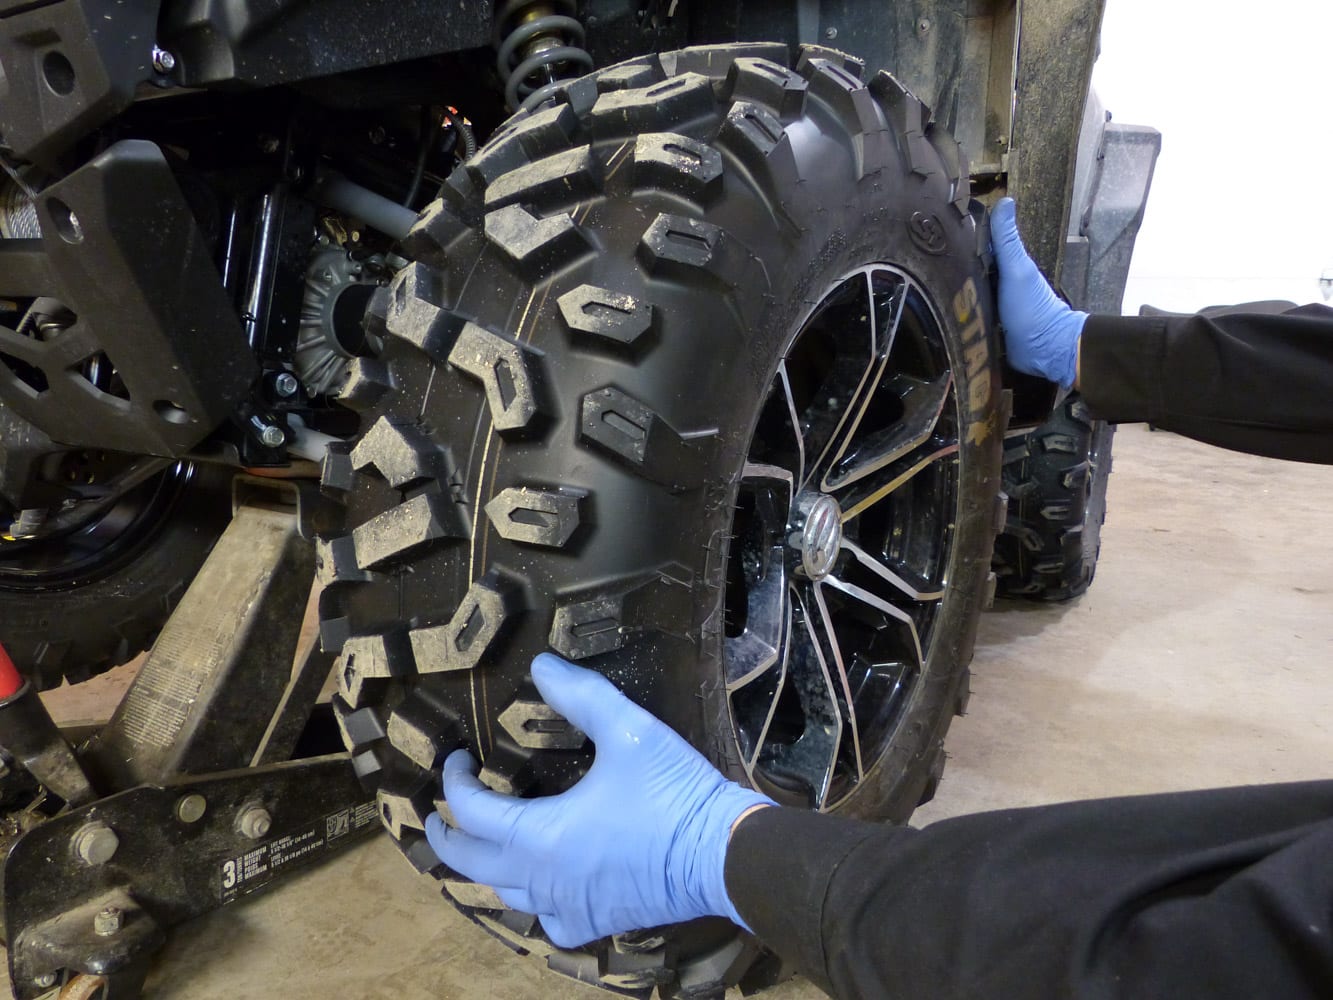
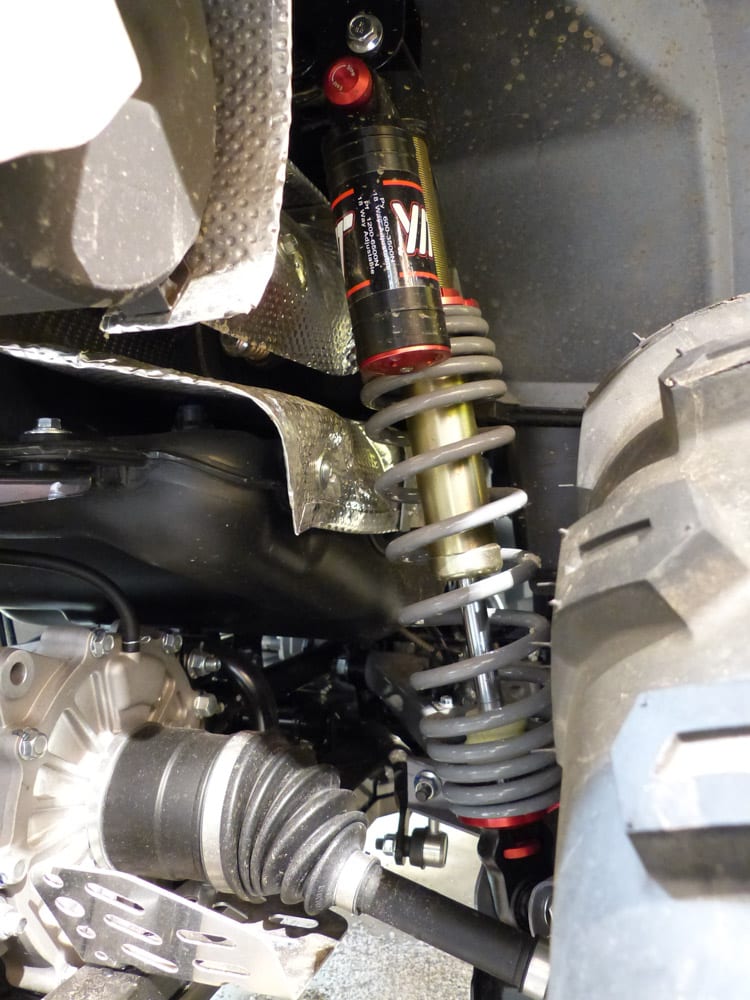
Suspension and steering
Lift the wheels of the ATV using a jack. Take one wheel firmly in your hands and try moving it from top to bottom and from left to right. Search for looseness. The looseness can come from worn tie rods, ball joints, wheel bearings, or suspension arm bushings. A small play in the suspension bushings may be acceptable, but all the rest should be firm and tight. Do not neglect the condition of the suspension springs and shock absorbers. The springs can break, usually at the ends. Defective shock absorbers will leave traces of oil along the rod. These elements have a huge influence on the stability of the ATV.
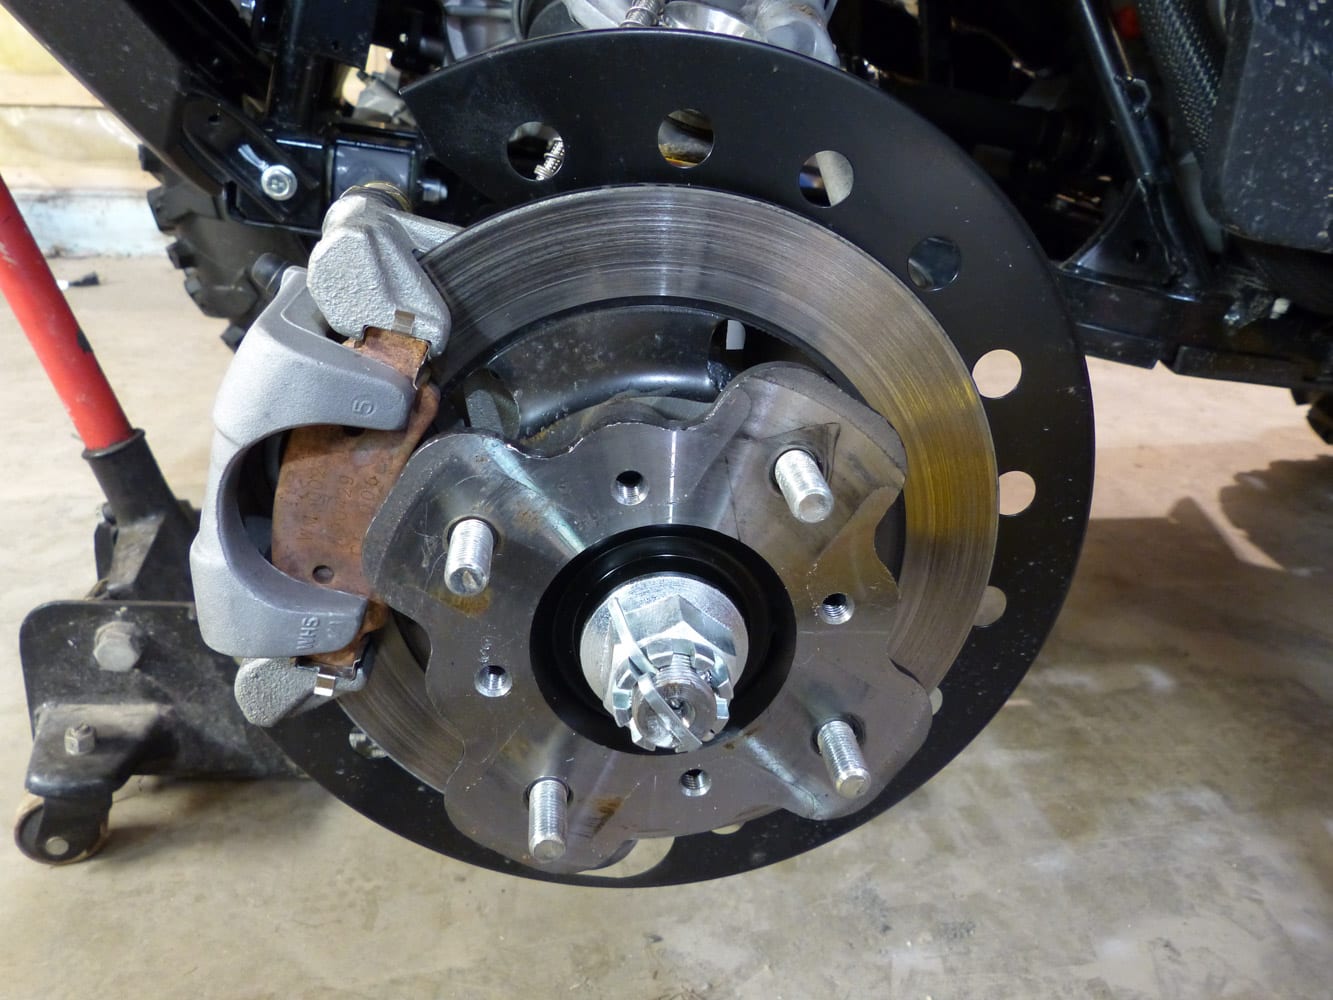
Brakes
Remove the wheels and inspect the brakes. Confirm that the remaining brake lining is not less than a millimeter thick. Confirm that the caliper pins and piston slide freely.
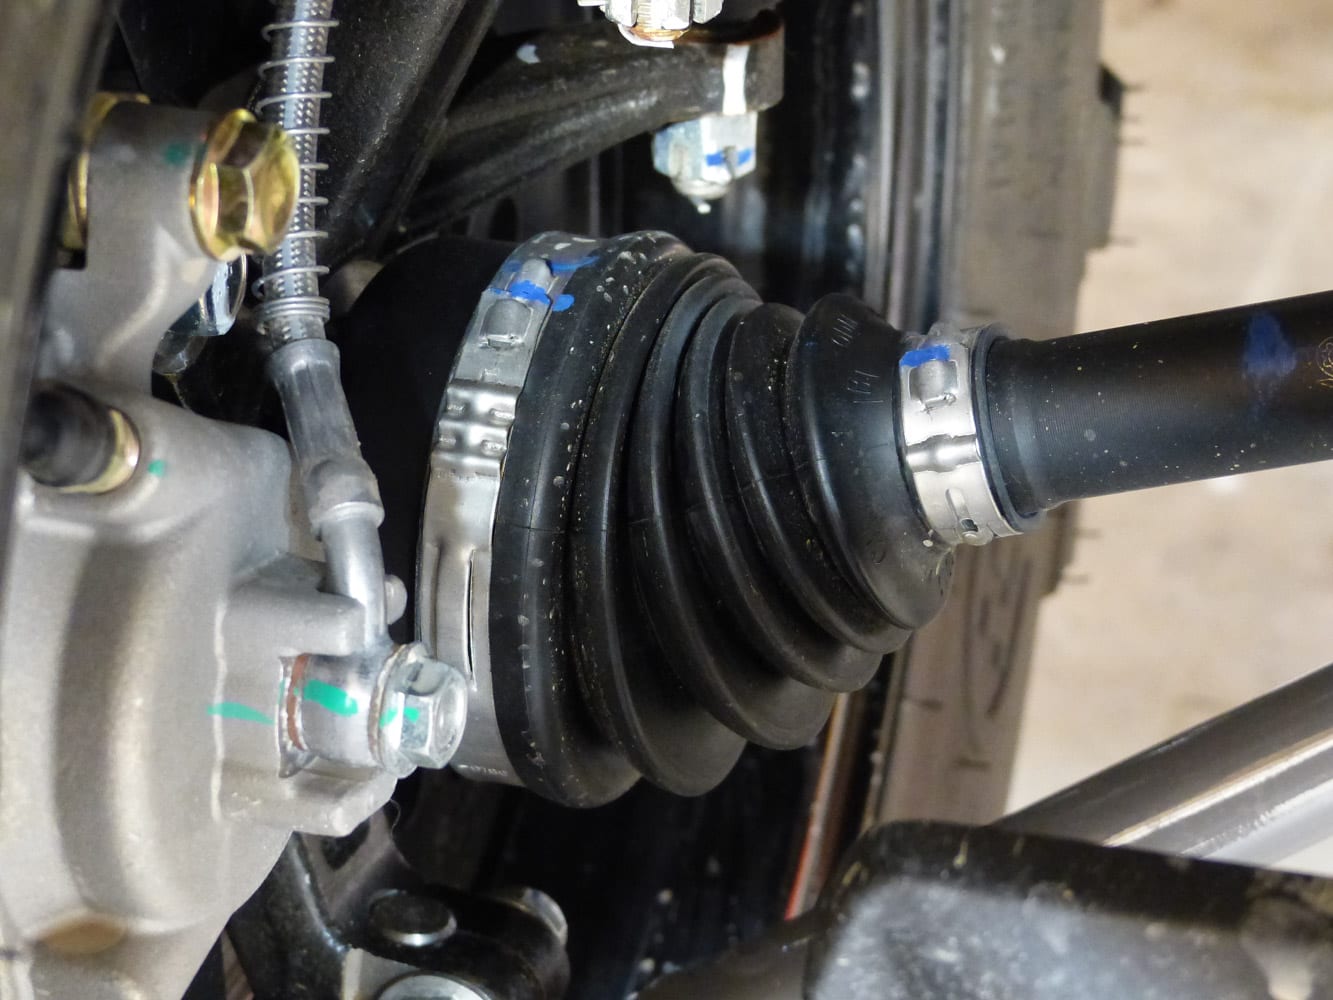
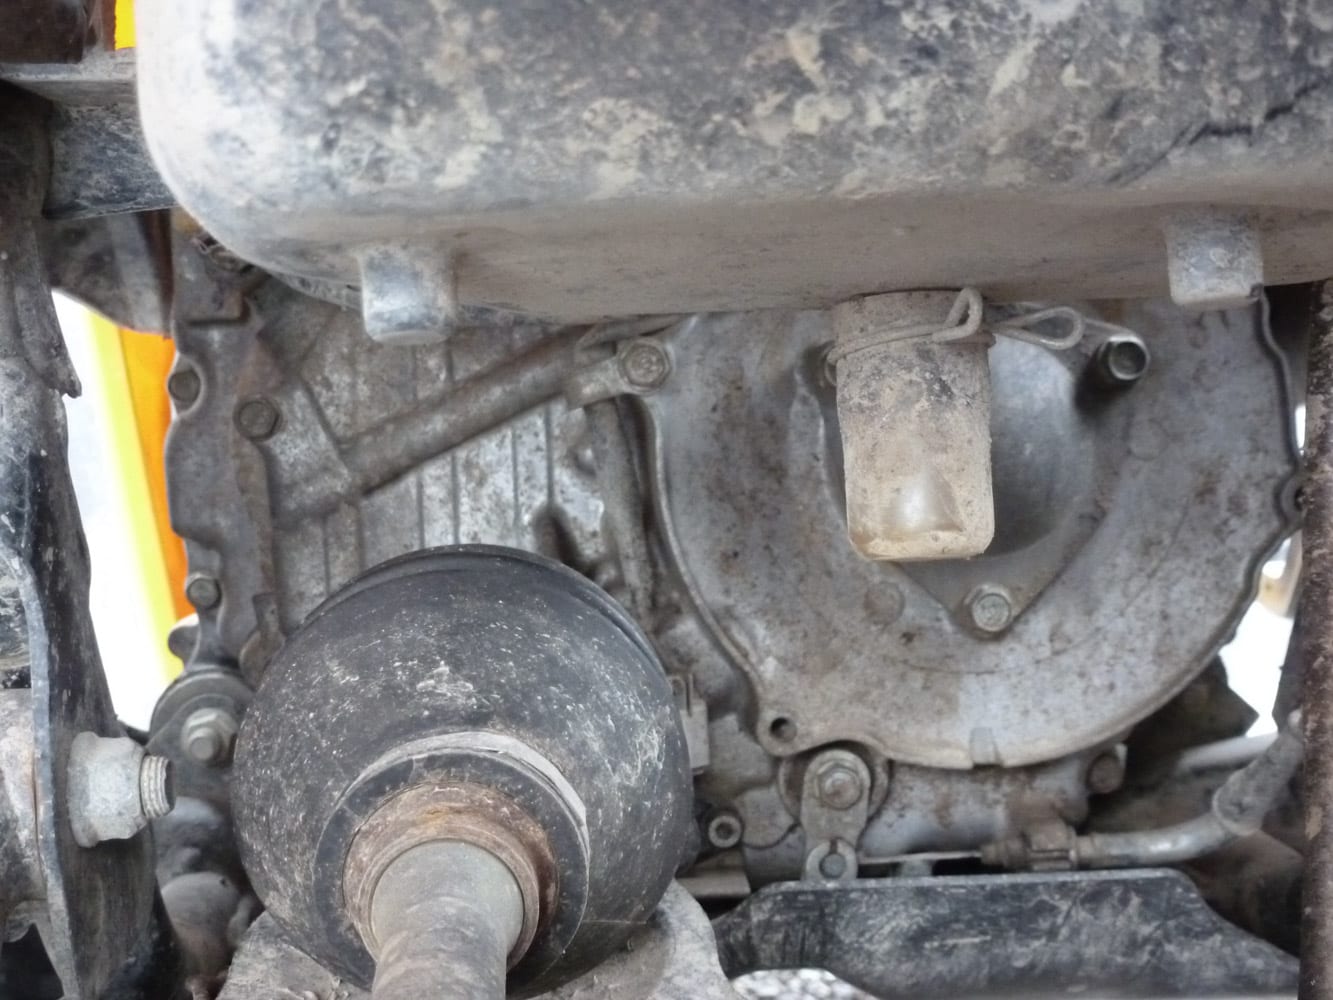
Drive axle boots
The wheel axle boots are very vulnerable. Off trail excursions will expose them to branches, rocks, and thick mud. These elements will sometimes damage the boot collars or even tear the boots. If you notice traces of grease near a drive axle, it has probably suffered the fatal assault of a branch. The boot replacement is a priority. Using the ATV with a damaged axle boot will cause dirt and impurities to stick into the CV joint grease and will rapidly damage the joint.
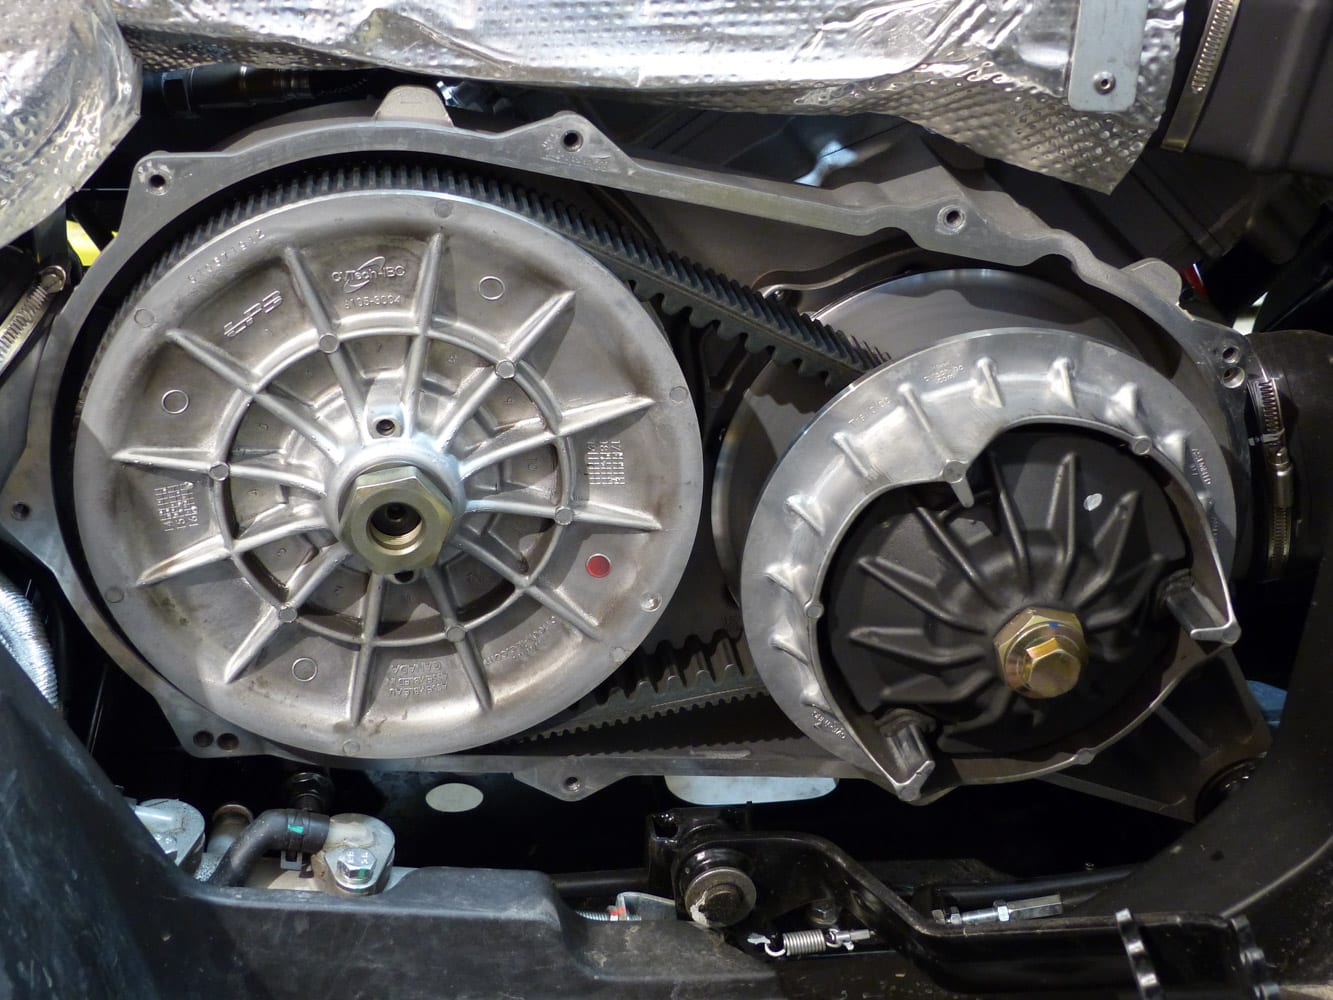
CVT transmission
Annual removal of the CVT cover is highly recommended. The CVT is one of the biggest causes of ATV breakdown. This mechanism is complex and constantly in high demand. Once the CVT cover is removed, blow the dust out of the clutches using compressed air. Inspect the friction surfaces of the clutches. A soft touch of an abrasive pad (Scotch Brite) to erase the traces of the CVT belt is ideal. Listen for noises coming from the clutches. The primary clutch may require additional attention or even its removal and repair.
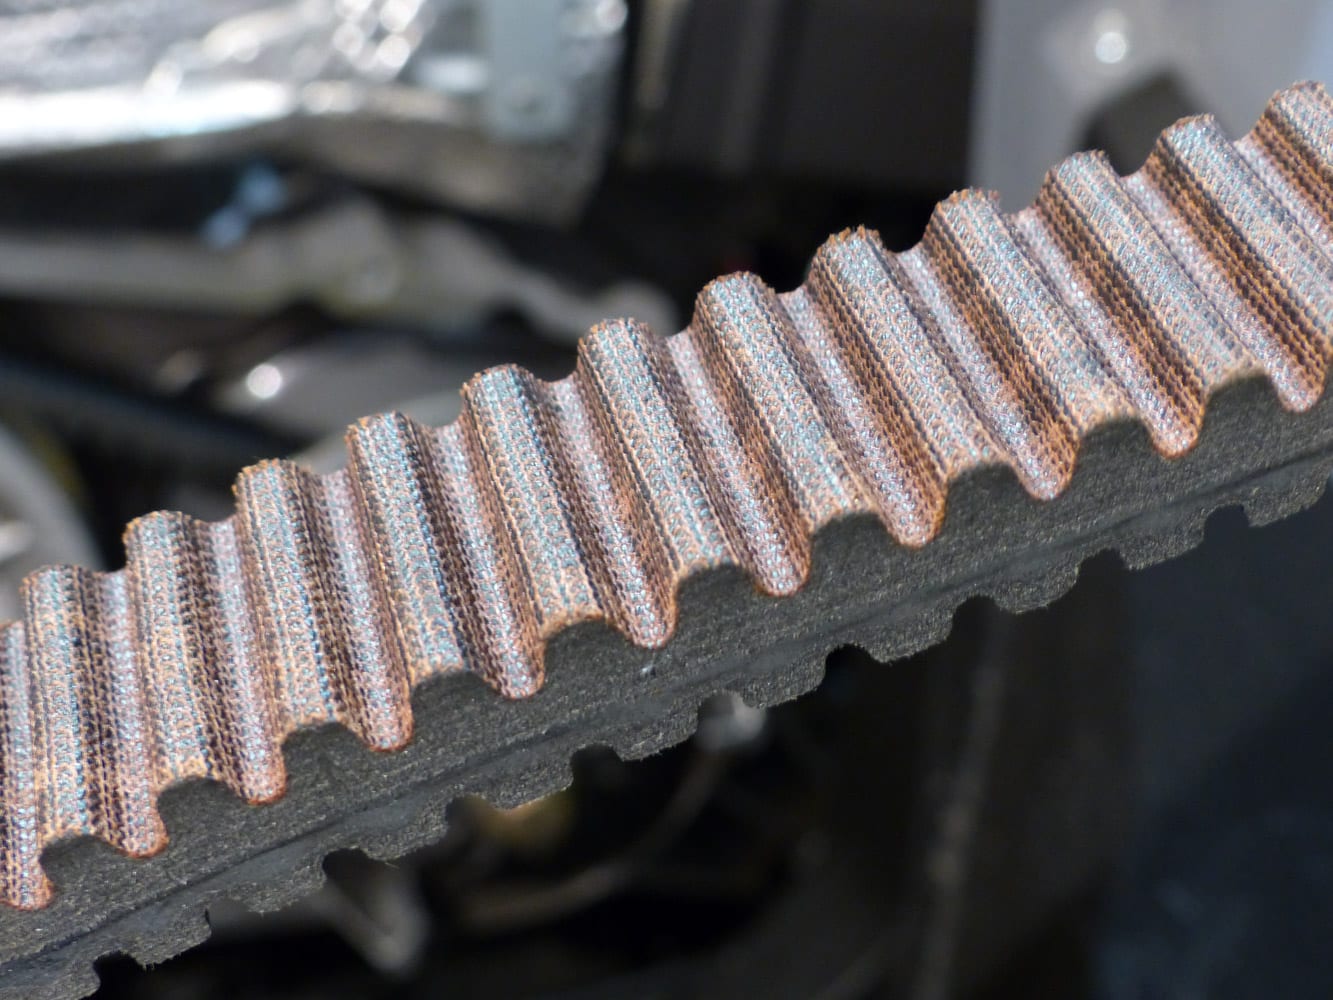
The drive belt, for its part, Takes the abuse from your driving style, mood, and adrenaline rushes. All the engine’s power goes through it. Thoroughly inspect the belt. If you see traces of rope, splits or flat on its sides, the belt replacement will be necessary. Belt failure is the leading cause of trailside breakdowns.
Spark plugs
For spark plugs maintenance, the solution is very simple – replace them with new ones once a year, ideally at the beginning of the summer. Keep another set of spark plugs in the ATV. Take the time to inspect the spark plug wires and their connections.
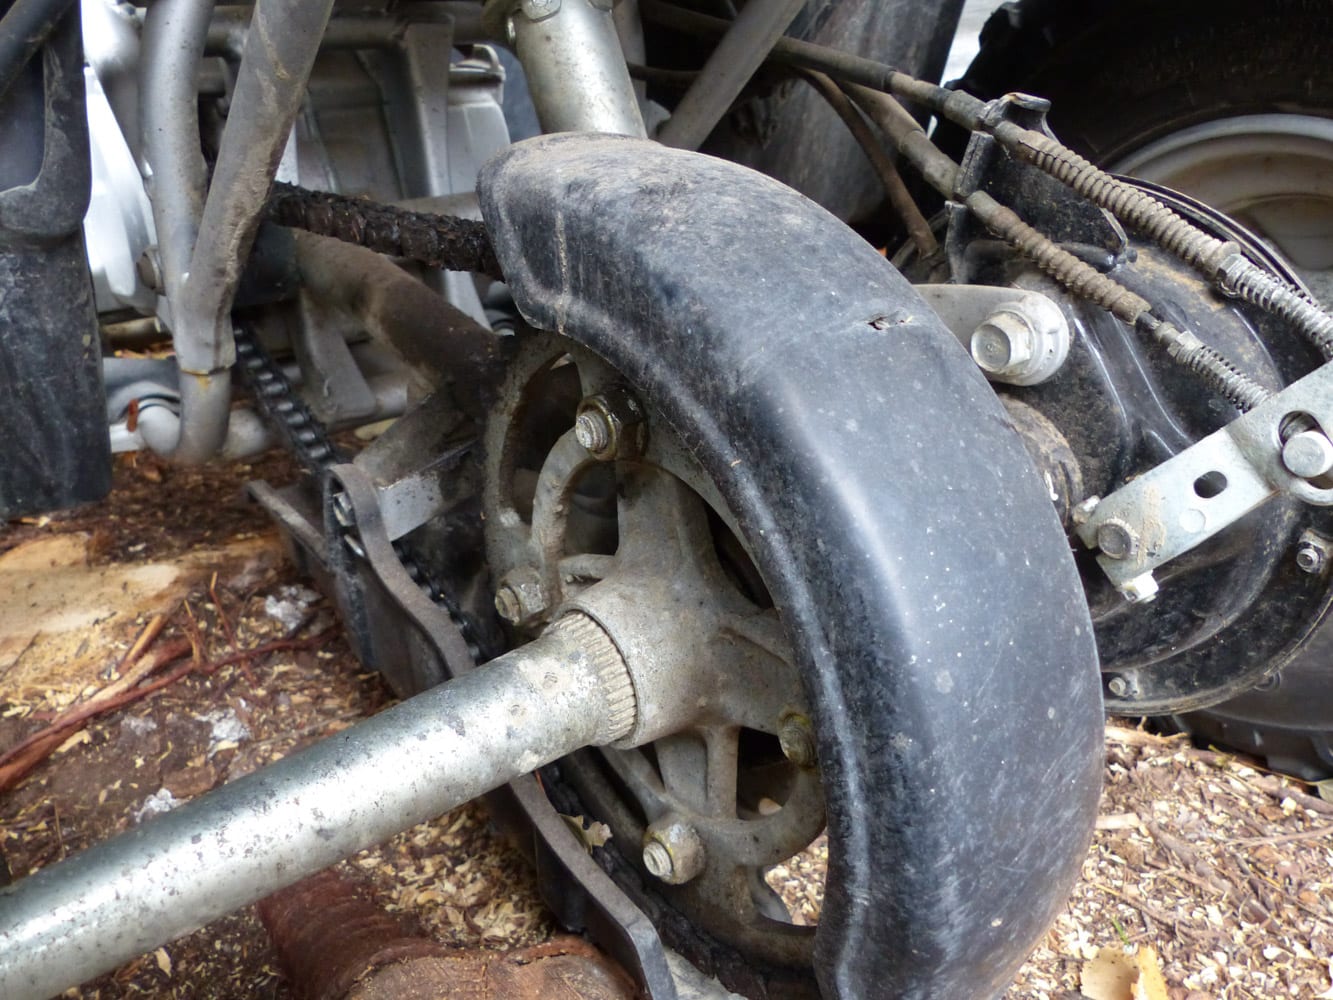
Chain and sprockets
If your ATV has a drive chain, confirm that it is properly tensioned. Take a look at the sprockets, their teeth should be symmetrical. The asymmetry of the teeth is a sign of wear. Lubricate the chain with a suitable lubricant.
Wheels parallelism
Of great importance, but few people pay attention to it, the parallelism of the wheels adjusted per the manufacturer specs brings good ease of driving to the ATV; proper alignment will also significantly reduces premature tire wear.
Battery
If your ATV is not being used for a prolonged time, the use of a smart battery charger to maintain the charge is a good idea. Batteries come in two categories: with maintenance or maintenance-free. Batteries with small plugs on the top are usually serviceable. The electrolyte must be periodically checked and filled up, which is not the case for a maintenance-free battery. Since most ATV owners neglect to maintain their batteries, you can imagine that the performance of the battery will quickly fail.
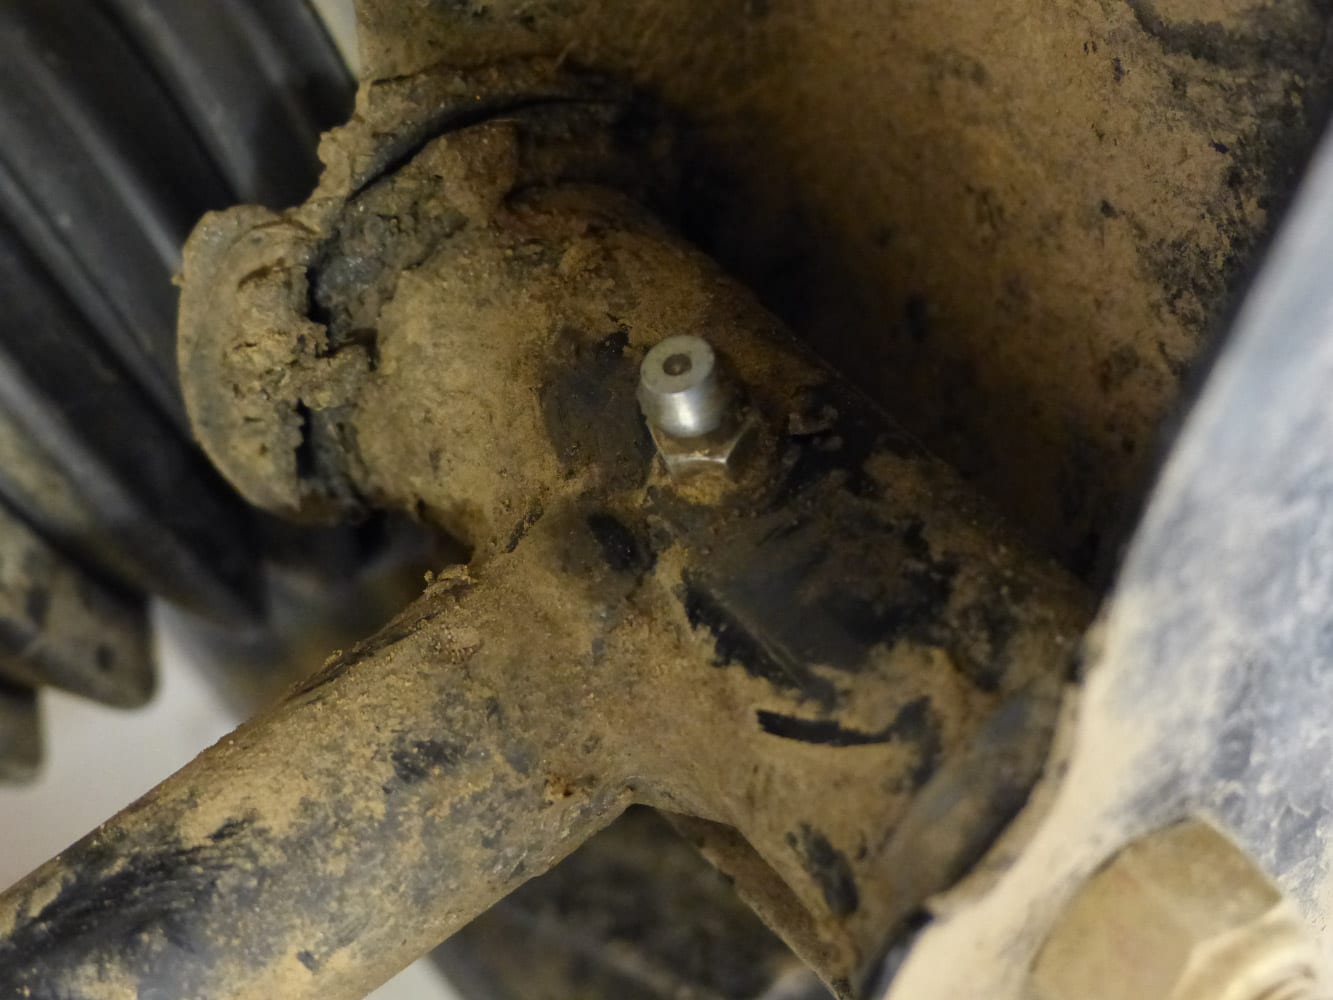
Lubrication
Save this step for the end. Go around all the grease fittings. Do not exaggerate on the quantity. If you use your ATV like a submarine, increase the frequency of lubrication. Take the opportunity to check the condition of the drive shaft universal joint cross piece before lubricating it. If there is slack, replace the U-joint.
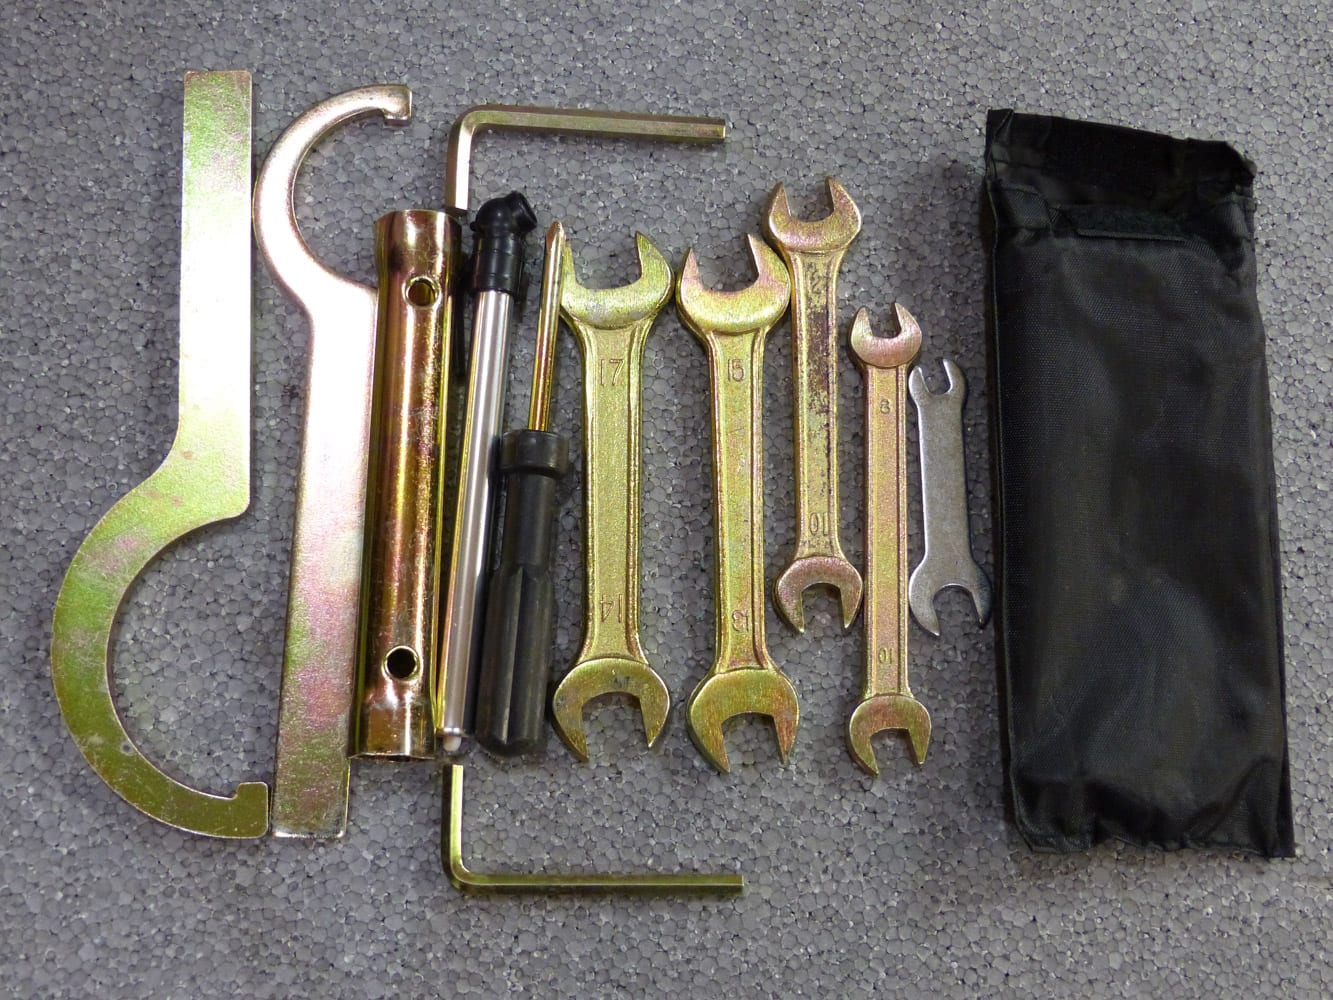
Emergency kit
Although most ATVs are equipped with a repair tool kit, it is best to have it upgraded. Adding a tire repair kit with an air compressor, a tow rope, spare spark plugs, a CVT transmission belt, and a few more tools will be well appreciated in case of a glitch. We always make sure we have zip ties, and some duct tape along too.
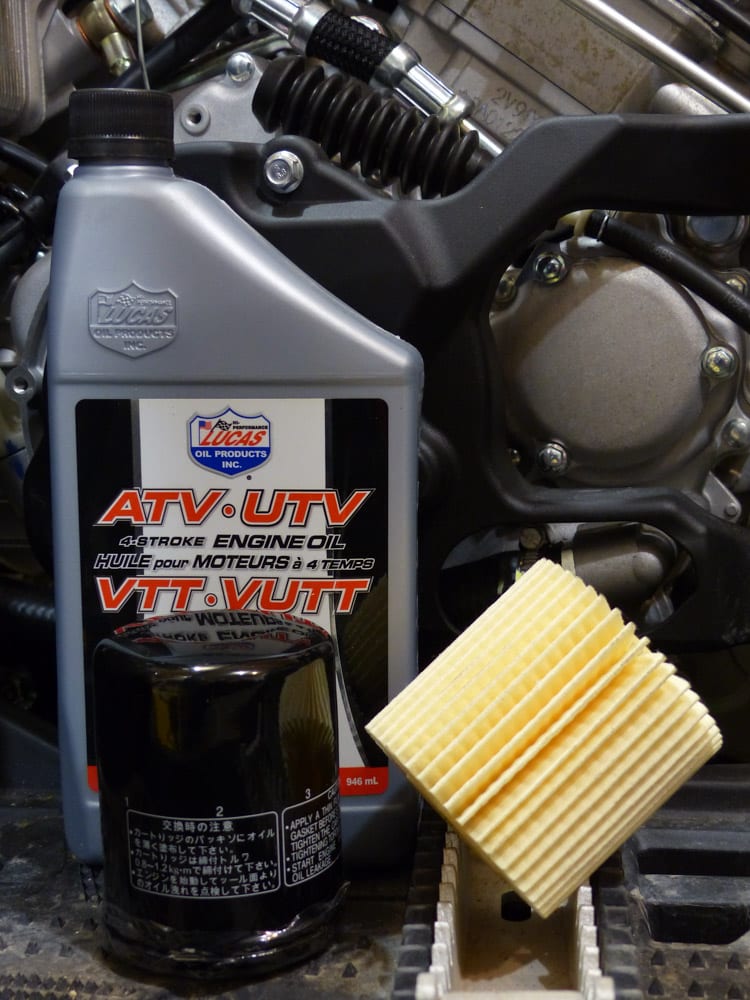
Oil is not just oil
Be sure to always use liquids according to the manufacturer’s requirements. The improper type of engine oil can cause mechanical malfunction and may lead to very expensive repairs.
Despite all the efforts made, breakdowns are not always predictable. But with a minimum of prevention, it is possible to rule out a very large majority of them. In closing, remember that your ATV owner’s manual is a great reference tool.