Some ATV engines offer the possibility to be upgraded with bigger pistons and cylinders, these kits are called Big Bore Kits. The Big Bore Kit offers some advantages. If your cylinder and piston show signs of wear or if for any reason you’re looking for additional power gain, these kits may be a good choice and are often more economical than a traditional engine rebuild.
The main principle of the Big Bore is to offer a larger piston surface than the original. The larger this surface is, the greater the piston area will be exposed to the engine combustion pressure, resulting in an increase of the moving forces that will be transferred to the piston rod and to the engine crankshaft.
Today I’m going to look at a Big Bore kit to increase the displacement of a Polaris Sportsman 570cc which is, in reality, a 567cc motor. The end result would be 625cc. The kit is distributed by the company DG Usimécanique under Millennium Technologies. DG Usimécanique inc. is based in East Broughton since 2001 and specializes in the refurbishment of 2 and 4-stroke engines and crankshafts for snowmobiles, ATVs, watercraft, and motocross bikes. DG Usimécanique also specializes in the sale of light-duty vehicle products such as lawn tractors, lawnmowers, snowblowers, chainsaws, grass trimmers, ATVs, snowmobiles, etc.
When I met Charles Doyon of DG Usimécanique, he effectively drew my attention to these famous Big Bore kits. In the case of our Polaris ATV, it was offered in two sizes of cylinder bore – 578cc or 625cc. These sets are sold with all the gaskets required for installation. You’ll guess that I dive directly on the biggest of 625cc. There will be a gain of 5 millimeters in additional diameter of the piston and cylinder. Pretty cool stuff!
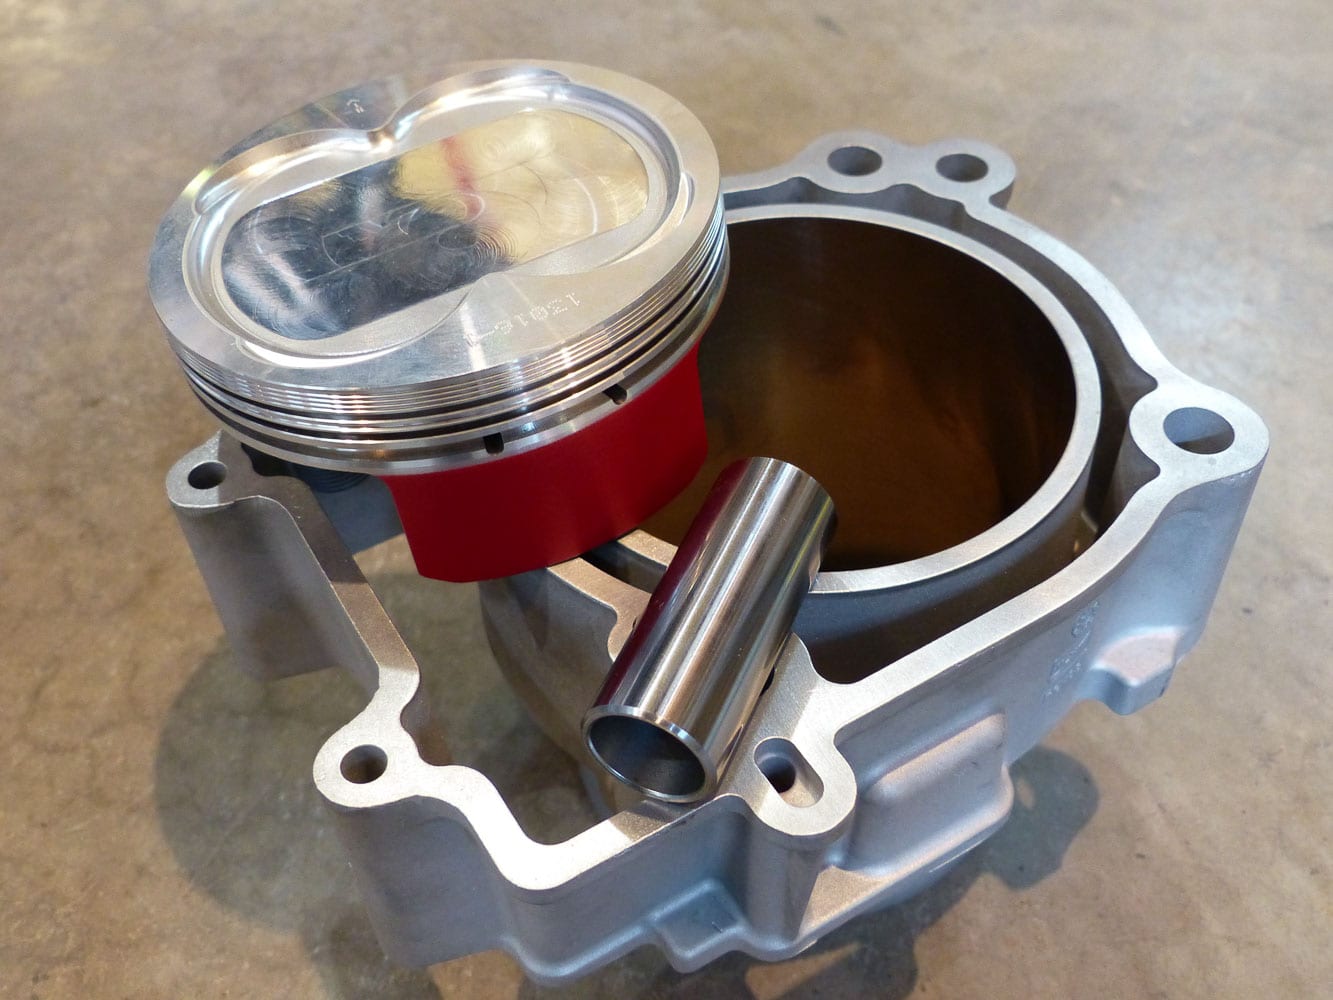
Inspection and analysis of the 625cc Big Bore kit
The whole kit seems of very good quality. When I got to the measuring session of the cylinder bore and the diameter of the piston, I was glad to see that the sizes and clearances are in accordance with the specifications. I must admit that the piston rings are very stiff and rigid, which is not a defect, but this leads me to predict a certain level of difficulty during the assembly. Since everything is calculated in an engine, the weight of all moving components is very important. The vibration caused by any weight imbalance could devour some engine power and make the engine operation very unpleasant.
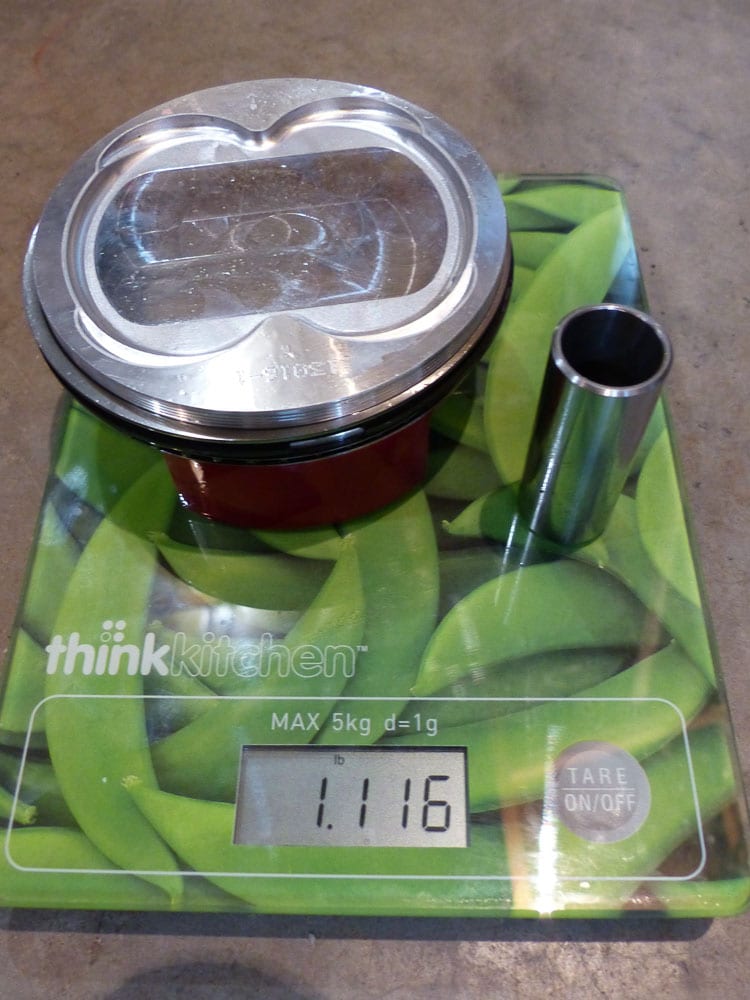
When I compare the weight of the original piston with the Big Bore kit one, I noted a significant difference of 0.113 pounds heavier with the Big Bore. I thought something was wrong here, I later realize that the piston pin provided in the kit is lighter than that of the original piston. I went back to the scale, this time with the respective piston pins, which reduces the difference to 0.028 pounds, which is more reasonable.
Past experience on a Honda 200-S had caused me some engine knocking problems, which were the result of a compression ratio being too high. In the case of a trail vehicle such as the Polaris Sportsman 570, the mandatory use of a specially formulated gasoline that would reduce self-ignition is very inconvenient and really not desirable. Comparing the ATV manufacturer’s specifications with those of the Big Bore kit, I see only an increase in the compression ratio of 10.1:1 to 10.2:1. So there’s virtually no risk of self-ignition. That led to the next question – how can the compression ratio remain so low? Millennium Technologies uses a 23 thousandths of an inch thick multilayer head gasket while the original is 17 thousandths of an inch. The additional 6 thousandths increases the volume of the combustion chamber. This simple method keeps the engine running in a more reliable and less problematic range for everyday use. If we reduced this head gasket in thickness, the performance would probably be better, but we would certainly end up with some problems such as engine knocking, difficulty in maintaining the idle, shortened engine lifetime and reduced reliability.
Required equipment
You will need 1/4 and 3/8 drive hex head socket set, screwdriver and plier sets, torque wrench, steel brush, 320 grit sandpaper, cleaning blade, engine leak tester, engine compression gauge, combustion chamber cleaner, brake parts cleaner, silicone (preferably Threebond # 1184) as well as some specifications from your ATV manufacturer.
Preparation before installation
Before rushing on your ATV and spreading it all apart, get a good idea of its engine condition before disassembly. This way, it will be possible to repair an unsuspected engine failure at the same time. In addition, you will be able to compare the results before and after reassembly. If any result after reassembly is out of specification, an error has crept into your process – you need to avoid starting the engine and make a diagnosis.
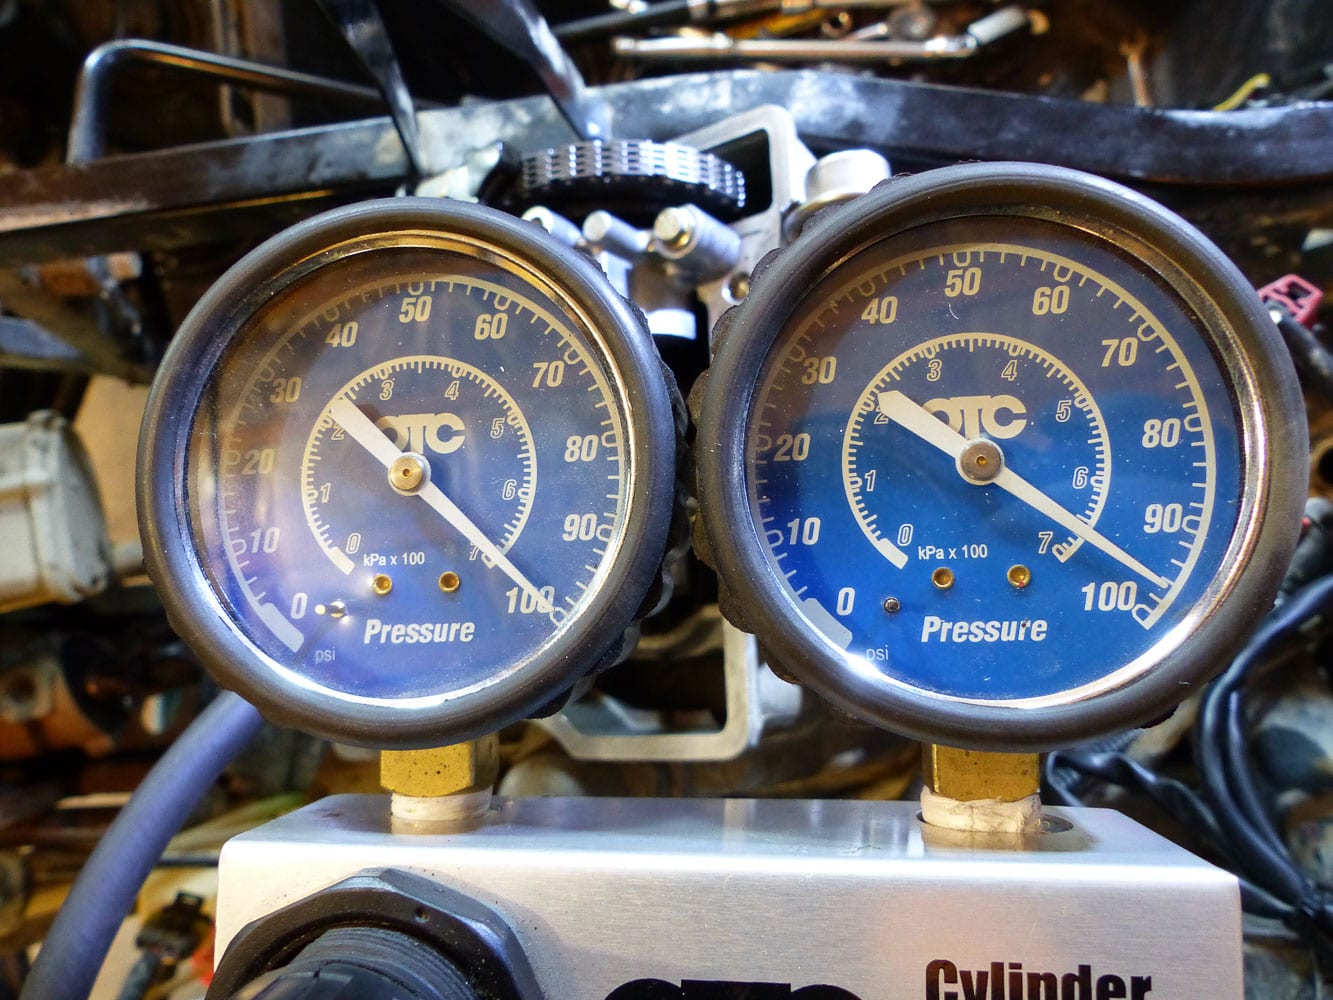
First, perform an engine leak test and compression readout. In our case, the measured leakage was 4% and the compression obtained was 105psi. Take note that this engine is equipped with a decompressor, which significantly reduces compression during the test. The manufacturer’s specification is 80- to 120psi.
Disassembly
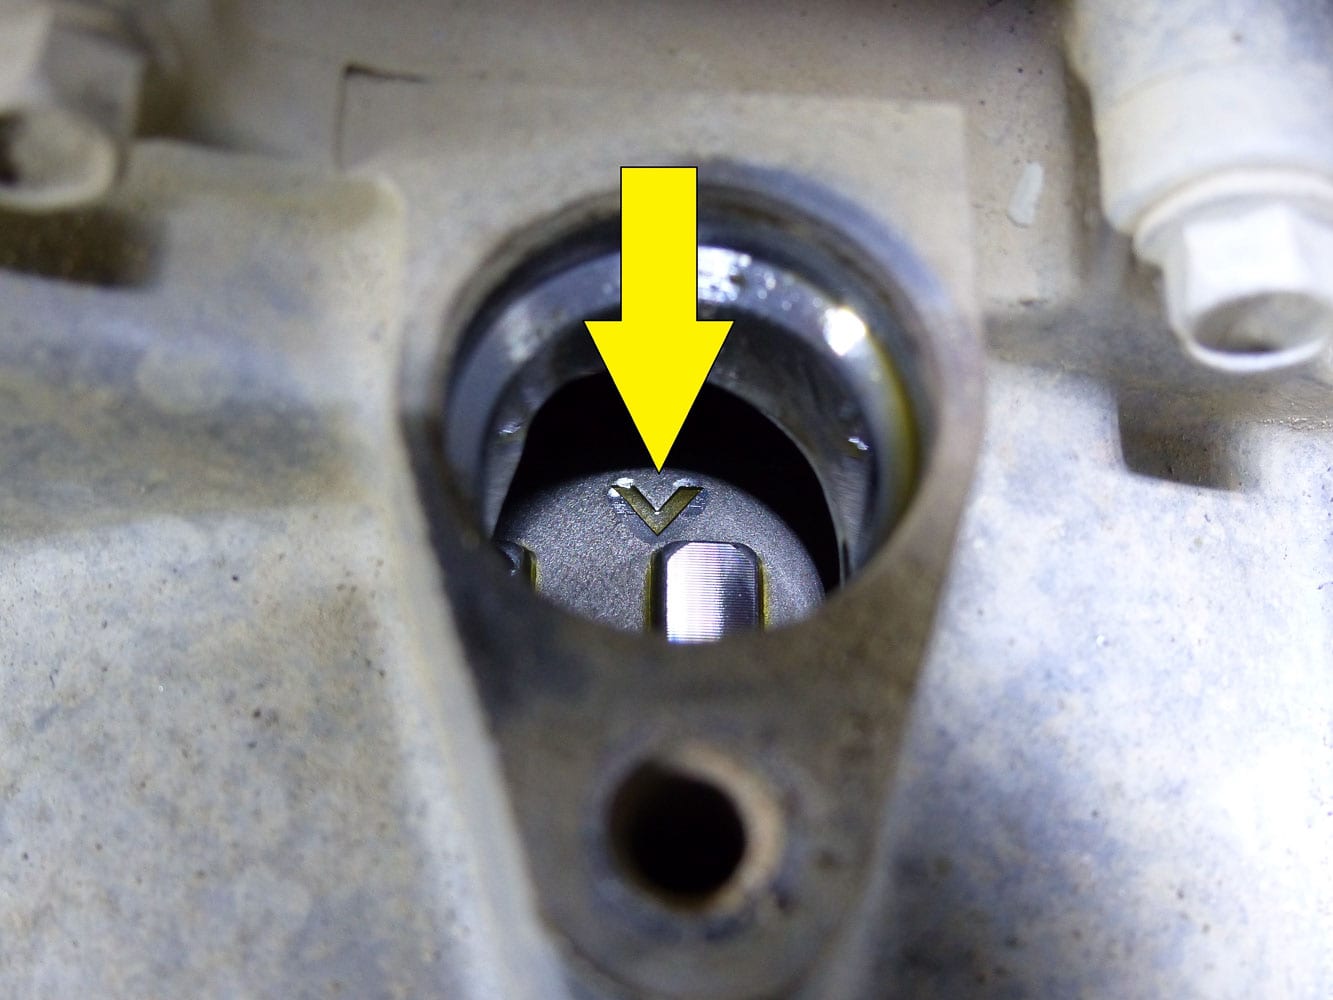
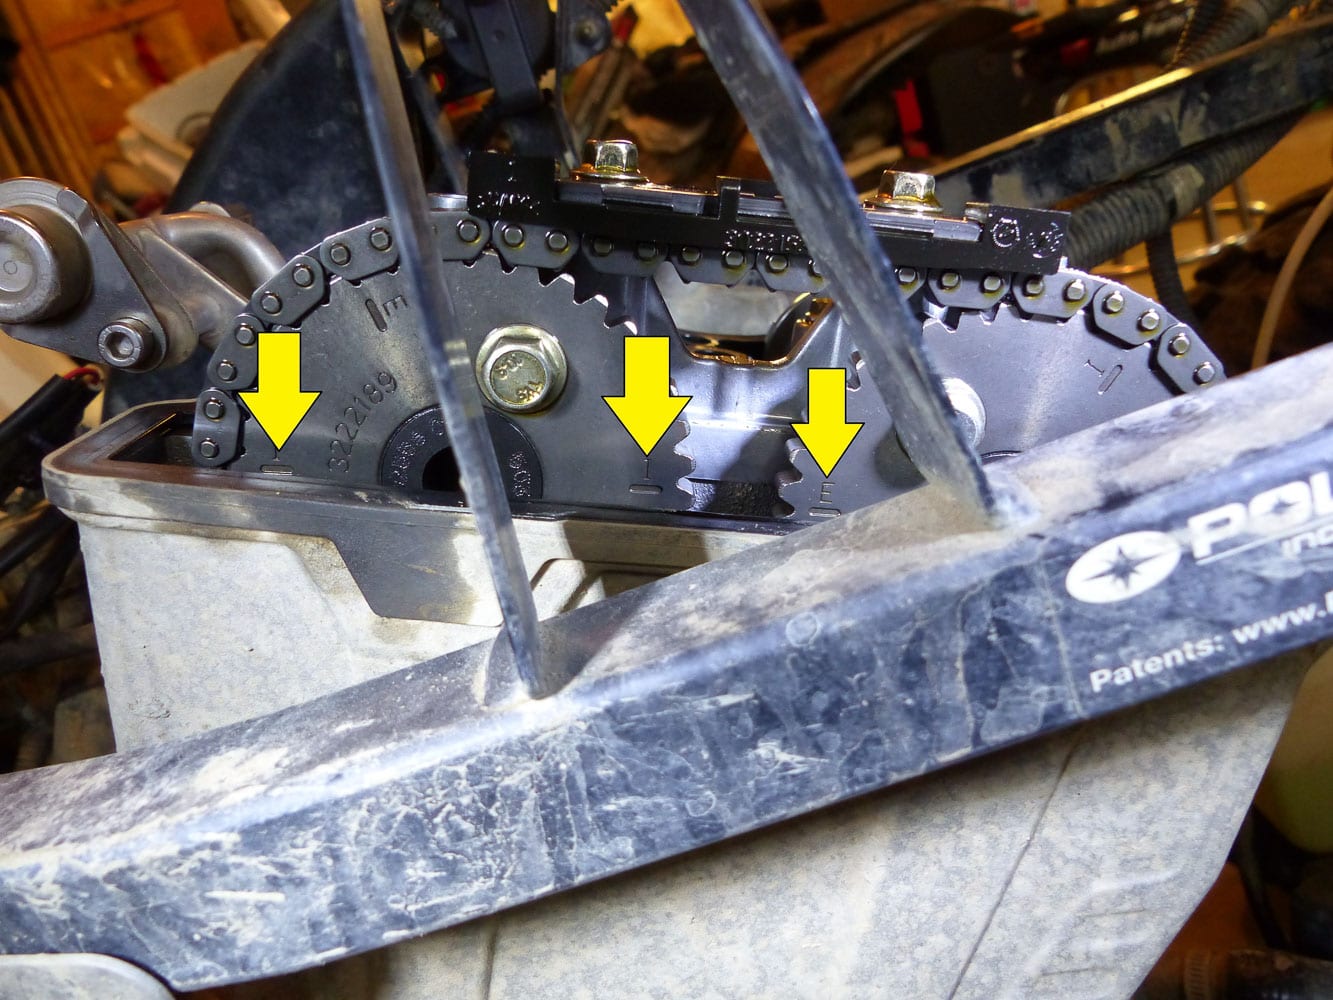
In the vast majority of ATV models, work on the top end engine is possible without removing the engine from the vehicle. The removal of certain parts such as wheel fenders and fuel tank will be necessary. Take off the engine valve cover. Before going further, the engine must be positioned at Top Dead Center (TDC). This will avoid damaging the engine valves during disassembly and will prepare the engine for reassembly. Locate the mark on the crankshaft by removing the crankshaft position sensor or by removing a plug provided for this purpose, as the case may be. Align this mark with the timing gear pins as follows: (I) for intake and (E) for exhaust.
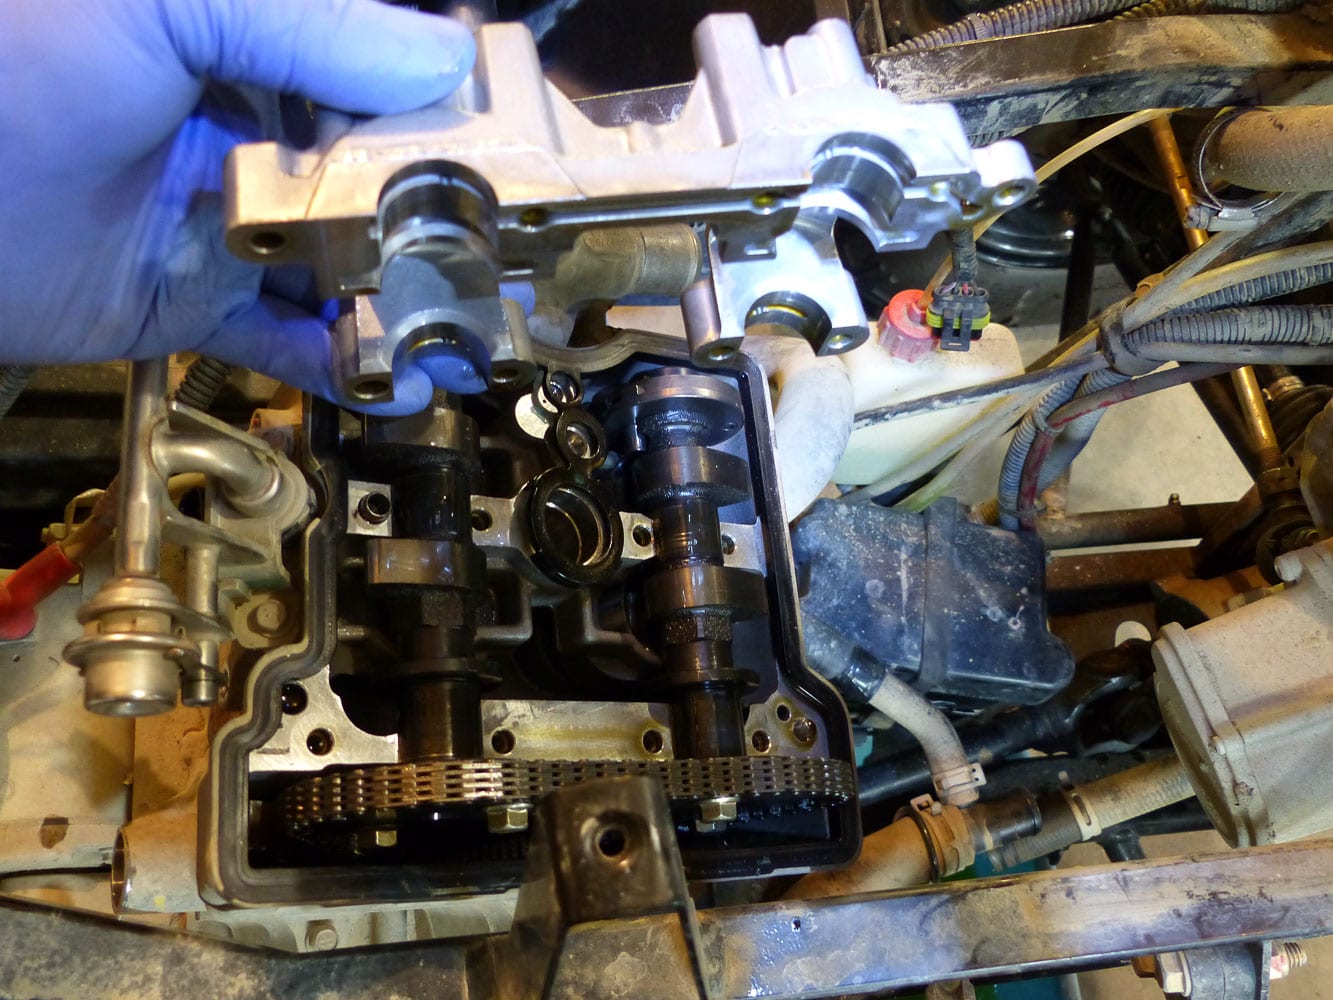
Remove the timing chain tensioner. Unscrew and remove the camshaft bearing caps. Secure the timing chain to prevent it from falling into the motor base. Carefully remove the camshafts.
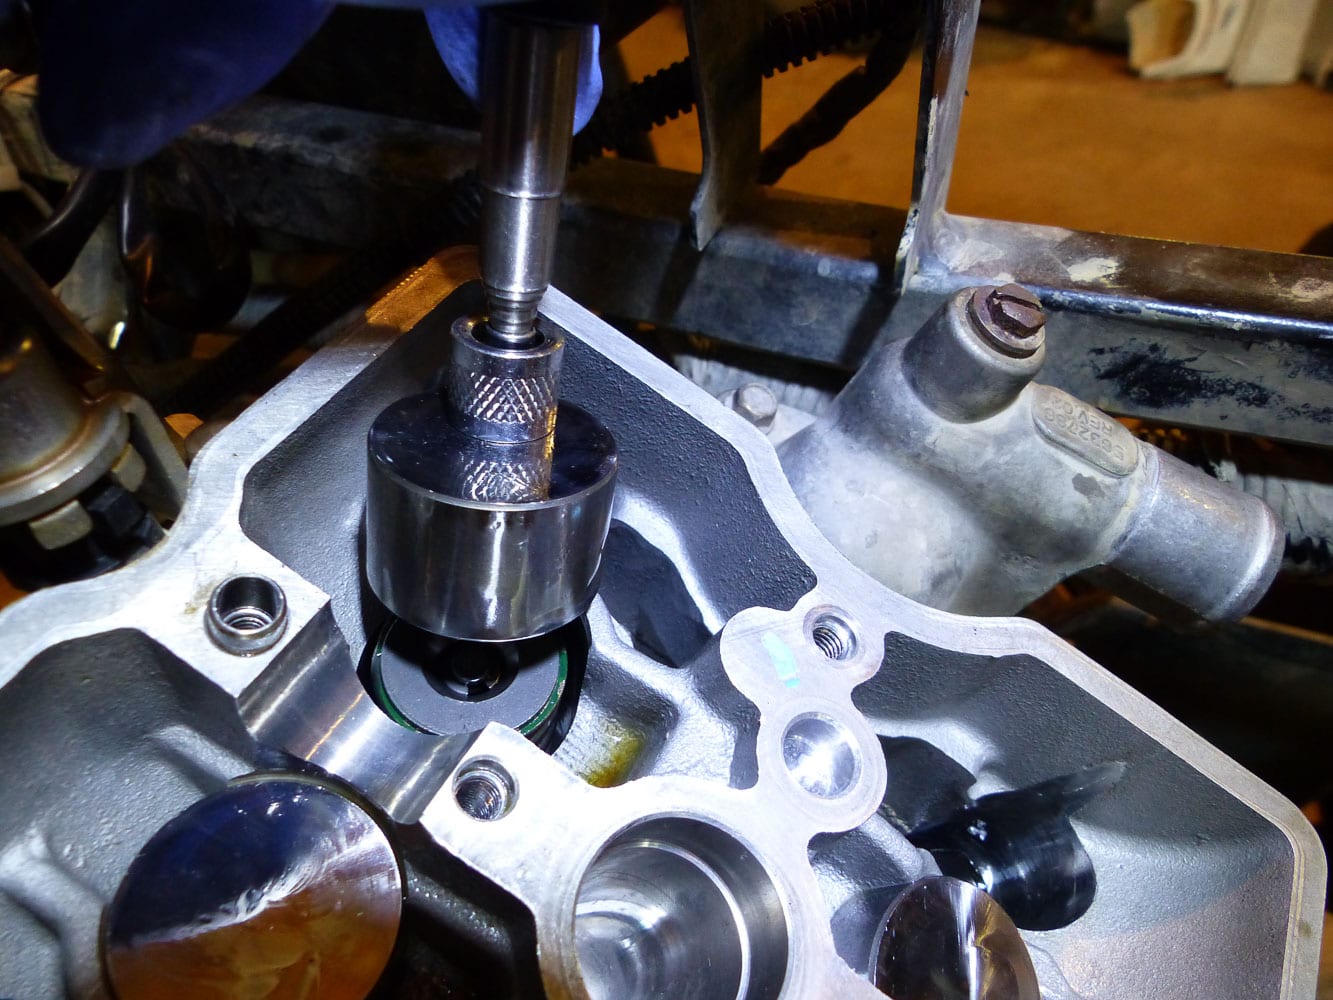
In this case, the engine has valve tappets. They are used to adjust the valves clearance and they must maintain their positions. Identify their positions and remove them with a magnet.
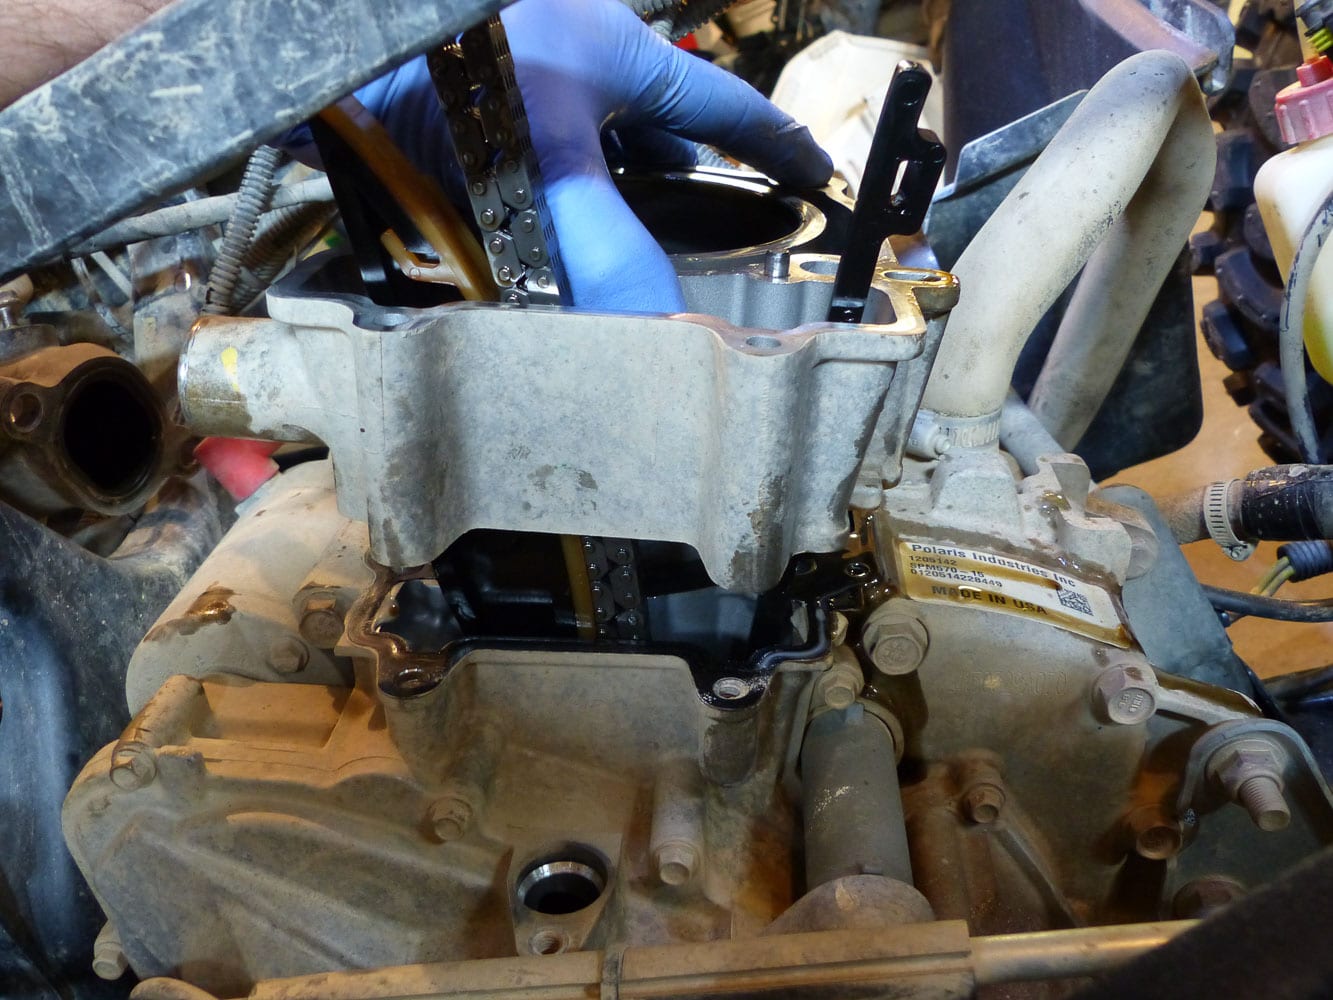
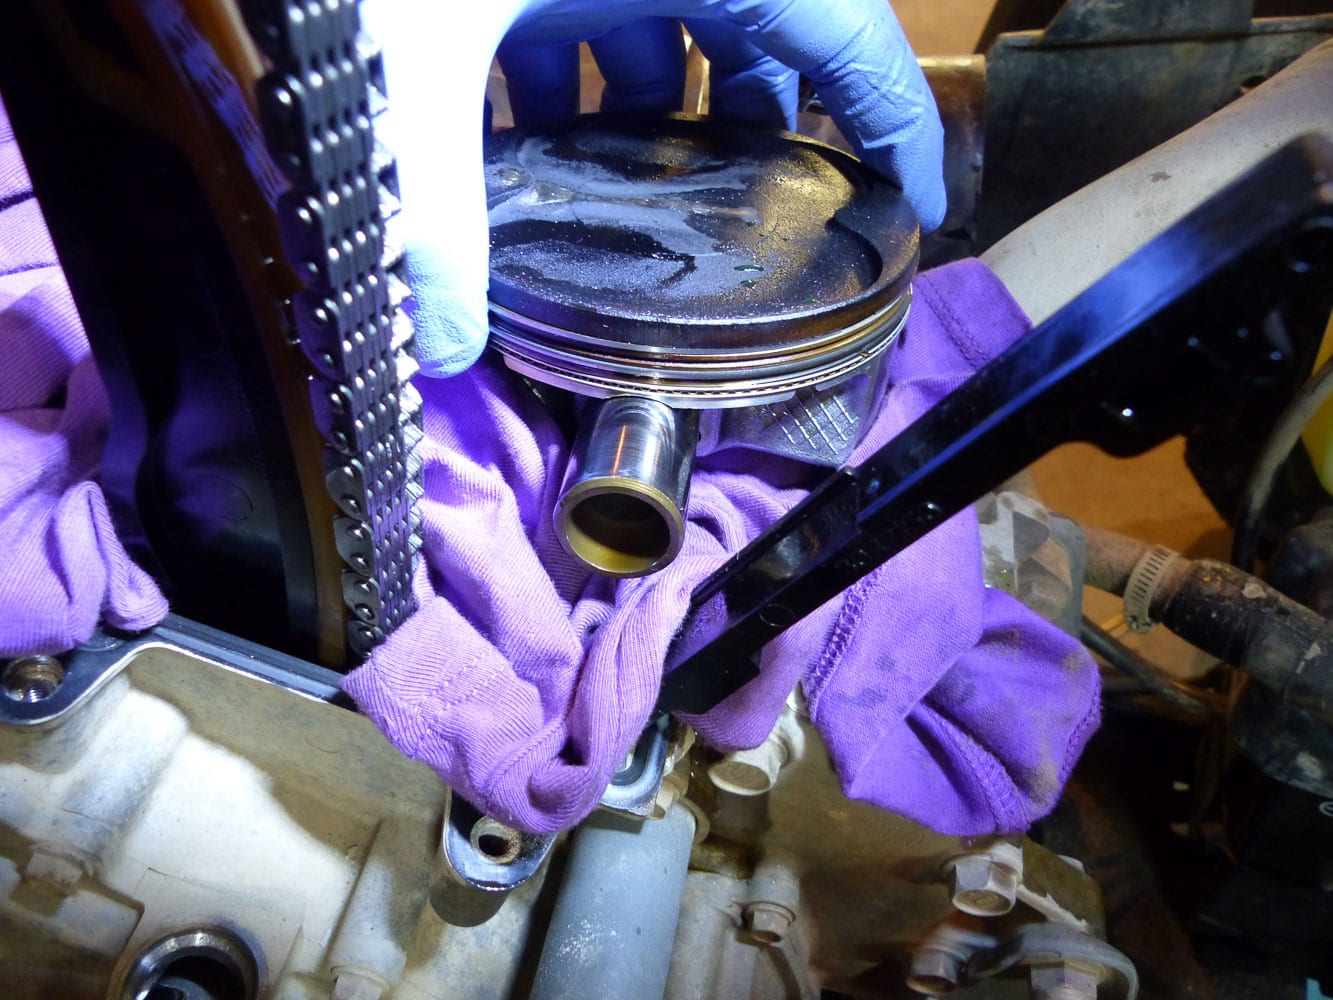
Unscrew the bolts from the cylinder head and remove it. Do the same with the cylinder. To remove the piston, a ring (c-clip) must be removed from the piston pin to allow sliding out the piston pin. Place a rag on the motor base to prevent the ring or other debris from falling into the motor base.
Cleaning and inspection
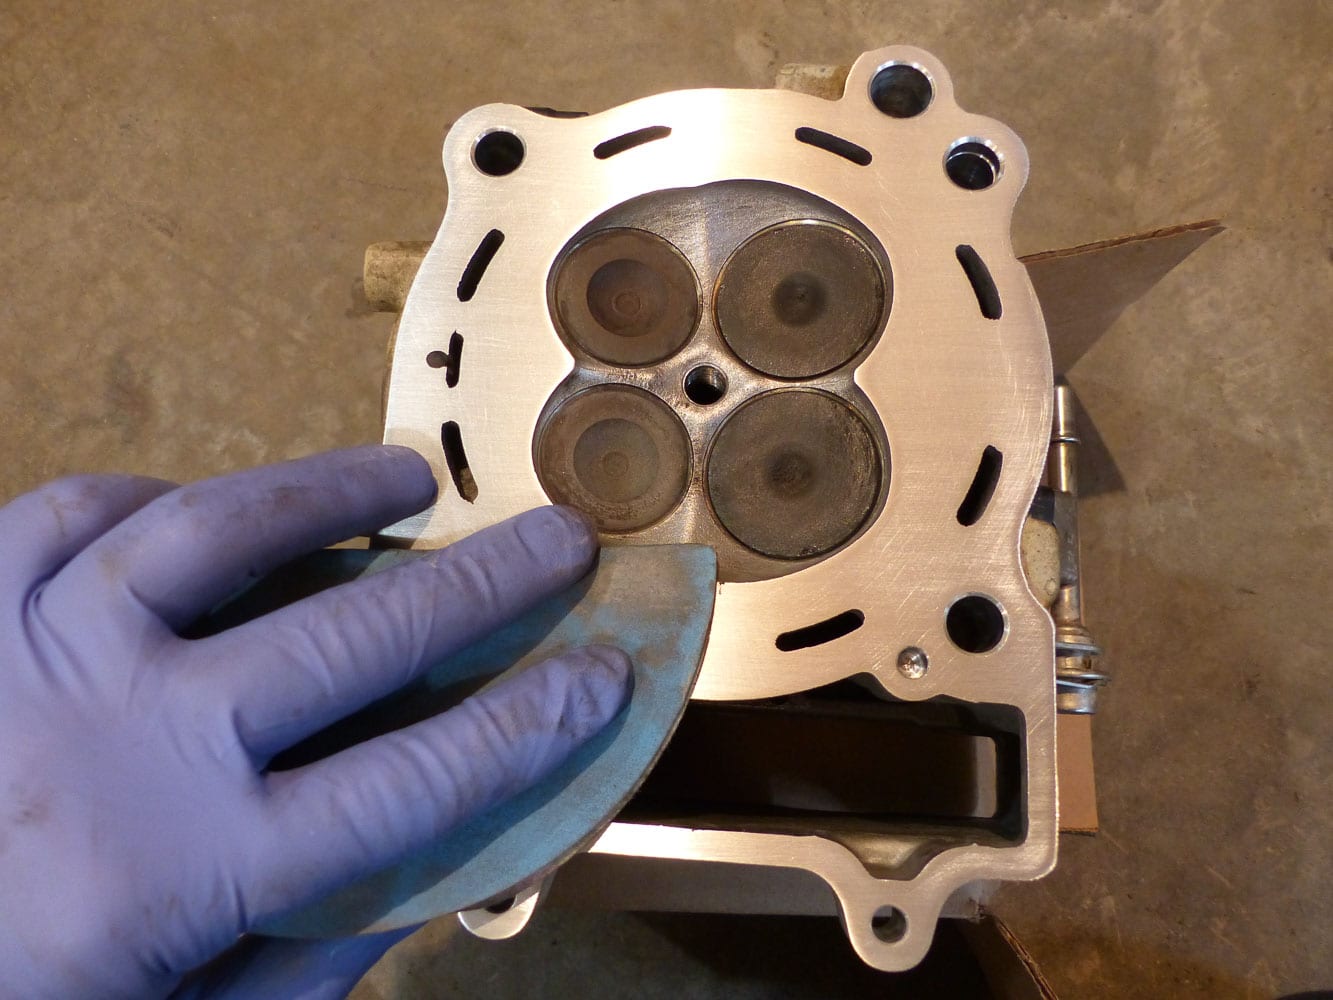
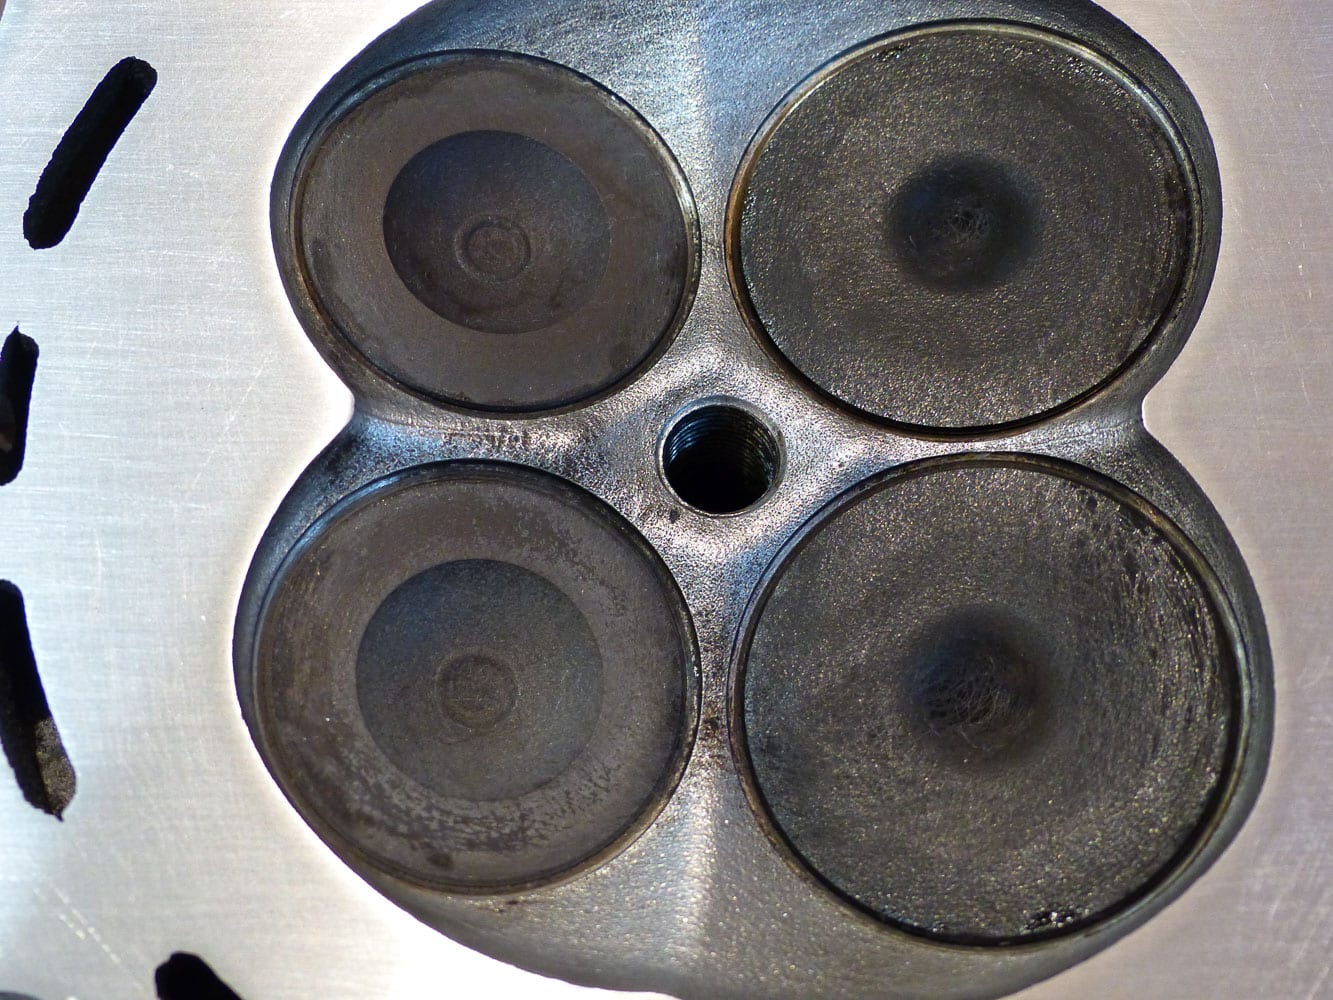
Cleaning the parts is one of the most important steps although not very pleasant. The main cause of engine rework for oil leakage or oil paths obstruction is attributable, in the vast majority of cases, to bad cleaning. All traces of silicone, corrosion, and oil should be thoroughly removed with care. A blade, fine sandpaper, and brake parts cleaner will be needed. Special attention should be paid to the contact surfaces of the seals and gaskets. Also, remove the accumulated sludge or carbon deposit in the cylinder head using a steel brush and a combustion chamber cleaner. Once everything is clean, inspect the condition of all parts.
Reassembly
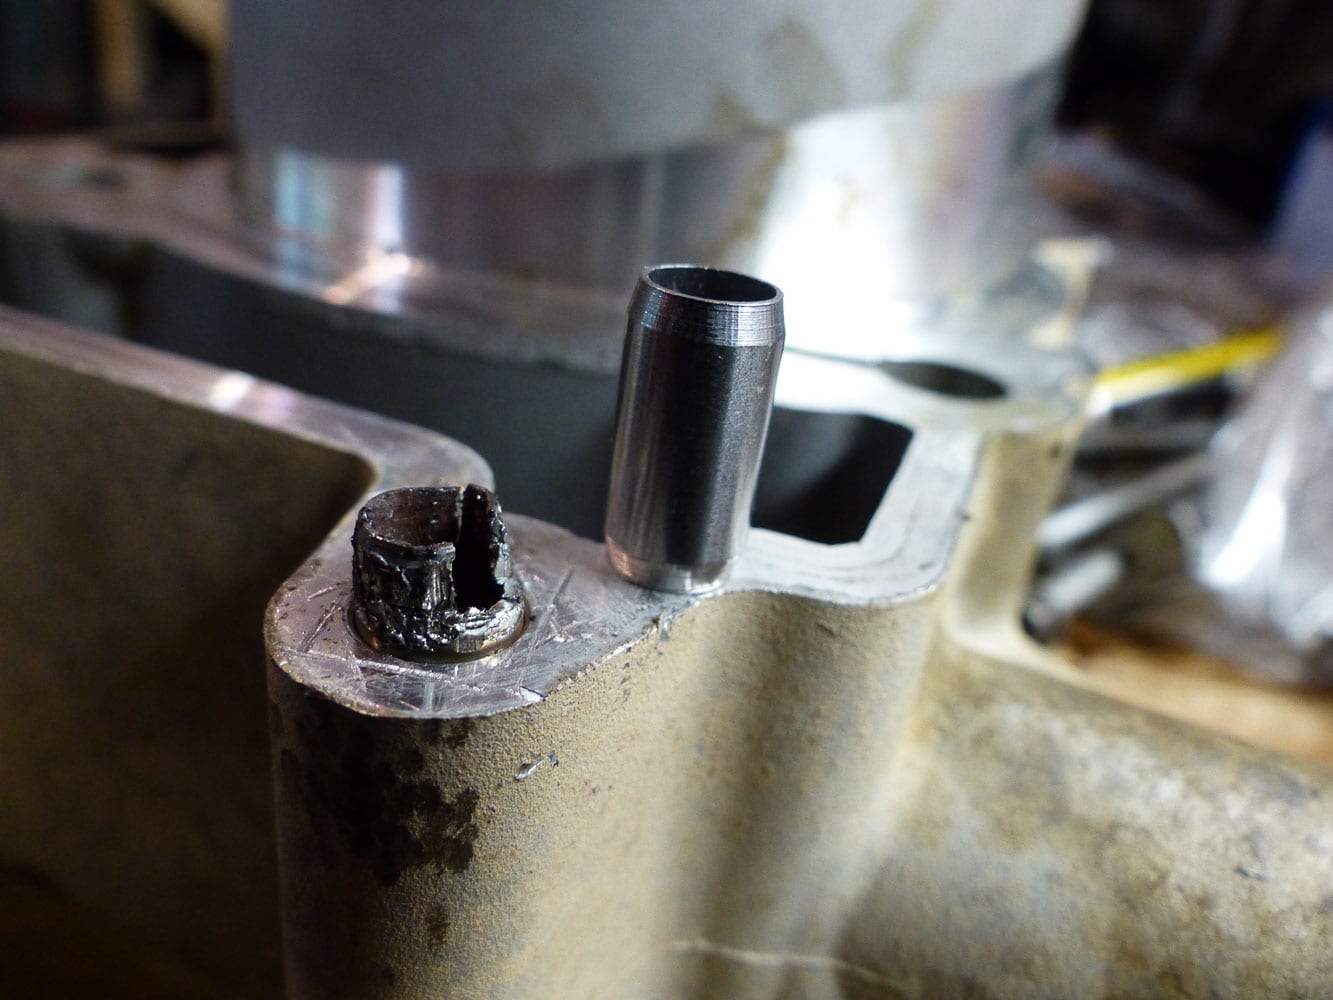
Remove the alignment dowel pins from the original cylinder and place them on the motor base. It may be possible that some of the pins end up being completely unrecoverable in the effort to extract them from corrosion. In that is the case, replace with new ones.
Install the piston rings in the order and orientation specified by the manufacturer. Do not rely on the positioning of the original rings: they could have moved position during the operation of the engine. Install the piston to the connecting rod and insert the piston pin locking clips. Position the opening of the c-clips at 6 or 12 o’clock.
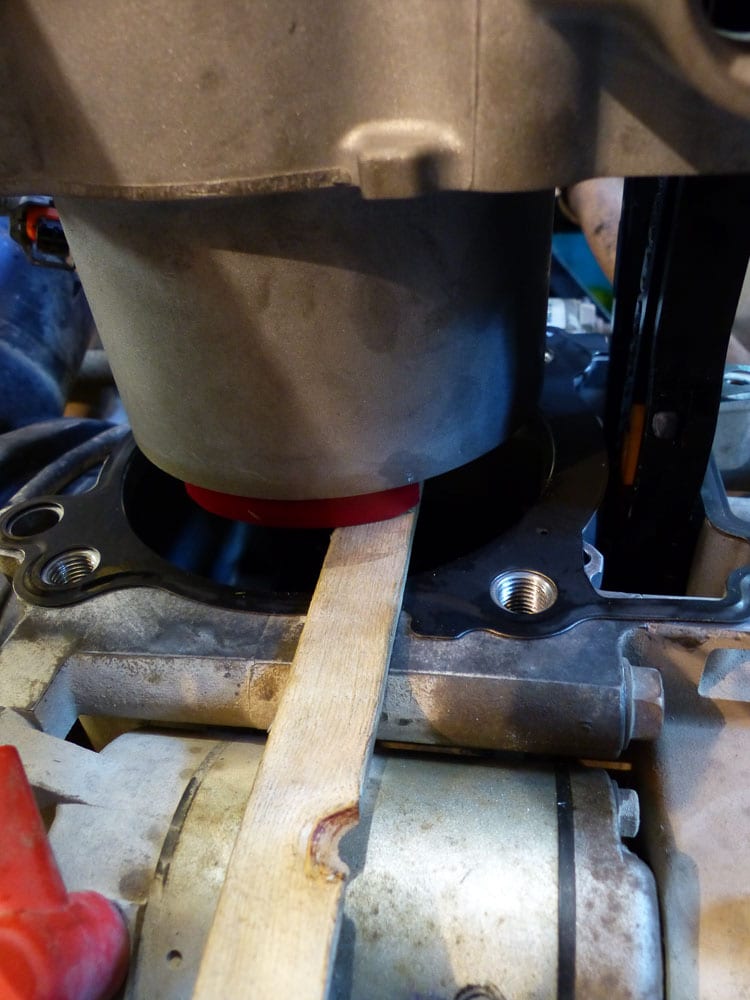
Here is a small tip: to install the cylinder, put a small piece of wood between the piston and the engine base. This will keep the piston in place and prevent it from being damaged. Do not forget to properly lubricate the piston rings before inserting the piston into the cylinder.

Apply a thin layer of silicone between the base seal and the base grooves to prevent small oil leaks.
Install the cylinder head gasket and lower the cylinder head in place. Apply a thin layer of engine oil to the cylinder head bolts and tighten them in the order and at the torques specified by the manufacturer.
Now it’s time to install the camshafts. Make sure the crankshaft is still in the TDC Top Dead Center. Return the valve tappets to their respective locations. Position the camshafts with their mark (E) and (I) with the sprockets well aligned. Confirm that the timing chain is properly installed on the camshaft sprockets. Lubricate the camshaft bearings and install the bearing caps. Tighten the bolts in sequence and at the torques specified by the manufacturer. Complete the engine assembly by installing the valve cover.
Starting the engine
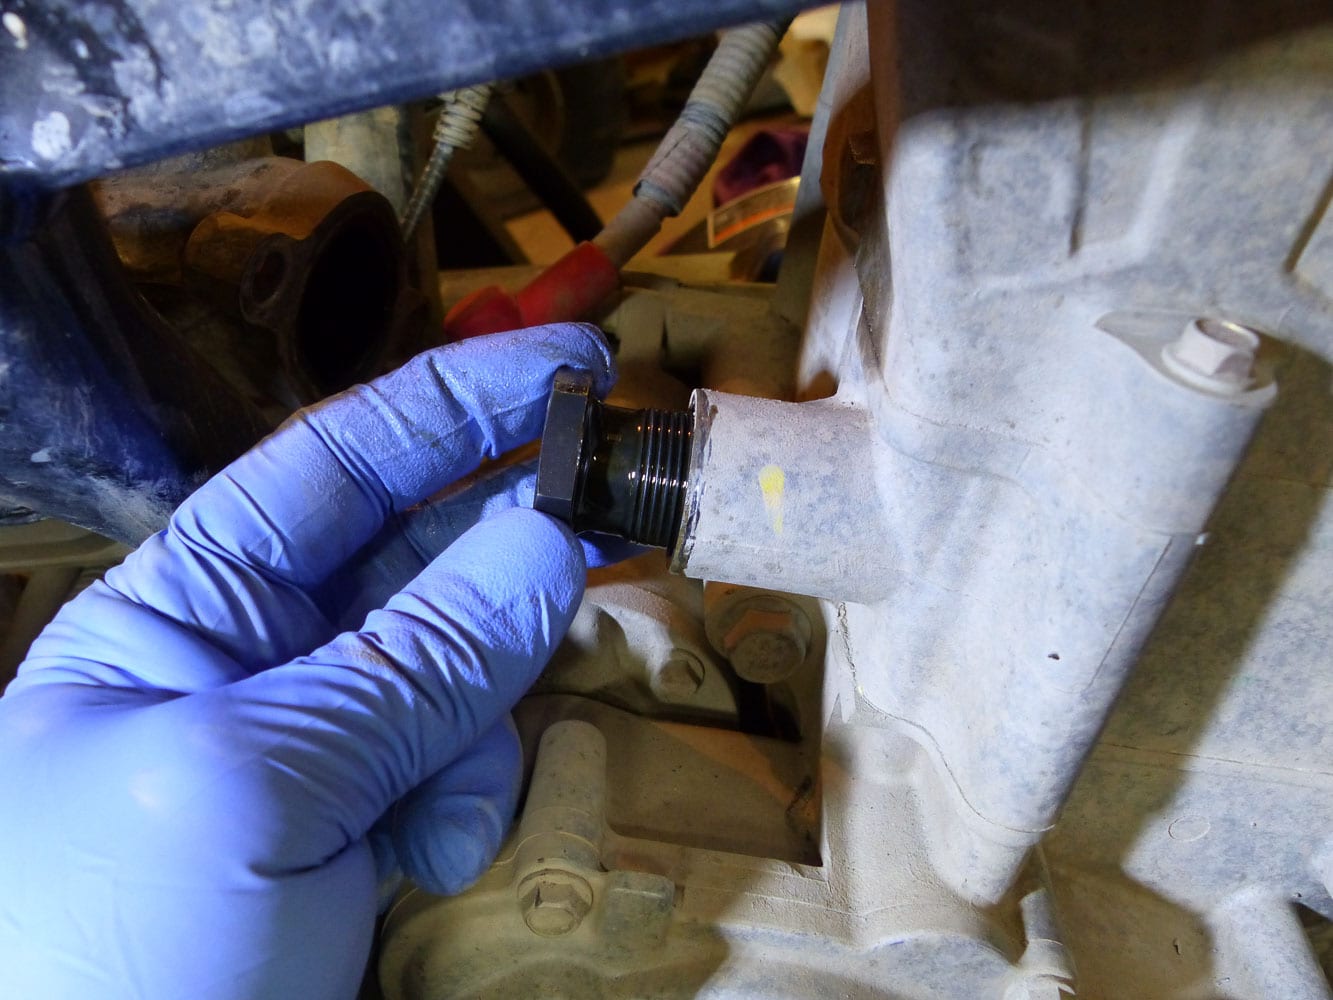
Before starting a newly reassembled engine, some procedures will ensure a better and safer start for your engine. First, begin by replacing the engine oil and filter. Repeat a leak test and a compression test, compare the results with the previous ones; that will confirm the success of some of the work done. Then leave the injector disconnected and with the spark plug removed, crank the starter and run the engine for a few seconds. This will allow the engine oil to access all lubrication points and will avoid dry starting of some components. Complete the connections and final assembly of your engine. Make sure all liquids are properly filled. Now you can start your engine.
According to Polaris, it is advisable to carry out a break-in period. This period is 25 hours of use, or 53 liters of gasoline. An oil change is suggested once these requirements are met.
The final test
I will let you imagine how I could be in a hurry to test my ATV with this new engine. First things first, I notice that the starter has cranked the engine and got it running without difficulty despite a larger displacement. However, I feel the engine idle a bit rough compared to the original. Then I go on the trail; unfortunately, with the engine break-in not being done, I have to spare my ATV but I did let go to some small excesses in order to confirm the change. At the first rise of engine RPM, I noticed no additional vibration. Pushing the ATV a bit while cornering, I quickly feel that the engine gives more torque which is well appreciated. Surely not enough performance to make an 850cc blush, but it can certainly surprise the other 570s.
This was a very simple and inexpensive investment. In the event that this task seems too risky for you, it is possible to have this Big Bore kit installed at a fair price in your mechanics workshop. As for the reliability, I do not know the results in the long term yet, but with an OEM compression ratio reasonably respected, I feel very confident and this should not be a concern. Finally, as for the performance gain, a dynamometer test will confirm this in a future article.