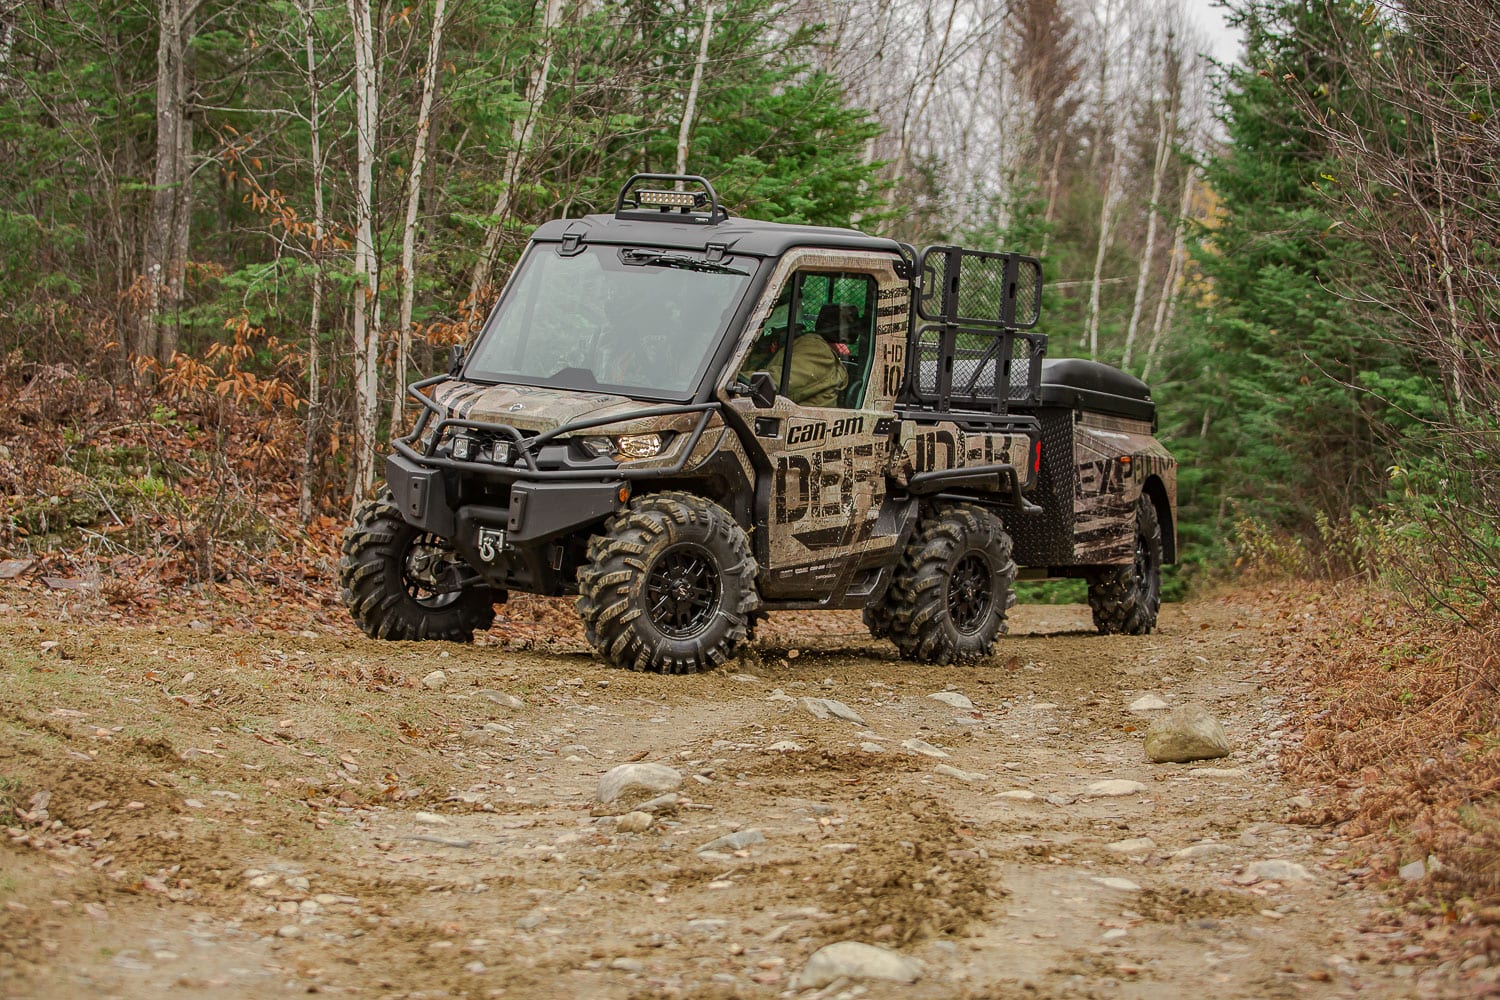
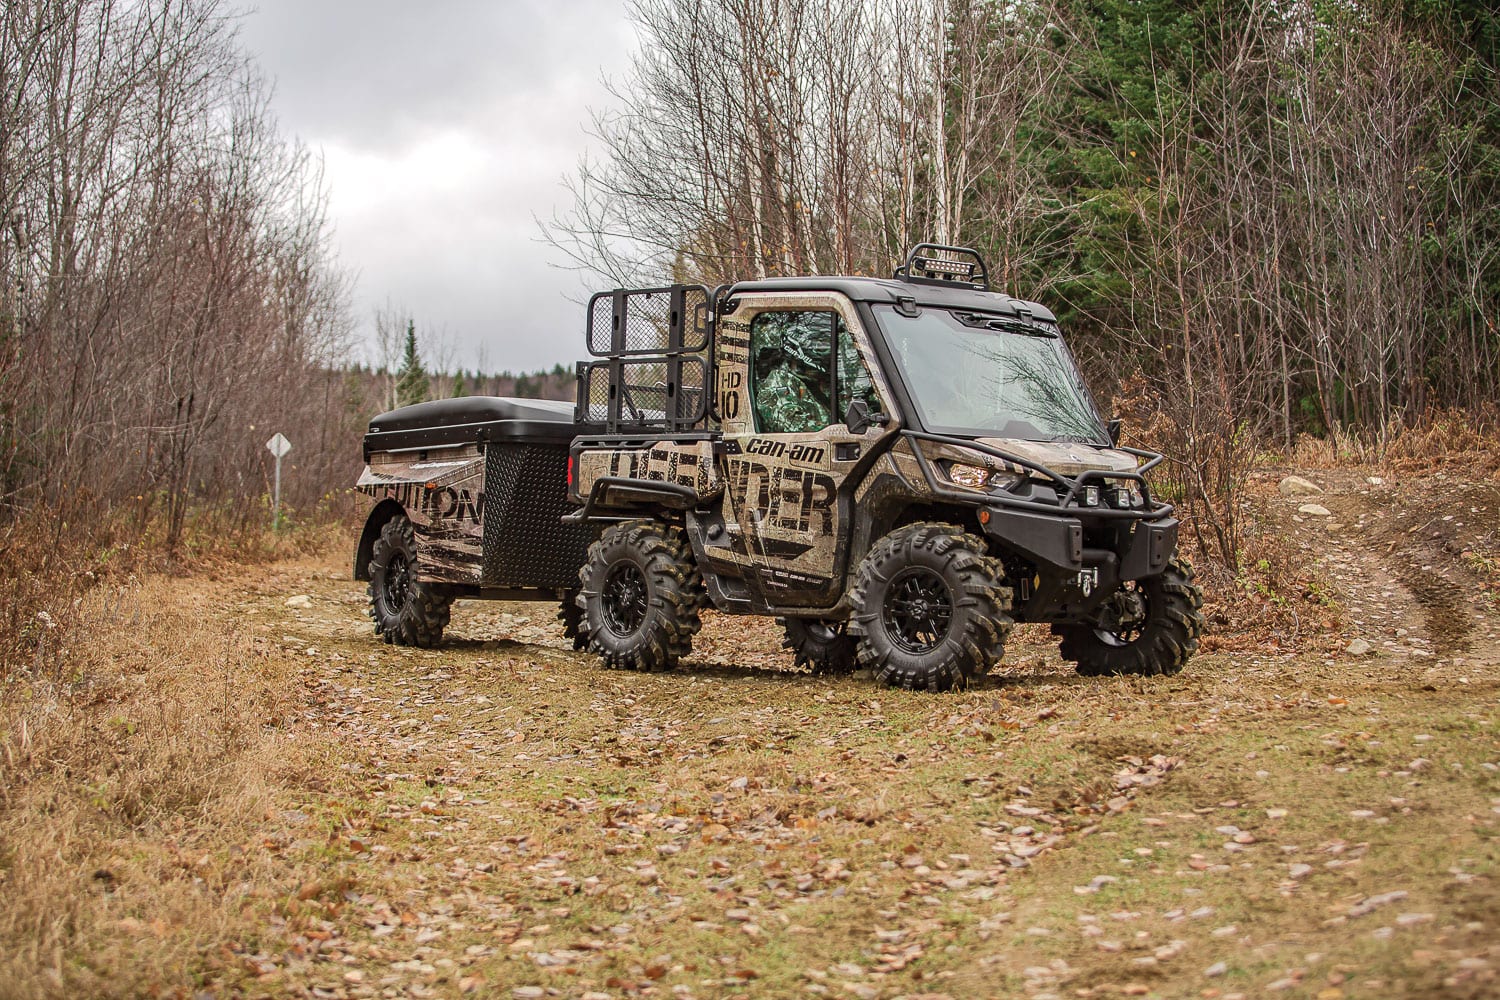
With our “Expedition” build project we wanted to assemble a vehicle which would be employed for backcountry exploration and adventure. The Can-Am Defender being a purpose built workhorse with its versatility to be used in various applications was the ideal vehicle for this project. We contacted Can-Am and a Defender XT CAB was soon on its way.
When it came time for parts and accessories selection for this project, we wanted to do something different. In our previous builds we used after-market parts from various manufacturers and vendors. For our Expedition build, when possible we used Can-Am OEM parts and accessories.
We decided to go this route because of the sheer quantity of OEM parts that were readily available for the Defender. We felt that the PAC division of Can-Am excelled at their parts and accessories offerings for our model year Defender. So simply put, some of the parts/accessories deserved recognition and needed to be included in this build project.
Using OEM parts however also added an extra challenge for our team. How can we assemble a unique build and stand out from the masses using mostly OEM parts? That was indeed the big question. However, we remained confident that with some creative ingenuity we would deliver an awesome looking ride!
THE BUILD PHASE
For those of you unfamiliar with the Can-Am Defender XT CAB package, the vehicle comes stock with a full cab enclosure which features: plastic roof and cab liner, 3-postion glass windshield, back glass, full hard doors with powered windows and a heater kit. Not only was the XT CAB package the ideal canvas for us to start our build project, but also the ideal setup for any backcountry explorer.
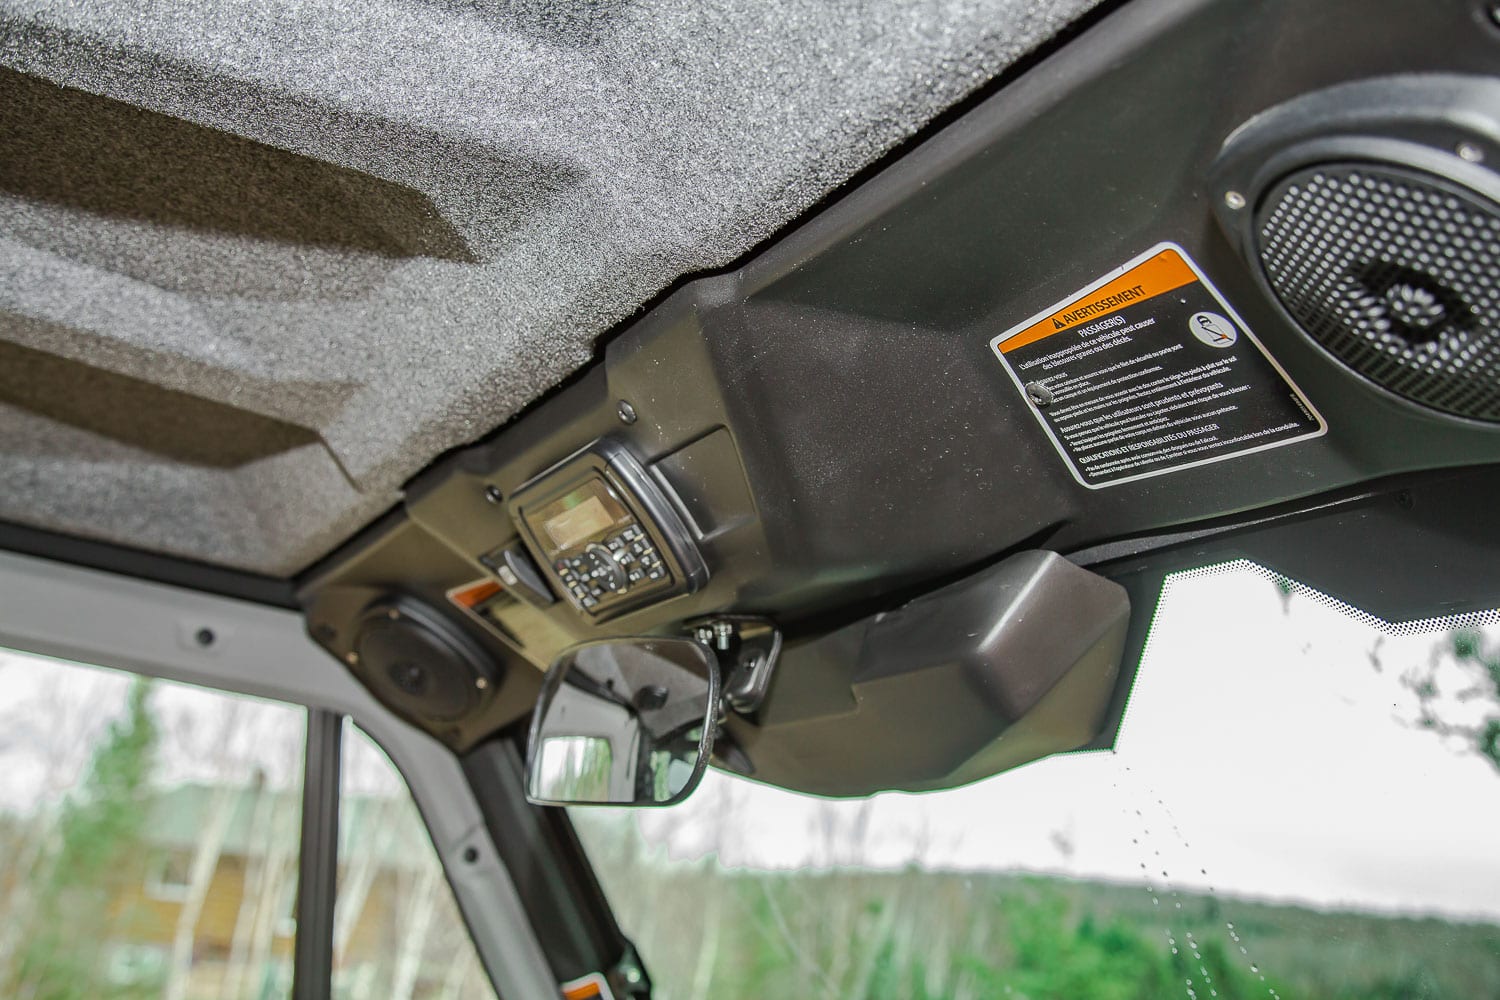
Since the Defender boasts one of the best interiors in the industry, the only add-on modification we made here was the addition of some serious tunes. For this we installed the Complete Overhead Audio System (OEM part #715002019). The audio system features: a rugged waterproof Jensen Bluetooth Stereo that offers multi-source inputs, a powerful 4x40W amplifier and 4 ultra-sturdy outdoor speakers. Installation is straightforward and well documented, but some time-consuming assembly is required.
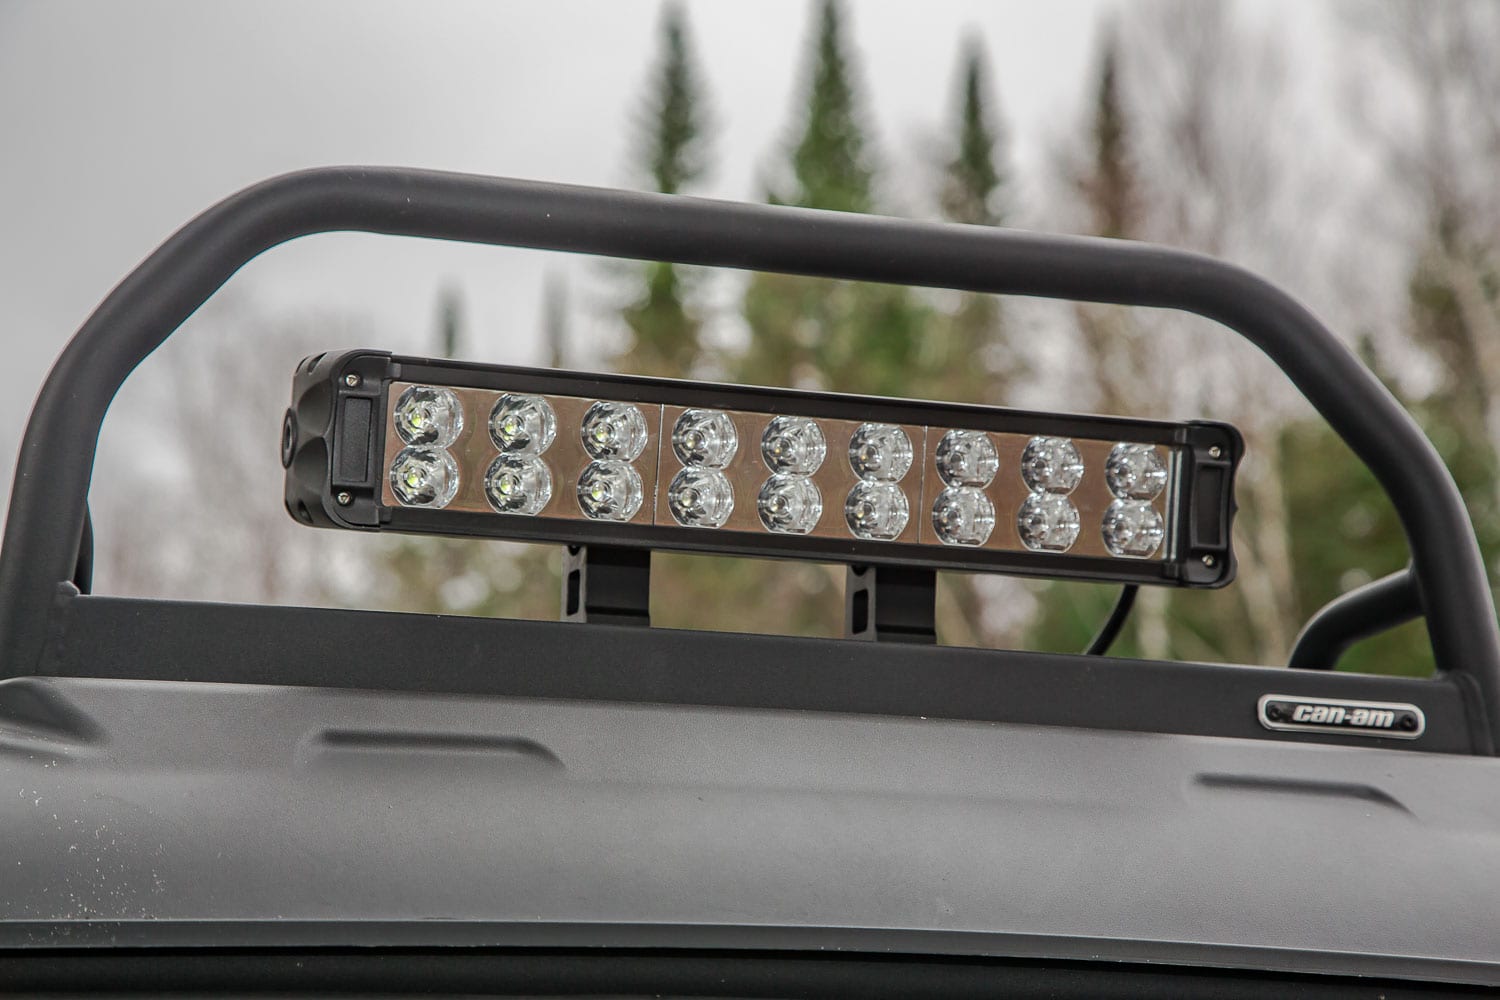
Before completing the installation of the audio system, and since we had the interior roof liner removed, we proceeded to install a 15” (38 cm) LED Light Bar (OEM part #715002934). The light bar was installed on the roof of the unit using the Light Rack (OEM part #715002456). Power was supplied to the light bar using the Roof Power Cable (OEM part #715003094). Once we did all the necessary connections and tested the LED light functionality, we re-installed the roof liner and completed the audio system installation.
The audio system not only sounds great but also blends well with the Defender Cabs interior. The LED light bar mounted on the light rack compliments the roof design and contributes to the unit’s rugged exterior. Plus the extra lighting power is a definite must-have when venturing throughout the remote backcountry at night.
To increase all-round visibility and to make the unit trail compliant in our area, we installed a Panoramic Center Mirror (OEM part #715002512) and a set of Side Mirrors (OEM part #715002459). The installation of the mirrors was child’s play and complimented the unit nicely.
To protect the Defender’s front end, we added the following accessories: Front Bumper (OEM part #715002418), Front Corner Protectors (OEM part #715002833) and the Xtreme Front Bumper Plates (OEM part #715003005). Once again the installation was simple and well outlined in the installation instructions. Once installed, the combination of these 3 accessories not only added the protection element that we required for our build, but also added to the aggressive styling we were seeking.
To the front bumper we also installed and mounted 2 lights: Rear Cargo Light (OEM part #715002422). As the name implies, these lights are obviously intended to be used to illuminate the cargo bed area. However, we felt they looked awesome sitting on the front bumper. We connected the lights with the included wiring, ensured they were operational and move on with the rest of the build.
Since the Defender Expedition Build would be venturing on some tough terrain, we wanted to add as much protection to the body and the rear of the unit as possible. This was accomplished by installing the Body Side Protectors (OEM part #715003055) and the Rear Bumper (OEM part #715002419). These accessories were quick and simple to install and contributed to the unit’s assertive appearance.
One of the key features of the Defender is its versatile cargo box. We wanted to take full advantage of this customizable area and to do so, we installed the following accessories: Bed Wall Extender (OEM part #715002421), Headache Rack (OEM part #715002423) and the Gear Rail (OEM part #715003391). To the gear rail, we also installed a Kolpin Fuel Can with the following mount accessories: Gear Rail Mount by Kolpin (OEM part #715001422) and Fuel Pack Bracket by Kolpin (OEM part #715001427). With these accessories installed, we could now configure the cargo box to suit our needs based on the expedition and gear we needed to carry.
For complete installation instructions on all the parts mentioned above, please visit: instructions.brp.com and enter the mentioned part number.
STANDING OUT FROM THE MASSES
At this stage, the Defender Expedition was starting to take shape. We had now completed installing all the OEM accessories and we were starting to achieve the bold assertive look we were going for. However to make this build unique we now had to turn on our creative juices if we wanted the end result to stand out from the masses.
The Defender Expedition needed a lift kit and it also needed to sit on a new set of tires and rims. For this, we turned to our friends at SuperATV.
First, we installed the SuperATV lift kit, which would give a full 3” lift to the front and rear of the unit. The kit is quality construction and consists of 4 spring spacers. The kit comes with precise installation instructions and is easy to install. It’s important to note that a spring compressor is highly recommended for this type of lift kit installation.
Once the lift kit was installed we proceeded to install the SuperATV wheel spacers. After the quick installation of the wheel spacers was complete, we were now ready to install the tires.
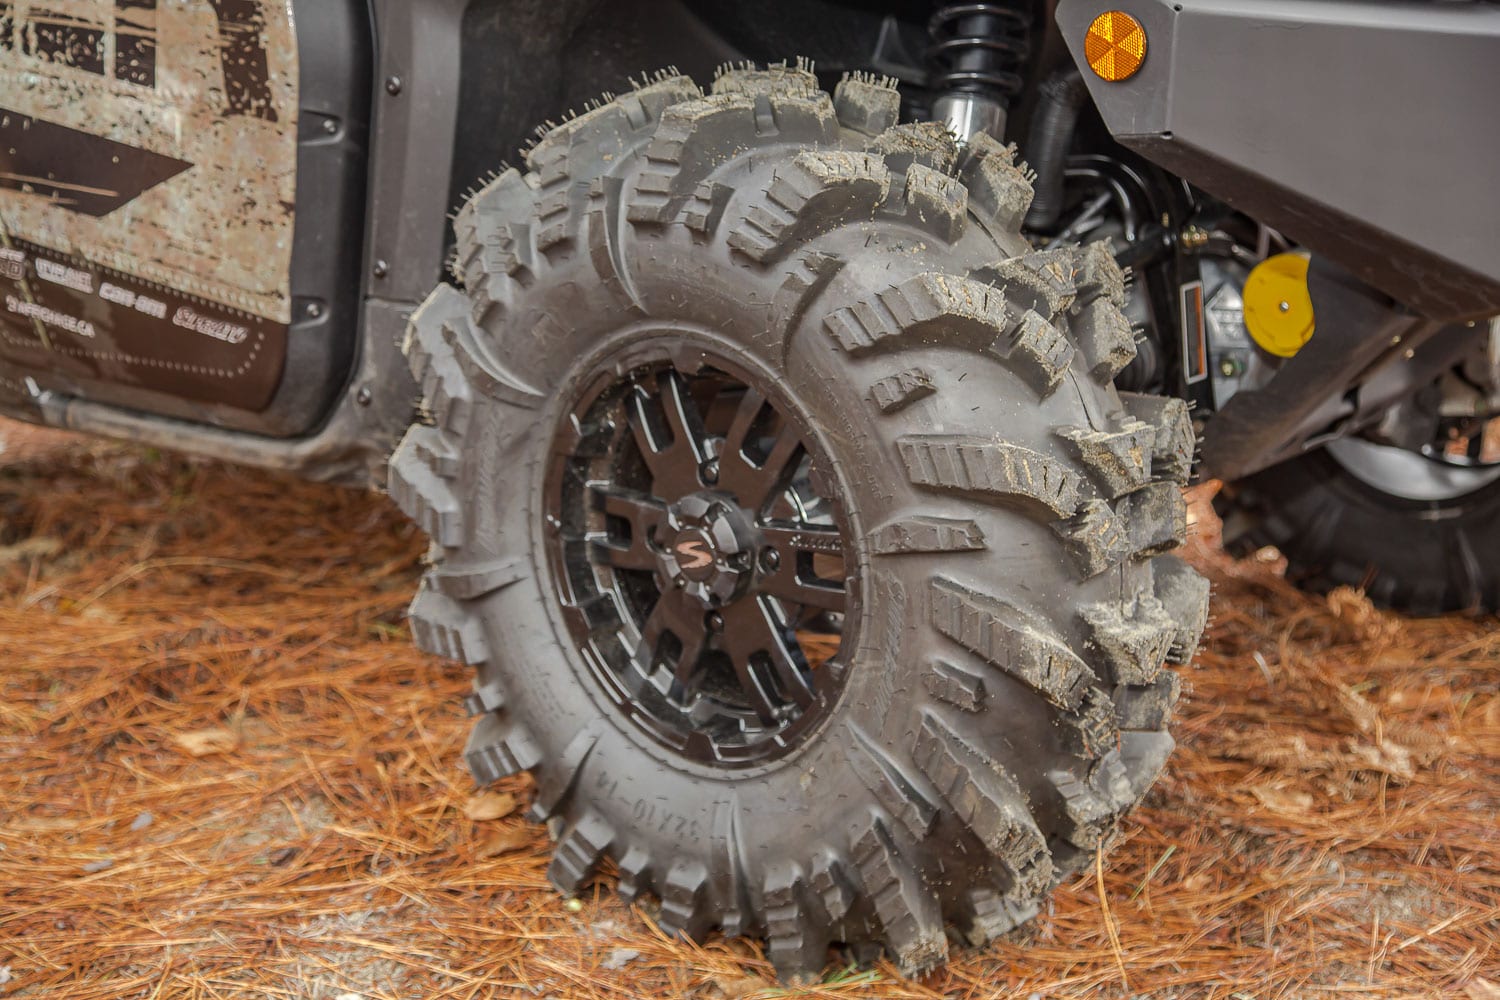
For the tires, we selected a set of SuperATV 32” Intimidator All-Terrain tires. The Intimidator has a 6-ply construction and is designed for ultimate off-road performance. This tire is a versatile mud tire with a unique footprint that provides greater surface contact for maximum traction. We mounted the Intimidator tires on a set of 14” Healy Fast (HF) Rims. The HF rims are cast aluminum construction and come in a black satin finish.
The Intimidator Tires and HF Rim combination added the final touch of boldness, which would complete our assertive design.
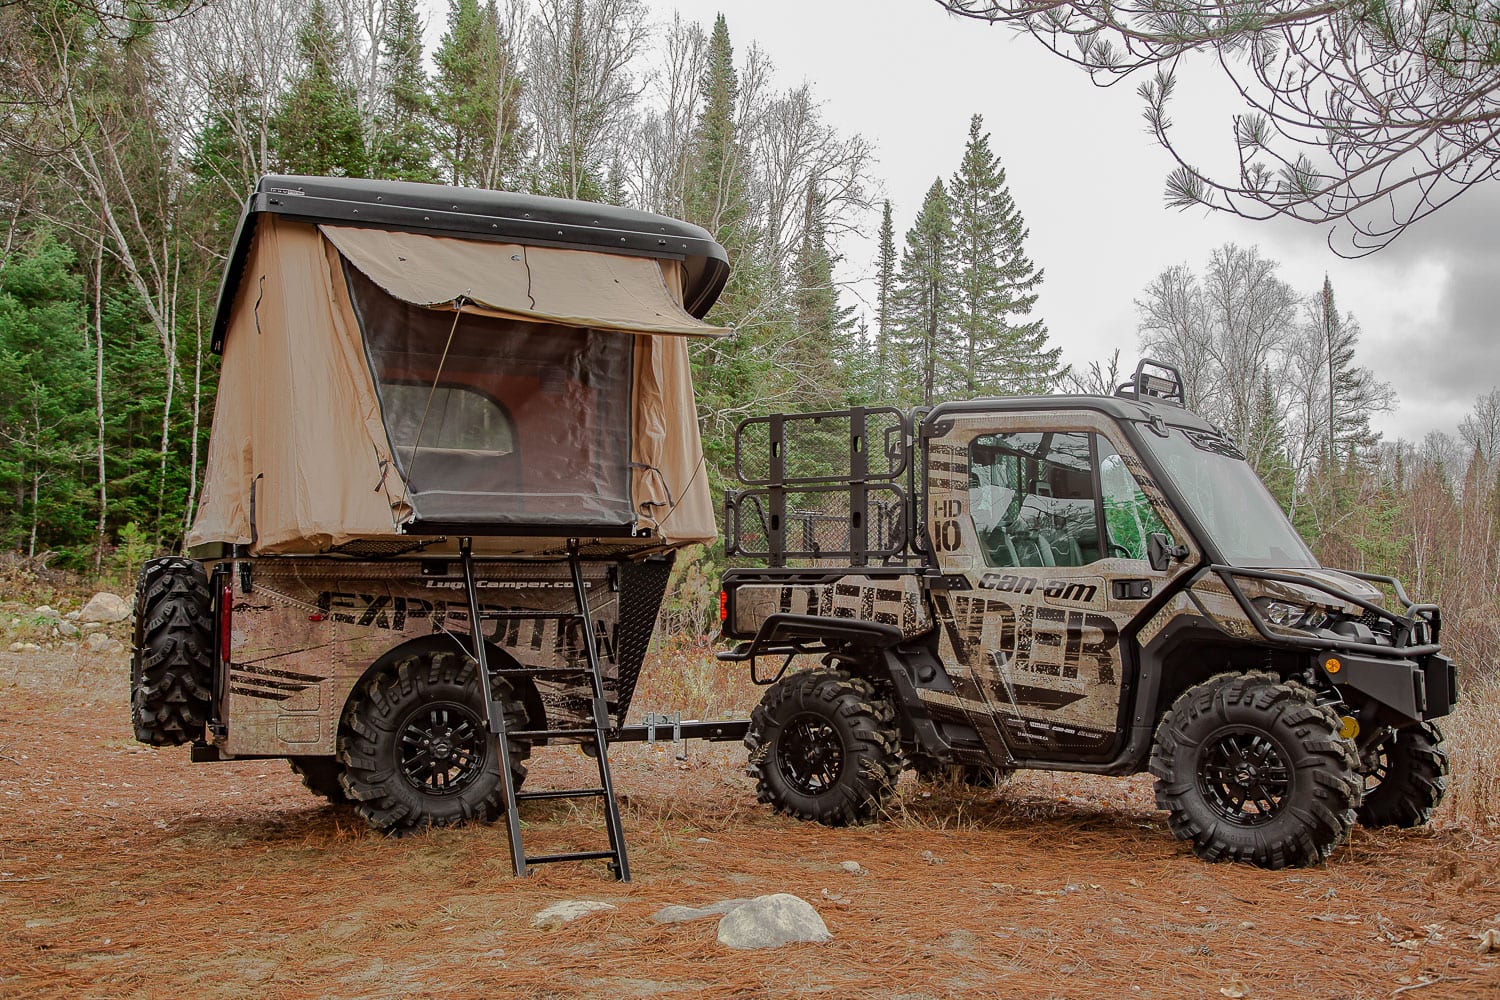
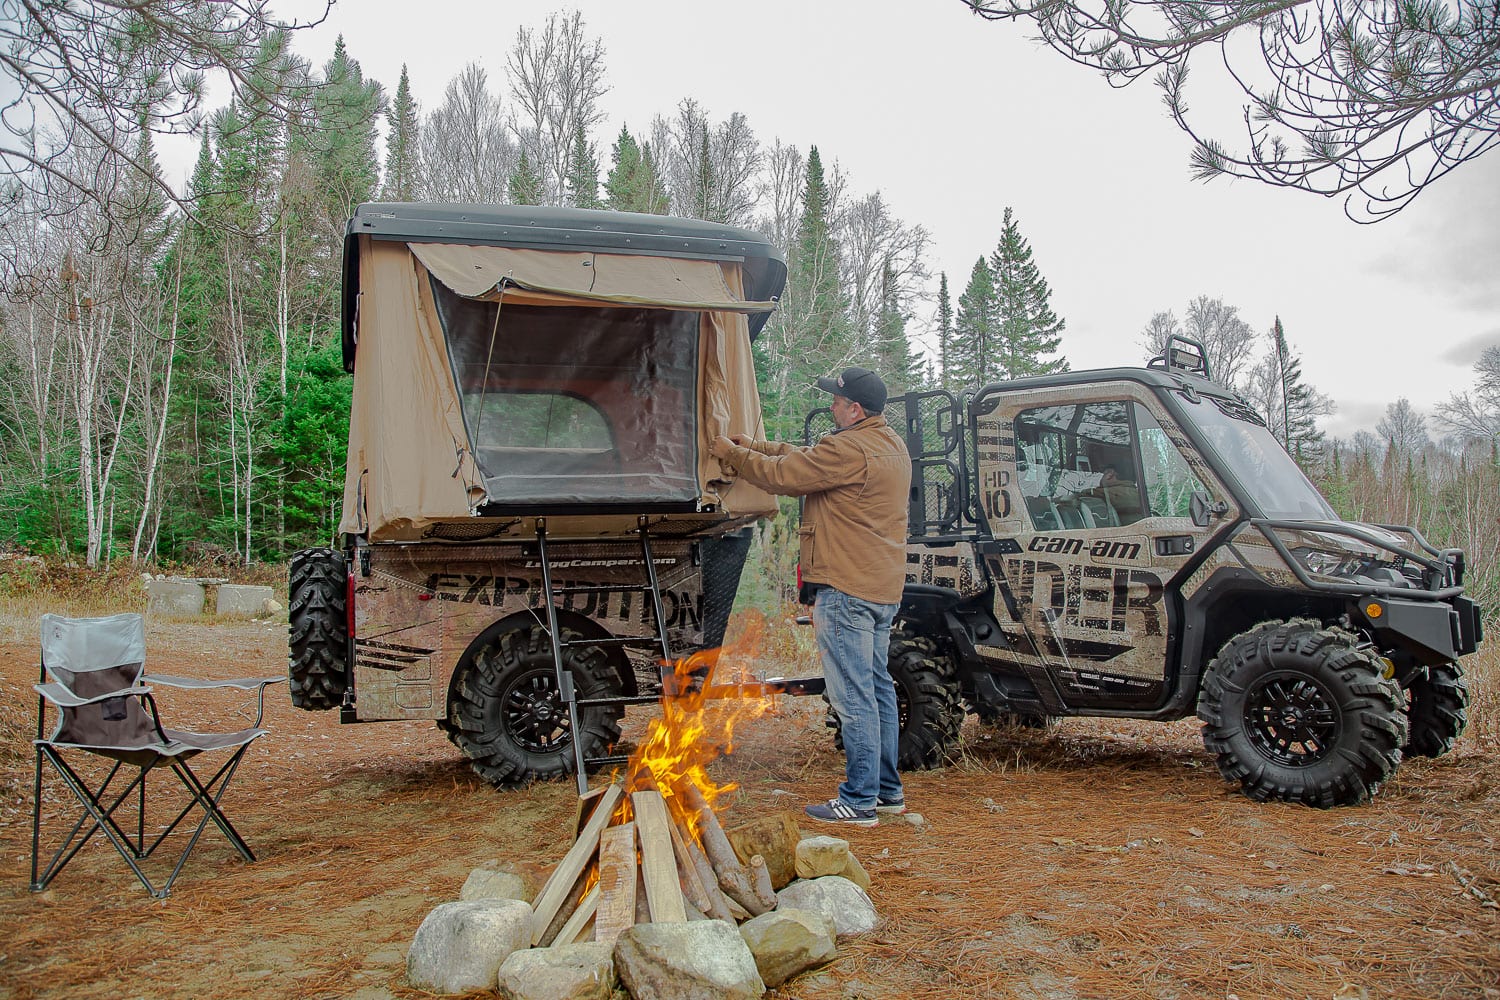
As I mentioned at the beginning, the Expedition Build was to be employed for remote backcountry exploration and adventure. Obviously this meant we needed to find a way to account for overnight (or longer) stays in the great outdoors. Sure we could have went the traditional route of lugging tents around, but our friends at Podium Trailers had a better idea.
Luggcamper, a division of Podium Trailers, is already manufacturing a trailer/camper roadster edition, which is primarily used by motorcycle or Spyder enthusiasts. The luggcamper is a dual-purpose unit: the bottom half of the unit serves as a trailer (storage) and the top half serves as a popup tent.
After several discussions with Claude Mayer, owner of Podium Trailers, it was decided that his team would come up with a prototype off-road trailer/camper for our build project. We supplied the wheels/tires and some basic dimensions and his team quickly went to work on the prototype unit. It should be noted that the trailer/camper uses the same tires/rims as the Defender, 32” Intimidators mounted on 14” Healy Fast (HF) Rims.
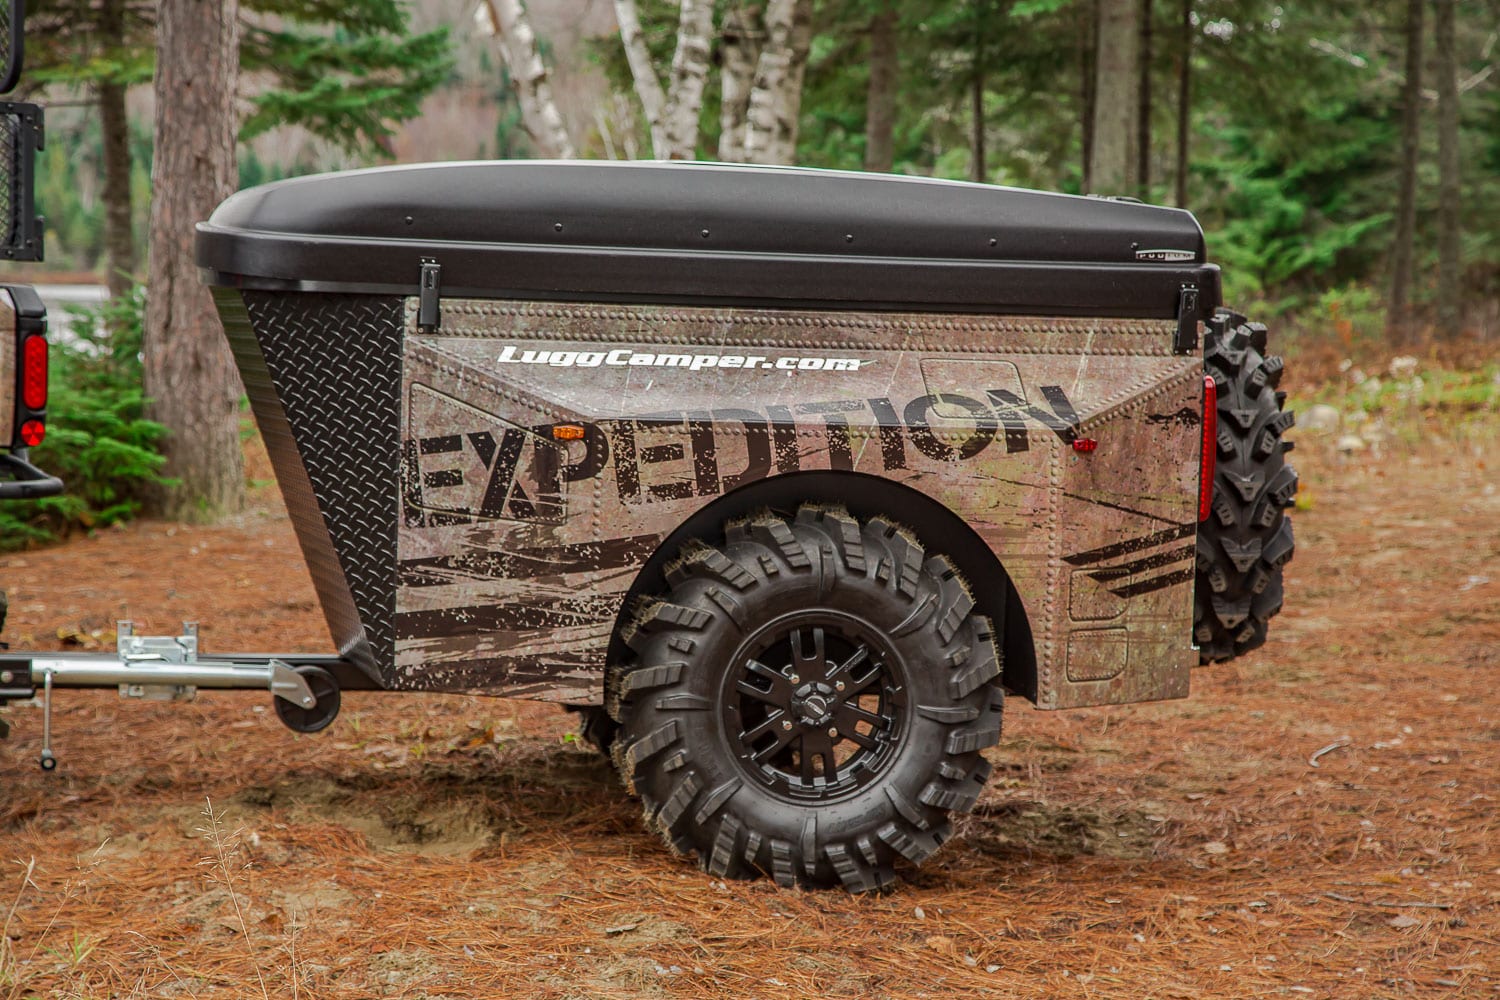
After several months, we finally received the call that the Luggcamper Off-Road Edition was ready. This unit was a beast and it was built for battle. The unit featured: high ground clearance, swivel coupler and retractable safety chains allowing it to tackle any obstacles on the trails. The base of the unit offered ample storage and was also use to transport the plush removable mattress. The popup tent was of quality robust construction that featured interior lighting, powered by the solar panels on the roof of the unit.
The prototype Luggcamper Off-Road Edition was functional, robust and could easily navigate any trails. Plus lets not forget to mention that it looked awesome, especially sitting on the 32” Intimidator tires mounted on 14” Healy Fast (HF) Rims.
Now that all the pieces of our build were assembled, there was just one element missing: a custom wrap. For this we could think of no other than our friends at Affichage.ca.
Affichage.ca does wraps and graphic design work for multiple large-scale companies. From commercial trucks to race team, boats and even planes! No job is too big or too complex for the team at Affichage.ca. As we had done with our other build projects, I reached out to Jonathan Gagné, president of Affichage.ca.
During my conversation with Jonathan, he quickly realized that we weren’t sure which direction we wanted to go with the wrap design. He also realized that this wrap had to be as unique just as the build was. We discussed some basic color themes and his design team immediately got to work.
After a few days of reviewing samples and making modifications, the design was finally ready to go to print. The design is printed on a 3M vinyl adhesive paper and then is laminated with a 3M UV protection film. What is also unique about the approach used by Affichage.ca is that they do not use templates. They print out square section based on measurement and apply the wrap to the unit.
The time had finally arrived to apply the final touch on our Defender Expedition. We delivered the Defender and Luggcamper to Affichage.ca and watched the master technicians painstaking apply the wrap to the units. I have said these exact words in previous write-ups about Affichage.ca and I will never hesitate to repeat them. The guys over at Affichage.ca are true professionals in the art of wrap design and installation. Watching these guys create and install the wrap was like watching an artist paint on a virgin canvas: totally mind-blowing!
We are very proud of our Defender Expedition build and we consider this build to be our best one yet.
A very special thank-you to Can-Am Off-Road and Can-Am PAC division for the help with the Defender HD10 XT Cab and Accessories
PARTNERS BUILD LIST
We would like to thank all these partners for contributing to our build, without them this project would have been impossible. We invite you to visit their websites for more information on the products and services mentioned throughout this article.
Affichage (Wrap) www.affichage.ca
Can-Am Off-Road www.brp.ca/off-road
Can-Am Online Store www.store.can-am.brp.com
LuggCamper www.luggcamper.com
Podium Trailer www.pod-ium.com
SuperATV www.superatv.com