ATV Air Filter Replacement, This is a simple element in the mechanics of your quad and it is vital to the proper functioning of your engine. I was privileged to participate in many discussions on the Quadnet.ca site with ATV enthusiasts looking to increase their quad’s performance. Very often, for increased performance, the first part that comes to mind is the exhaust system. I have to agree that the rich sound of a motor liberated from all its restrictions is like music to my ears. However, even the most gifted athlete in the world could not run a whole kilometer while breathing through a straw without imposing a substantial effort on his heart. So why should your quad have to bear through this torture?
All explosion type motors need air to allow combustion. If your quad breathes well, its performance will go accordingly. The installation of a high performance air filter on a quad is not a major investment and it will protect your engine by blocking out dirt and debris from getting inside of it. The improvement proposed to you here, is quite extreme in terms of air supply. The air box will be completely eliminated and replaced with a system where the air filter is placed in free air. This type of improvement is mostly meant for people who ride in a dry environment. Crossing water holes with this type of system could seriously damage your motor. However, those with amphibian tendencies can always get some inspiration from this system and increase their quad’s performance by installing a quality filter. A certain amount of prudence should be exercised, since too much air supply can be bad news for the motor. The important thing is to look for a certain balance in order to obtain the right air/fuel ratio. The improvements brought to my quad already included an added control to fuel injection and a modification of the exhaust system. The last step would then be to increase air supply in order to get the most out of the engine. One thing I should mention is that I never ride on trails aboard this quad, restricting my riding activities to race tracks only. Thank all for respecting both rules of conduct on trails and owners of property who allow a right of passage.
The first step is finding a kit that fits on your ATV and respects your budget. I have some young riders who were not lacking inspiration and had modified their air box themselves by cutting out all sides of the box and leaving the support brackets in place for fixation. One must remember that imagination and resourcefulness are definite assets when modifying a quad. I have set a limit of $200, but I still want quality components.
After a certain amount of research, I chose a kit made by Velocity, with a K&N air filter and an Outerwears protective device. Whatever type of ATV or riding style, a good air filter is a priority. For those into high performance, the choice of air filter is a capital element for optimizing improvements in power while maintaining reliability.


Removal
Each quad is equipped with a different air box. On my Suzuki LTR 450, access is quite easy. After removing the seat, the air box can easily be reached. As a general rule, the removal of the air supply system is not very complex. You might have to disassemble several parts on your quad but patience and a step by step procedure are mandatory.
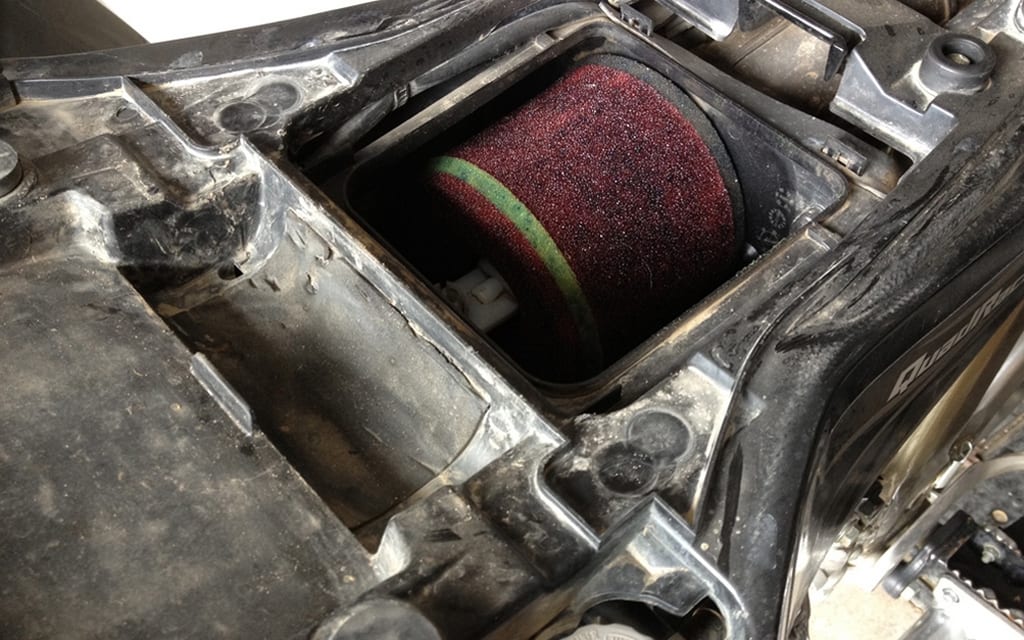
I remove the original air filter, a classic foam model, with a smile on my face, as I know I will not miss it.
Air box and filter
The air box is held in place with a few screws. The challenge here will be to remove it from its position as the frame seems smaller than the air box. I remove the rear fenders and the muffler and everything becomes much clearer. The air box must be pivoted in order to be removed from its frame.
Extraction of air box
Once the box is removed from its position, I notice a detail that had escaped my attention: on the air intake pipe, there is another pipe connected. This second smaller pipe is the crankshaft air intake and no point of entry is present on the replacement pipe for connecting this intake. At this point, I decide to keep it till later to find a solution. Before proceeding to the installation, I cover the motor’s air intake with a clean cloth to prevent impurities from getting into the motor while I work on the vehicle.
Protection on air intake
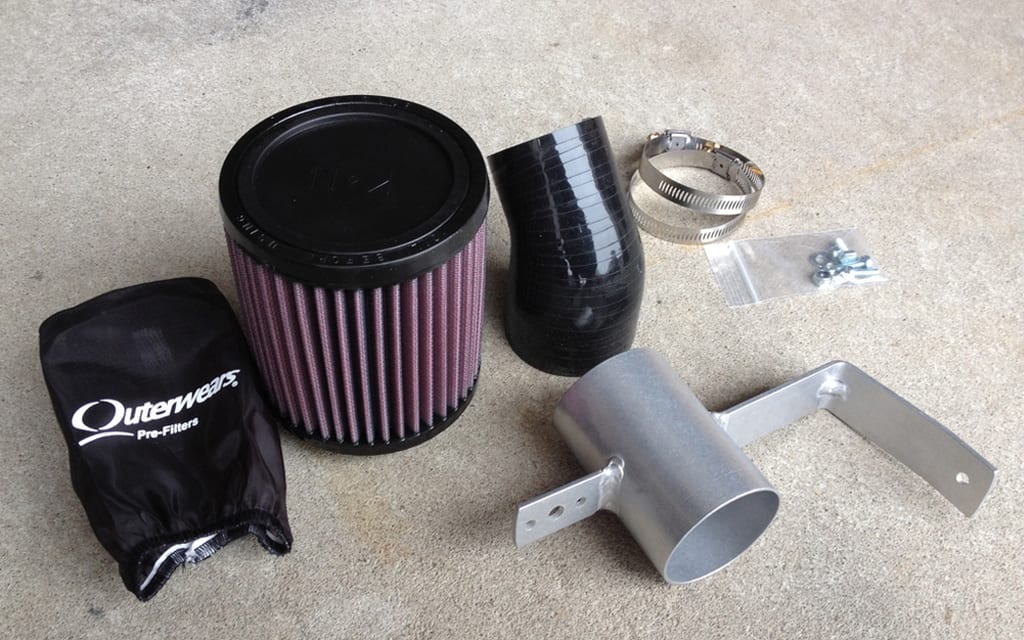
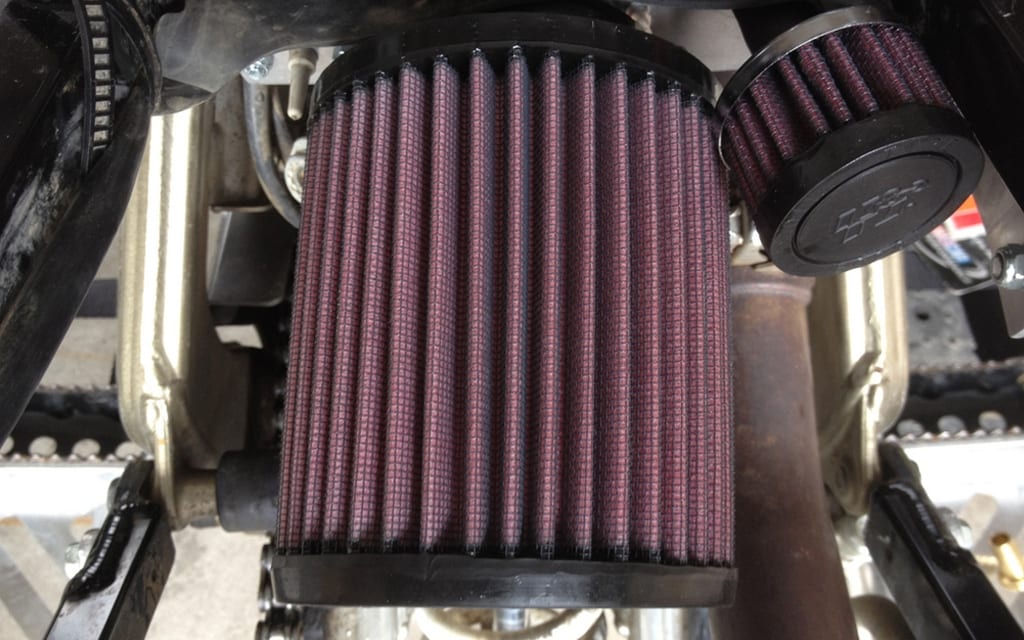
Our new system includes 4 parts and some accessories, the most important part being the air filter, and then, there is the air intake pipe, a support bracket and the pre-filter.
Parts kit
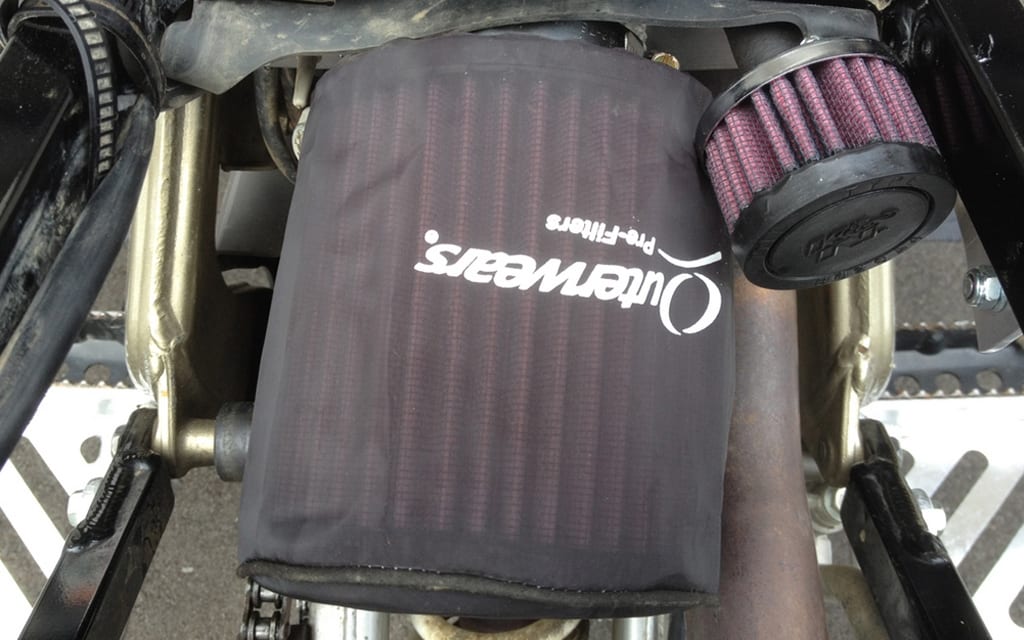
Putting the kit together is quite simple as the holes for the bracket fixation to the frame are properly placed. All necessary hardware is included. Installation of the new system can be completed in 20 minutes without difficulty but, ah yes, there is always a but, a solution must be found for the crankshaft air intake. K&N also manufactures miniature air filters appropriately designed for such an application. So I order this type of filter (ref K&N#62-1010).
Kit installation
Once installation is completed comes the time for certain tests. The quad starts right on the first try, but the sound of the motor is deeper than before. The absence of the air box affects the muffler’s resonance. Fuel delivery on my LTR is quite rich to allow a maximum air intake, but I would strongly recommend going at it progressively and making sure that the engine does not overheat. When executing such a modification, air/fuel and temperature sensors are excellent tools to use. Otherwise, one can resort to the good old methods used by certain mechanics, who are able to check motor operation just by inspecting your spark plug electrodes. The LTR seems at ease with its new filter, I really cannot claim that there is such a big change, although accelerator response does seem crisper. On this day of testing, I did not get the opportunity to push the ride to the max because of Nature’s whims, but I will surely put it to more tests in the following weeks to see if top speed has increased. The use of a chronometer will certify my impressions. I don’t often make a mistake on this count, especially since it is my quad and I know it quite well. For those who plan to use their quad in a dry environment, this modification is a pertinent choice. An excellent air filter and a motor that breaths well will not necessarily mean a lot more horsepower, but maintenance and protection of your motor will be made easier.
In order to complete this modification I had set a budget of $200 maximum. In spite of having to purchase the additional small filter for the crankshaft air intake, I managed to respect my outlay limit. The whole job cost me $121.17 and the K&N mini-filter $24. I was thus left with $50 on the budget that I will most surely use on the next improvement to my quad. Be sure to read our next issue to find out how!